Monday, August 30, 2010

Chhole recipe | a simple recipe for that authentic punjabi taste...


Authentic punjabi chhole recipe?

What would you call authentic chhole when there are more than a dozen Chhole kulche walas selling delicious chhole, each one is different from the other and each one is such that you can call as authentic as it can be. So for me chhole is authentic as long as it tastes 'punjabi', no wonder when I say this as I have tasted a few bihari and bengali versions of chhole and those have been far from tasting like chhole. Authentic punjabi chhole is something where the taste of chickpeas should not be overpowered by spices and the gravy should be thick and coating consistency and blackish in color, the chickpeas melting in the mouth and the spiciness just enough to complement the buttery textured chhole......

authentic punjabi chhole

While the Bihari version is loaded with onion and garlic and garam masala (good to taste but not like chhole), the Bengali version which they do not call chhole but ghugni is different too, I loved the ghugni with keema in it called 'mangsho'r ghugni'. I am sure there is a version including curry patta and tamarind and that too must be tasty but it should be named something else, not chhole. As there is Sundal, there is a tamarind-curry patta chickpeas too.

Coming to the 'chhole' chhole, here is my version which has fetched me many complements, people have been comparing it to the popular chhole walas of the city. Also, this chhole has been complemented for not causing flatulence though I do not add any saunf or ajwain to the recipe.

Cooking the chhole till it gets buttery is the key, the chickpeas should get cracked and should look like falling apart. Also, look for the smallest sized white chickpeas available, smaller the chickpeas tastier it is. Read on......

ingredients...

chickpeas/garbanzo beans/ kabuli chana 250 gm ( I use the smaller variety )
soak the chickpeas overnight
split chick peas/ chana daal 2 tbsp
ginger root 2 inch piece
whole dry red chillies 4-5 or to taste
coriander seeds 1 tbsp
cumin seeds 2 tsp
black pepper corns 2 tsp
bay leaves 2-3 nos.
cloves 4 nos.
black cardamom 2 nos.
amchoor powder 2 tsp or more if needed
salt to taste
mustard oil 1 tbsp

procedure...

Mix the soaked chickpeas with chana daal, add salt to taste and cook in a pressure cooker with enough water to be an inch from the surface, 20-25 minutes under pressure should be enough for cooking.

Sometimes when the cooking water is hard the chickpea takes more time to cook so use filtered water to cook. Adding a pinch of soda bi carb helps to cook the chickpeas thoroughly, as they should get cracked n about to fall apart.....this is an important point while making chhole n should not be ignored.


soft boiled chhole

Scissor cut the dry red chillies and bay leaves into very small bits and chop the ginger too. Now grind all the whole spices in the spice grinder jar of your mixie, adding little water to make a fine paste.

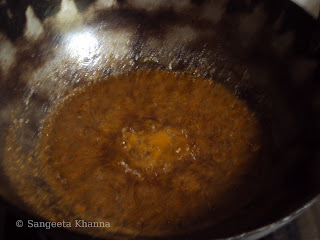
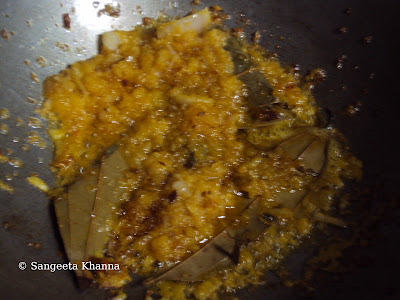
Heat oil in a iron kadai and pour the spice paste into the hot oil, fry till oil is released form the mixture.

authentic punjabi chhole recipe

Now pour the cooked chhole into the kadai and add water if needed, add the amchoor powder, adjust salt if needed and let it cook for about 30 - 40 minutes on low heat. This step is important too as it will lend a nice deep brown color to the chhole and the taste of the spices will blend well with the mushed up cooked chana daal, making a gravy of coating consistency. the chana daal gives a creaminess to the gravy and keeps it milder even if the masala looks very rich in color n texture.

authentic punjabi chhole recipe

Serve hot with sliced onions, bhatoora or kulcha is the bread to go with it but it can be enjoyed as it is topped with finely chopped onions and an assortment of chutneys, like a chaat.

authentic punjabi chhole recipe

We enjoyed it with fried bhatoore, made with yeasted dough, using half maida (all purpose flour) and half whole wheat flour, the bhatooras turn really fluffy and soft that way and do not soak oil like the traditionally made bhatooras. The bhatooras are not authentic for that matter.

It is a hearty Sunday brunch and we are set for the day, there is no lunch on Sundays most of the times in my home. I make a large bowl of fruit salad for lunch if the breakfast had been lighter, but if it is chhole bhatoore, even the fruit salad is out of question.

A free Sunday for a leisurely reading session or a nice outing without feeling hungry and grabbing a burger, makes sense for us.

Even chhole chawal with some vegetable added on the side is my favourite meal.

authentic punjabi chhole


Some people add a tea bag to the boiling chhole, that can be done if you don't have an iron skillet or kadai. Adding amla powder or even pomegranate skin can make it dark but they all hamper the taste. I have had good results with unsweetened cocoa powder though, using 1 tsp for this quantity. Try it if you like and tell me if you find it useful.

This recipe does not use onion, garlic, turmeric and tomatoes. The absence of tomatoes adds to the dark color too. Tomatoes are a common addition to chhole as many people in this part of the world cannot do without tomatoes, I feel tomatoes interfere with the taste of chhole and amchoor or dark anardana powder from the hills is a better souring agent for Chhole.

What do you feel ???


Saturday, August 28, 2010

vegetable biryani with fenugreek leaves

I had to prepare a Sunday lunch without the use of onion and garlic couple of weeks ago. It was a rainy Sunday and somebody was coming for a pakoda party on a very short notice. I made lots of corn pakodas with a hot and tangy chutney accompanied by tea for a late breakfast. It was great as the soft drizzle outside the window made it very very pleasant.

After this heavy breakfast the lunch had to be lighter as well as less time consuming. I had quickly planned for a vegetable biryani and had already chopped the vegetables. When you are not using onions and garlic the chopping becomes easier. Some beans and carrots were chopped finely and potatoes in cubes. I have a jar full of dried fenugreek leaves from the last season and that is super flavorful, you can use kasuri methi but the flavors will be slightly different.

Fresh methi will be better so use a cup of tightly packed fresh methi leaves for each tablespoon of dried leaves. That's it.


The pictures I took when i had actually started eating, it was so delicious that I wanted to share it here. Ihis was the first time I made the fenugreek pulav or birayani kind of rice without onion and garlic and it turned out great.

I make a low calorie high fiber version of this rice which is great too but this one is rich and qualifies to be called a biryani by every means. Yhe rice grains are white and lightly coated with the masala seasoning, fragrant with the whole spices and the dried fenugreek leaves and every piece of the vegetables retain their individual texture and taste ......

Yes I made it using the layering technique, only the layering was done hastily and roughly.

Ingredients...
(to serve 5-6 adults)
basmati rice 2 cups (I used basmati tukda)
finely chopped carrots 1 cup
finely chopped french beans 1 cup
potatoes peeled and cut in 3/4 inch cubes .. 2 cups
thin strips of ginger 2 tbsp
whole dry red chilies 4-5 nos. ( as per taste )
dried fenugreek leaves 2 tbsp
black cardamom 2 pods
green cardamom 3 pods
inch long cinnamon sticks 4 nos.
star anise 1 no. ( i used 4-5 pieces of broken stars )
cumin seeds 1 tsp
shahjeera 1 tsp
black peppercorns 2 tsp
cloves 8 nos.
bay leaves 2-3 nos.
a pinch of freshly grated nutmeg
aromatic garam masala 1 tsp ( optional )
ghee 1/2 cup
salt to taste 

procedure...
Wash the rice and soak in 4 cups of water. Keep aside.

Prepare for the other ingredients and just as you start cooking the other ingredients, cook the rice either in microwave or on the other burner of your gas stove, add a bay leaf and a stick of cinnamon to the cooking rice. Watch when you are cooking the veggies on the other side and you need the rice cooked al dante'...

Heat ghee in a wide pan (with a tight lid as the pan needs to cook on dum). Add the cumin seeds, ginger and potato cubes first in the hot ghee, stir for a couple of minutes till you get a ginger aroma, now add all the whole spices reserving a stick of cinnamon and one bay leaf. Add 2 pinches of salt for the potatoes and toss and fry till the potatoes become 3/4 cooked.

Frying potatoes this way results in firm yet porous potatoes in a biryani (or a tahiri), this way the potatoes retain their shape and yet absorb all the subtle masala taste. The only way I like potatoes in rice preparations.

Meanwhile, start cooking the rice on the other side of the stove or in microwave as suggested earlier. The rice will cooked along with aromatic cinnamon and bay leaf. Take care to cook it 3/4 done and the rice will not be completely dry and fluffy yet.

To the cooking potatoes add all the chopped veggies (I sometimes add soya nuggets too) and fry adding salt to taste within 3-4 minutes the veggies will be almost cooked and it is time to add the dried methi leaves. Keep  stirring till the aroma of fenugreek fills the kitchen, sprinkle the garam masala and nutmeg powders and mix.

The rice should be cooked to desired level till this point, if rice still needs some time to be cooked you can put the flame off for the veggies, cover the pan and wait till the rice is ready.

Pour half of the rice in to the veggies pan, turn lightly to mix them roughly and pour the remaining rice, fluff up one last time and cover with a tight lid. Cook on very low flame for a good 10 minutes, placing a hot griddle below the biryani pan may be a good idea if it is not thick based.

It can be served immediately after removing from heat, but needs to be fluffed up before serving. It is very very aromatic as soon as you open the lid and the perfect accompaniment is a cool raita.

It was a pineapple, onion and boondi raita seasoned with salt pepper n dried mint powder this time....


This picture is taken with the leftover we enjoyed the next day and it was as good as the freshly made biryani. Potatoes in a tahiri or biryani is the husband's choice and fenugreek is mine. It is great if it is medium hot and the aroma of the spices is preserved by dum cooking.

If using fresh fenugreek leaves you will notice the color of the prepared rice is bright green and it looks more like a tahiri or pulav. The taste will be fresh but the aroma and texture of finished rice will be entirely different from this preparation. I have posted a soya methi tahiri using a paste of dill leaves and fenugreek leaves and that's a completely different recipe, a healthier version though.

Vegetarians have their own pulaos, tahiris and biryanis and since one pot rice meals always make comforting food it doesn't matter whether some biryani enthusiast approves it as a biryani or scorns it as a tahiri. They would know if they taste it.

Go make some no onion garlic vegetable biryani right now. 


Friday, August 27, 2010

kashmiri rajma : the most simple delicious rajma recipe you need


Beans and rice or rajma chawal as it is called in the north of India is not as Indian as I have grown up thinking.There are other places in the world where this meal is cooked in different ways. Check out here if you don't already know. Now I wonder it may have come to India through the spice route and welcomed by the curry loving folks.....

The variety of kidney beans and black beans available in our country is a testimony to the grand welcome this kind of beans received here. Welcome would be a wrong word to say in this age as we have grown up knowing it as a truly indian khana. Somewhere deep in my heart it hurts to acknowledge that rajma chawal is not truly Indian by origin, you know what I mean ....

kashmiri rajma recipe

Rajma chawal is such a punjabi favorite that it is the most favored comfort food in this part of the world. A delicious filling meal of rajma chawal once a week is what a true punju needs to go through the rigors of life.....true bliss on a plate. It is such a popular meal that small stalls or rehris (push carts) of rajma chawal can be seen in almost all the north Indian cities to cater to the low budget traveler or even the office goers during lunch break.

Rajma is usually served with plain boiled basmati rice. I cooked small grain govindbhog rice for this meal as it is very very soft and goes well with this mildly flavored smooth kashmiri rajma.

Now about the rajma being kashmiri, this is a variety of kidney beans smaller in size and darker in color, very smooth n creamy and flavorful when cooked, called badarwahi rajma or kashmiri rajma.

It grows in the hills they say, I get it from a small shop owner from katra whenever we visit Vaishno devi. It is available in Delhi too you just need to look out for very small grains of rajma with dark skin color.

There are other varieties of kidney beans too, chitre rajma, pahari rajma of uttarakhand, and many other varieties which differ in taste and texture though all of them are great if prepared accordingly.

Kashmiri rajma chawal

This recipe of rajma is kashmiri too , it is mild in taste as the flavors of the rajma beans is so wonderful you'd not want to mask it with overpowering spicing. So it is just the onion-garlic-ginger-tomato gravy and a hint of butter brings the richest flavors of rajma. This is the favorite rajma of Arvind while I sometimes like it a bit spicy n hot made the punjabi way but he always prefers this one whenever asked.

I used to love it at one of my Aunt's place and learnt it quickly as the recipe was very simple and tastes unbelievably creamy mild and full of earthy rajma flavor. Every family has it's own version of rajma and another kashmiri version uses the fennel-dry ginger- kashmiri masala and that version is very different from this one....

This one is absolutely our favorite kashmiri rajma...

ingredients...
 ( for 4-5 servings )

rajma / kidney beans 250 gm
( i used badarwahi or kashmiri rajma as this recipe is best suited for this variety)
the beans have to be soaked overnight 
red onions medium sized  2 nos. or coarse onion paste 1 cup
ginger paste 2 tsp
garlic paste 2 tsp
tomatoes large and fully ripe 2 nos. ( or 200 ml tomato puree )
red chilly powder 2 tsp
( i used regular chilly powder, use kashmiri chilly powder if you want a brighter red color )
cumin seeds 1 tsp
bay leaves 2-3
ghee 1 tbsp
butter 1 tbsp or more
salt to taste

procedure...

Boil the soaked rajma in pressure cooker for 12-15 minutes under pressure, with enough water to submerge the beans and salt to taste, till the rajma beans look cracked.

Do not use the soaking water for cooking as it causes flatulence (due to phytates that are soluble in water and get washes away when soaking water is discarded), traditional cooks cook along with this pinkish water though. Some cooks don't even soak rajma and cook it directly, I wouldn't ever do that. 

Make a coarse paste of onions and tomatoes separately and keep aside, the onion paste should be about a cup full and the tomato paste should fill up 2 cups, juice n all.

Heat ghee in a kadhai or any thick base pan and throw in the cumin seeds, wait till they splutter and get fragrant and then pour in the coarse onion paste ....

rajma recipe

Fry with a pinch of salt and throw in the bay leaves after a couple of minutes, bay leaves should not be put directly into the hot ghee as the essential oils get lost at such a high temperature, it releases great flavor in a watery-oily cooking mixture. Add the ginger n garlic pastes too and fry till the ghee separates...

kashmiri rajma recipe

Now add the fresh tomato paste too or tomato puree if using , and fry for another couple of minutes, adding salt to taste.

kashmiri rajma recipe

Wait till the tomatoes are cooked and then pour the boiled rajma into the kadhai ...

kashmiri rajma recipe

Add water if needed, depending on how thick or thin gravy you like and as soon as it starts boiling, add the butter too. Simmer this for about 15 minutes on low flame, the rajma beans will soak up all the flavors from the gravy, very subtle flavors with just a mild hint of aromatic spice due to the bay leaf used....

kashmiri rajma

Because of such a mild spicing the actual taste of the rajma is enhanced by the butter even though it is used in minimal amounts and the rajma is not at all oily. No ghee floating on top.

kashmiri rajma chawal

With hot boiled white rice it is a slice of heaven on your plate, I like the spicier punjabi version of rajma with brown rice or with boiled millets daliya (broken millets). With coarser grains the spicy curies and stews taste great.

This Kashmiri rajma needs a perfect mate. White (rice) is right with this.....the beans are melt in your mouth texture and the puddle of gravy beneath the rice is something to relish without any hindrance of a side dish.

Do you need sides with your rajma chawal? Really?

For me just a few slices of onions and cucumber and I am set.

Other versions of rajma will be featured soon as I like to cook according to varying moods and seasons and different spices are needed at different points of time. That is why we cook the same things differently I think...


Sunday, August 8, 2010

fara, goojha or peetha : the steamed lentil stuffed dumplings from UP

fara, goojha or peetha (steamed dumplings)

 Cooking a traditional recipe always warms me up. I love the nostalgia it brings with it, I remember how my grandmother used to make it and then my mother and how all of us siblings would huddle up in the kitchen and be curious. No wonder all of us siblings (two brothers and three sisters in all) are foodies and great cooks. Though when it comes to try the more labor intensive and time consuming recipes it's yours truly who plays granny. And I love doing this and I love when I see happy faces around me. Food always succeeds in spreading happiness. This goojha as we call it at home is a family favorite. It is called fara (singular) or Farey (plural) or pitha in different parts of UP. Bengalis make a sweet version of the same dumpling with a jaggery and coconut stuffing.

I find the fara one of the many dumplings that are made in south-east Asia. Momos, steamed bao, Tingmo or siu mai are all staple foods wherever they are cooked and people find excuses to make such meals even in modern kitchens that trashes the belief that only junk fried foods are liked by all.

I had promised this fara and many of you took interest in this ( I love you all for this )...... an anonymous reader (why anonymous?) said that he/ he will be happy to see if it is with the rice outer shell. I wanted to fulfill this wish so I made the rice flour at home, and tried to cook the rice dough which is a tricky process. Normally I just make a dough of 1:1 ratio of rice and whole wheat and that is good enough to make the fara shells. It took me the whole day rinsing and drying the rice, grinding it and then cooking the dough. Okay about 6 hrs to be precise. It was about about 2 hrs on the kitchen counter and the time spent, the muscle work done was all worth it. We got a whole lot of fara to last a week.


To make the rice flour at home you need to wash the rice (I used basmati tukda or broken basmati) , drain well in a colander and spread it on a news paper to get a bit dry for about 2 hrs in shade. Test by taking a handful and crushing it in your fist, it should get crushed to smaller bits. Now it's ready to be ground in the dry grinder of your mixie.
You can use ready made rice flour too if available.


The right side heap of rice is crushed by hands to test for readiness.........

chana daal and urad daal were also soaked for 4-5 hours and ground wet in the mixie with appropriate spices.....

Now see the ingredients for the filling...

for urad dal filling 
urad dal soaked 1.5 cup
red chilly powder 1 tsp
asafoetida 1 pinch
aromatic garam masala 1 tsp
salt to taste

grind everything together with minimal water .

for the chana daal filling 
chana daal soaked 2 cup
green chillies 5 nos.
garlic cloves 5-6 nos.
ginger 2 inch piece
cumin seeds 2 tsp
black pepper corns 2 tsp
salt to taste
salt to taste
turmeric powder 1 tsp

grind everything together with minimal water.

ingredients for the outer shell ..

rice flour 2 cups and some more
whole wheat flour 2 cups or as needed
salt to taste

To make the whole wheat dough you just mix whole wheat flour n rice flour in equal amounts, add salt to taste and make a medium soft dough by adding appropriate amount of water. Adding the rice flour to the wheat dough makes the fara have a nice bite, and it is more moist even when cold.

Making the rice dough is tricky. But rest assured it is very forgiving and you can always nip and tuck the mistakes.....
first of all measure 2 cups of water and salt to taste (for 1 cup of flour) and boil the water covered in a pateela or preferably handi.  Don't use a wide pan here.

Click to enlarge the image below to read instruction on it.

fara, goojha or peetha (steamed dumplings) stepwise recipe

As soon as the water comes to rolling boil open the lid and pour the rice flour at once and cover the lid immediately. Do not stir the mix and let it cook for 4-5 minutes or till the water spills off a little. Check that the rice flour lump will look glazed, it reveals rice flour in powder form when poked but that is how it needs to be. Take the pot off the flame.

Now use a large fork or a sturdy ladle or a wire whisk to mix it vigorously.

It may appear lumpy first but be patient and add more rice flour if it's too sticky, don't worry about the lumps as you have to knead it with hands once it is cold enough to handle.

Knead with your hands when it is cool enough to handle.

Make a pliable medium soft dough which you can roll easily, more rice flour can be added but the dough should become smooth. You can oil your hands while doing it.

Now is the time to shape the faras, pull out small portions of the dough, roll small disks about 1 cm thick and place the dal mixture over it, fold and make a semi circle and seal the top leaving the corners open .....

I make them in different sizes and shapes and I prefer filling urad dal mixture in the rice dough and the chana dal mixture in the wheat dough. You are free to have your own combination .

The bigger faras take less time to assemble but more time to cook, I prefer slicing them and frying them for a nice crunchy tea time snack.

There are two ways to cook the fara or goojha, you can either steam them over a steamer plate or boil them in lots of water like you boil pasta. The steaming over a porous plate is explained in the collage above. And boiling in a wide pot with lots of water is explained below.

While you are shaping the faras, boil water (with a little salt and a tbsp of oil) in a big wide pateela, when the water starts boiling slip the faras into it taking care not to scald yourself.
All the dumplings will be submerged in water at once, but they will start coming up as soon as they start cooking. Let it cook for another 3-7 minutes after they float on the surface, 3 minutes for the smaller ones and 7 minutes for the bigger daddies.


Take out one of them and prick with a pointed knife, if it comes out clean it's cooked.

Use a slotted spoon to fish them all out, you may need to boil them in two batches but this is the easiest step and you'd feel like popping one of them in your mouth as soon you fish them out.......

fara, goojha or peetha (steamed dumplings) They can be served right away if you want them steamed and it makes a filling satisfying and yummy dinner. I have fond memories of having a large platter of these on the dining table,  just out of boiling water and all of us sitting and eating them as if there is no tomorrow.

This time I halved one of the bigger ones and had it just when the second batch was cooking.
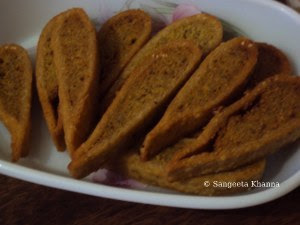

fara, goojha or peetha (steamed dumplings) It has such a wonderful bite, the covering is a perfect wrap for a soft crumbly spicy filling, a bite into the doughy shell leads to aromatic spicy interiors. A perfect alternative to daal roti, healthier and exotic desi.

I don't even need a chutney with it I like it so much.
A green chutny or even a sonth chutny is a great accompaniment, but I prefer making the filling spicy and no accompaniments whatsoever.

Yeah it is a different story with the fried ones. I generally fry the refrigerated ones, you know I make them for a week as I can't have enough of them in one go.

fara, goojha or peetha (steamed dumplings)

It keeps very well in the fridge and you can fry the smaller ones whole and the bigger ones can be sliced and fried to make exotic tea time snacks. They don't absorb oil and as you drain them on tissue paper any oil clinging to the surface is also absorbed by the tissue.

We had these for the evening tea.

fara, goojha or peetha (steamed dumplings)

These are so filling that you are free for 4-5 hours after having 2-3 of the smaller ones .....

The covering becomes a bit hard and crunchy after frying, without taking any oil and we love it.

It is after years that I have made them, though I was thinking of making these for a long time. Ravioli pasta and other types of dumplings I used to make a lot but these fara (goojha) brought many memories along and that made the meal even more special.

The urad daal and rice combination is softer and milder in spice level. I used just a hint of garam masala and the hing flavor combines very well with urad daal, making it tastier and easier for the tummy as well. I like the urad one more but Arvind likes the chana dal one. Tell me which one you'd like to have ....

fara, goojha or peetha (steamed dumplings)

PS : In our home it is called goojha as it is shaped like a gujhia. I have seen many people in banaras call it fara and bengali friends and a few bihari friends call it peetha. Now this anonymous reader has come up with another name, gointha. It was great to know this name and hilarious too, as gointha is a name for cow dung cakes used as fuel in the rural areas. They are made into the same shape and may be the name is inspired by that.

What's in a name when the end product is so yummy. You make it for a week and enjoy it any way you like Warm it with a sprinkling of water in microwave and enjoy it steamed for dinner with a soup may be, or fry them for a snack.

A blogger friend says that the best way to learn is to share your knowledge. I experienced it when I shared the recipe of patode. I knew only about the gujrati patra till now and after posting the recipe I came to know about the konkani and mangalorian pathrode as well. Many of your comments indicated that there are so many versions of this recipe and it is so heart warming to see this diversity with the same ingredients. I am sure that I will be knowing many more types of peethe too now, I know there is a different version in almost every state of India. But I have known only about the bengali peethey so far. What about your kind of peethey or any such dumpling ?? Had you known this Fara or goojha? Or you also know it as pitha or peetha?

Come on tell me. Iwelcome your links too if you have posted the recipe already on your blogs.

PS once more : I made these fara or pitha again for a get together ta home and decided to click more pictures. Uploading this post with a few better pictures so the process and the texture of this goojha of my home town is more understandable to someone clueless about pitha, or fara, or goojha or goitha :-)

Sunday, August 1, 2010

patoda | patra | girmachh | rickwachh | recipe of colocacia leaves savory rolls


The recipe of girmachh, rickwachh or patoda used to be the test of the new bride in some families I am told. However misogynist it sounds but I agree the recipe and procedure of making this patoda or rickwachh needs deft hands and some practice too. It is definitely a test of a good cook, man or woman. Luckily in my family all of us can make it regardless of gender. The dear husband is not a cook but a great helper when one is set out to make elaborate meals.

To find the recipe of rickwachh please scroll down if you are in a hurry. Else you might find the little stories of of our food interesting when you read from beginning.

I was in Banaras for two weeks and had a good time there. Roaming around the ghaats early in the morning, going for boating and watching the serene sunrise to illuminate our soul. Literally.

The early morning ghaat visit has become a ritual for us whenever we are in the city. It strangely feels like 'home' even though we have spent very little time on ghaats ever. It is something to do with the way these areas have not changed in the last 3 decades since we are witnessing.

Those from Banaras know that when we go to Dashashwamedh ghaat or Dr. Rajendra Prasad ghaat to watch sunrise we can take a bylane to reach a great fish market and a subzi market and this subzi market is no usual subzi market. There you get all those unusual vegetables and greens which you normally don't get to see in the city. Stems, roots and leaves of various shapes and sizes and may more things you wont even recognize and the subziwala will tell you the names and how to cook them.

That is where I found the leaves of colocasia/arbi ka patta on of the days we were on our holy walk.

We love the patoda made with it and never find these leaves in Delhi. I bought a few bunches of arbi ka patta from an old lady sitting on the corner where there are a few stoneware shops and a small mandir. The lady had at least 10 varieties of leaves and I even bought Bramhi from her and planted some of the stems in my dad's garden.

My dad has turned an avid gardener after retirement apart from doing some social service.

rickwachh or arbi ke patte ka pakoda recipe

After planting the stem cutting of Bramhi and a few more herb plants I brought from this market, I made the patoda myself as the cook was doing other things, it was my brother's wedding and the whole family was around.

Since the kitchen was occupied by the cook I just spread out everything on living room floor and started layering and wrapping while a few young hands clicked a few pictures of the process on my request, my hands were messy with the besan paste :)

The pictures may not be very aesthetic and properly angled but you'd get a fair idea of the detailed process, it is not a difficult recipe but you need to have some patience and a little practice to roll thee leaves up tightly. For me it is always a pleasure to cook something which delights everybody in the family............

 ingredients....
rickwachh or arbi ke patte ka pakoda recipe
(to make 4 huge rolls, each roll sliced up to yield about ten patode)


colocasia leaves 40 nos.
besan (chickpea flour) 500 g
ginger garlic paste 2 tbsp
green chilly paste 1 tbsp
rickwachh or arbi ke patte ka pakoda recipe
red chilly powder 1 tsp or more
cumin powder 1 tbsp
turmeric powder 1tbsp
amchoor powder 1 tbsp (more if using off the shelf kind)
salt to taste


 to proceed...
rickwachh or arbi ke patte ka pakoda recipe
Remove the stalks from the colocacia leaves and carefully remove the midrib from the dorsal side of the leaf, taking care not to tear the leaf.

Make a paste from the remaining ingredients, adding enough water to make a sticky paste, it should not be runny. The leaves have to be stuck together with the help of this paste and rolled up....


Spread a leaf dorsal side up (the side with prominent veins) on the back side of a thali or parat (a wide plate or even your kitchen platform), smear the paste over it generously and stick another leaf on it, keep smearing the paste and layering the leaves till 8-10 leaves are piled up.

It is better to align the pointed sides of the leaves in opposite direction for each layer, this way it makes a smooth n tight roll.......

rickwachh or arbi ke patte ka pakoda recipe rickwachh or arbi ke patte ka pakoda recipe

 Now fold an inch from both the sides of this layered up arrangement making a rectangular shape ...

And roll up tightly starting from far side towards yourself, tucking in the folded portions at the ends of the roll.......

rickwachh or arbi ke patte ka pakoda recipe rickwachh or arbi ke patte ka pakoda recipe

Repeat to make more rolls till all the leaves are used......

Now place a suitably sized round wire rack in a wide kadhai or a pan and place all the rolls onto the rack, pour 2 cups of water into the pan (the water level should not touch the rolls), cover and steam the rolls till a tooth pick comes out clean. Any type of steamer can be used for this purpose and they can even be microwaved.

rickwachh or arbi ke patte ka pakoda recipe rickwachh or arbi ke patte ka pakoda recipe

Let it cool and then keep the rolls in the fridge.

colocasia leaves may irritate or itch the inner lining of mouth because of oxalic acid crystals found in it , so it is better to let the rolls rest overnight into the fridge . 

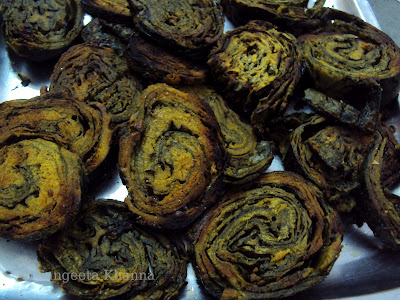
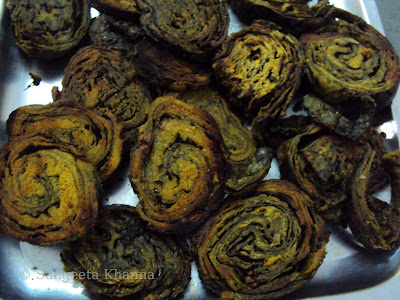
The next day they get firm enough to be neatly cut into slices. Shallow fry in mustard oil and enjoy the crisp spirals of yummy patode ........

rickwachh or arbi ke patte ka pakoda recipe

This a traditional recipe of eastern UP, a delicacy, some people like it deep fried but we always stick to shallow fried version because even my mom used to make it this way. The spirals loosen up if you deep fry them and the patode become bigger in size, definitely more crispy but the oil it drinks up while deep frying gives me a heart attack. The rolls keep well in the fridge for a week and can be frozen for a couple of months.

Great as a tea time snack but it is mostly served as a side dish with daal-chawal-subzi-raita  lunch. It was a wonderful experience making it because all my family members were there to savor them.

Tt was really great fun right from buying the leaves, preparing the rolls, taking pictures and eating them.

The name is patode but the specific eastern UP name is girmachh, the Gujarati version which is different in taste (just steamed sliced n served garnished with grated coconut) is called patra and that is great too. Actually the freshly steamed rolls can be sliced up while still warm and I like them just as it is with some green chutney and some imli paani. Sour toppings are good to have with it as the itching caused by colocasia leaves is neutralized this way.......


Lovely spirals. Delicious, crunchy, hot and sour. These spirals can be curried in masala gravy or a mustard gravy . Usually the leftovers are curried the next day.

You wouldn't ever want to waste such a delicately made dish, curried patode is great with plain boiled rice. You have to eat it to believe it.

I would love to know if it is made in your home, in what way do you make it if you do ............