Wednesday, December 14, 2011

jhingey posto...ridge guard with poppy seed paste...bengali style...


Have you ever heard a Bengali talking about food , this is one community madly in love with food . Shopping for food , cooking and serving the food takes a better part of their time and when they start
talking about food they forget about time and space and you feel like being transported into the wonderland of sorshe , kalo jeere , mouri and posto bata ...blah blah blah ..... :)

It was during one such blah blah blah that i realized i would like this jhingey posto which was the hot topic during a club meet . I decided to make it and it became a hot favorite at home . I have never tasted this recipe at any of my bong friends as they tend to overload the dining table with all sorts of meat and fish whenever they invite somebody and the humble veggies are given a miss. For me , it is the simple vegetarian fare of bengali cuisine i like the most and i had to train myself to make those to my taste . Yes , this curry may not be a true blue bengali progeny , because i made it as i overheard it and like the way i made and have been cooking it like this since then..............let's see if you like it and the bong friends can point out where a bengali element is missing ........i don't miss anything in this curry and it is a favorite of both the extremes .... vegetable haters and vegetable lovers in the family..... :)

Jhingey is ridge guard and you have to peel it before using it , the taste of this guard is a bit different from the regular smooth sponge guard and this curry uses the ridge guard only .... though alu posto is quite similar and other veggies can also be experimented upon.

It is a quick recipe once the peeling and grinding has been done. Cooking time is irresistibly low, especially if you like the vegetable almost half cooked like me.

ingredients...
(2-4 servings depending on what side dishes it is served with)
Ridge guards 400 gm
slit green chillies 2-3 (you would like the heat to be mild in this curry so use less green chillies if you otherwise avoid much heat or use the less hot ones)
nigella seeds 1 tsp
mustard oil 1 tbsp
turmeric powder 1/4 tsp (optional, omit if you want a white gravy)
salt to taste

Paste of poppy seeds 3/4-1 cup ....this is white Indian poppy seeds called posto or posta ...
(wash about 1/2 cup poppy seeds through a sieve, let it drain and then make a paste in mixie using some water)

procedure...

Peel the ridge guards first of all. You might like to lightly scrape them if they are tender but the bigger ones need the ridges to be removed using a peeler and most of the skin too. You can retain some of the skin if you like but i usually peel off the skin altogether. Cut about 1.5 inch long pieces first and then slice them in batons lengthwise, making 6-8 long batons out of each piece.

I would like to mention that the cut of the guards makes a lot of difference in the taste and texture of the finished dish.If you cut round and thin slices it releases more water and the vegetable gets very mushy. I have seldom cut a ridge guard in thin slices. For a chana daal or mung daal cooked with this guard, i cut it into dices and that works perfectly well for that. So it is thick (1 cm) batons for this recipe.


Heat the oil in a pan, mustard oil for the authentic bengali thing, and throw in the nigella seeds and wait till they crackle a little. Add the slit green chillies and let them fry and release the heat in oil, just for a few seconds though.

Tip in the chopped ridge guard , add salt, turmeric if using and toss them all.   Cover and cook on medium flame till the slices get wilted and release some juices. 5 to 7 minutes to be precise.

This is the time to add the poppy seeds paste , mix well and cook till a gentle boil. The poppy seed paste is added when the ridge guard is almost done. I like the ridge guard 3/4 done , or till there is still some bite in the pieces and they are not really mushy so the cooking time is about 5 minutes covered before adding the paste. You can always cook the guard longer if you like them mushy.

The curry looks a nice and creamy thing when finished. No garnish is required for such a stunning looking jheengey posto..

Serve hot with chapatis or rice. It taste great with both and doesn't really need any side dishes if you really like it. Jheengey posto could be your quick fix meal in that case, some rice made in microwave and jheengey posto prepared in a pan in the meantime...that's it.

Making a smooth paste of poppy seeds is quite a challenge as the seeds are very tiny and some of them always remain whole if we do it in the mixie jars. People who make the paste using the flat stone mortar and pestle(sil batta) vouch for the smooth paste that results. That kind of work out has become outdated in our modern kitchens...I still possess 3 types of mortar and pestle and yet I seldom use them. Time saving gadgets are the call of the day.

Difficulty in making a smooth paste of poppy seeds has led to some experiments in my kitchen and I have used some additives in the paste time to time. Got very good results with melon seeds and almonds. Poppy seeds and either melon seeds or almonds in 2:1 ratio work really well for the dish. You can always reduce the amount of melon seeds or almonds if you want that grainy posto in your curry.

I like the curry so much that I even deviated from using a posto paste ....Now you know I love the ridge guard as a vegetable just too much. I always store a powder made with almonds,poppy seeds and black peppercorns (in 1:1:1 ratio) in my fridge to have it with milk whenever i have my headaches (migraines to be precise, it works really well if you take in the beginning)....

Sometimes I use that powder for instant jheengey posto with the heat of some kaali mirch instead of hari mirch. And since i use a powder, I usually cut the guards in semi roundels so it release more water and does some justice to a powdered instant solution.....


The taste in this case is great too but definitely different when a fresh paste is used. Make a fresh paste when you are trying it for the first time . The powder version is for those who have migraines :-)

The recipe was lying in the drafts for about two years now , half written and neglected. A picture of nicely cut ridge guard by Shail Mohan on facebook got me talking about jheengey posto and she wanted the recipe. And this was a cue for my fingers to work but i am frustrated at the end of it as there is no ridge guard in Delhi markets right now and i really want to have it for my dinner. Facebook can be really unfair at times.

Saturday, December 10, 2011

bajre ka maleeda ... a rustic dessert or meal made with pearl millet flour...


A thick roti made with pearl millet flour, crushed to bits while still hot, then drizzled with ghee and mixed with jaggery is our bajre ka maleeda that is one essential winter food. Also called as bajre ka choorma or choori, this is one dish that no one can refuse, the only thing is that many people think it is too difficult to make it. That truth is far from it indeed.

Get some bajre ki roti made, that is all you have to do whenever you want a dessert heavier than your meal or a dessert meal all alone to savour in leisure. This used to be a regular dessert at the end of the day during winters when we were growing up. It was always made in large quantities and the leftovers were great for breakfast too. Sometimes the breakfast would be just bajre ka maleeda, the ways we accommodate our favourite seasonal foods.


Bajre ka maleeda or choorma is a great breakfast option as mornings are better time for heavy meals.

Just go get some pearl millet flour or bajre ka atta and have a sweet meal any time of the day. Although I would like to have it for breakfast always, the reason being you just cannot stop eating it till you feel full to the brim. So serving this maleeda as a dessert is out of question at my place. It is always a meal preferably a breakfast or weekend brunch.


Let's see how to make this maleeda. 

Making the bajra roti is the only step which needs some skill, although anyone can do it as you do not need to make a perfectly round roti or evenly thick roti for that matter. The only condition is that the roti must be cooked properly, being grilled slowly on the gas flame after roasting it both sides on the iron griddle..

How to make bajre ki roti

Knead a dough using bajre ka atta (pearl millet flour) and some warm water. Kneading small portions of the flour, just enough for one roti is convenient as the dough remains warm for flattening it by patting it under both your palms. So pour some warm water in about half a cup of flour first, mix and knead, then make a ball and rub some more between your palms, smoothen and then pat between both your palms to flatten it. The roti can be anywhere between 1-1.5 cm thick.

Pat the roti on hot griddle, let it brown slightly both sides and then grill slowly on the gas flame till cooked. It will puff up as a sign of being cooked and will break easily .

Alternatively the roti can be baked in an oven, laid on a greased baking tray, for about 15 minutes at 180C. The roti gets a nice thick and hard crust in both the cases, the insides remain softer but crumble easily.

The roti should break easily into to halves when folded and that is a test of being cooked. Also, the inner parts should not be gooey if you check.

Repeat to make more rotis and keep them wrapped in a cotton napkin till mashed or broken to make maleeda.

How to make maleeda 

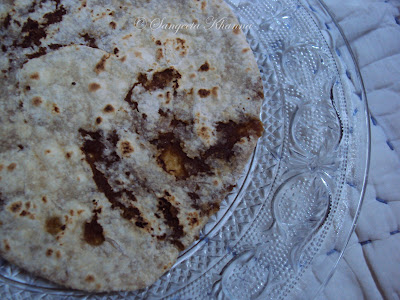
Drizzle some molten of softened ghee over the warm pieces of roti. Top it with powdered jaggery or shakkar (unrefined brown sugar in this case) and enjoy the maleeda crushing each piece for every bite you take.


Or crumble a warm roti using your fingers and gather it on the plate like this.

You can make maleeda even if you don't get bajre ka atta (pearl millet flour). Just use any whole grain flour and follow the above process to make a thick roti.

Use corn meal or coarse whole wheat flour or powder either daliya (broken wheat), or burgul or even couscous or a mix of all these flours. You get different taste with all these flours but every time it is equally delicious.. This maleeda is made with many millet flours, each having it's own taste and if we do not have access to millet flours we resort to coarse whole wheat flour or regular whole wheat flour mixed with semolina and some bran, with great results.


have you had maleeda before?
Try this simple dessert/snack/meal and toss that muffin you are munching..

And if you have witnessed all your childhood winters sinking your teeth is such delights, come on...make it again for yourself.

Thursday, December 1, 2011

keema wala gobhi musallam...


This keema wala gobhi musallam is a whole head of cauliflower cooked covered with a keema masala dry curry. This recipe can be baked if using a bigger cauliflower or you need many cauliflower heads to serve a gathering. This was a small head and was just enough for two servings so I cooked it in a deep pan so all the steps of cooking can be done in a single utensil and it saves time too. So this is kadai cooked gobi musallam covered with mutton mince(keema). Cauliflower acquires a new dimension of taste in this recipe as the juices from mutton mince get absorbed really well . This is one dish which remains always in demand and doesn't demand much work to be done, although slow cooking is the best way to get a great tasting gobi musallam. Slow cooking will not be a problem if you keep on working on the next steps of the recipe while frying the cauliflower and then working on the side dishes later when it takes it's time on the stove top.

You can always cook broken florets of cauliflowers with the keema masala following the same recipe if you find it difficult to wrap the masala around cauliflower , or to core the cauliflower the way it is done here. The taste of the small florets remains the same if you cook them the same way but a musallam packs in a surprise element. The keema masala covers the cauliflower completely and it doesn't look like a vegetable hiding under  the spicy looking rich masala. It's only when you cut through it like a pie when the cauliflower is revealed...


And don't worry about the oil/fat content of the recipe. The picture is the proof, there is no oil on the plate can you see...

ingredients...
(2 large servings)


mutton mince or keema 200 gm
one medium sized cauliflower (this one was 400 gm)
one large onion (half of it diced finely and half cut in bigger chunks for the paste)
garlic cloves 5-6 fat ones
ginger peeled and diced 1-2 tbsp(to suit your taste)
dry red chillies 3-4 or to taste
every day curry powder 2 tsp
special garam masala 1 tsp
turmeric powder 1 tsp
freshly made tomato paste1/2 cup
salt to taste
mustard oil 3 tbsp or any other oil you use
procedure...

Core the cauliflower as shown in the picture, removing the hard stalk so a cavity is formed through the flower to let it absorb all the flavors.

Heat 2 tbsp oil in a deep pan, tip in a tsp of salt in the oil directly to avoid any splattering of oil and fry the cauliflower turning it all the sides to make it brown like this.

Keeping the flame medium low and turning the cauliflower every few minutes is the key to even browning but do not worry if it brown unevenly. Just that it should be browned all around.

Make a paste of the onion,garlic,ginger and red chillies till the cauliflower is frying. After that, pour in the remaining oil into the same kadai and tip in the onion paste. Add salt to taste and keep frying the paste till it looks glazed. If you use more oil it will release the oil when fried, using less oil needs patient frying (bhunoing) of the masala paste.

Now add all the powdered spices and 2 tbsp of water to make them into a paste and bhuno again for a couple of minutes or till the spices get nicely aromatic.

Add the ground meat or keema and keep stirring till it gets cooked , takes about 8-10 minutes on low flame. You can cook it covered after mixing it nicely , but check for the water content to prevent burning in the bottom.

Add the tomato paste, mix and cook for a couple more minutes.

Now, using your spatula, shift all the fried masala paste to one side of the pan and place the fried cauliflower in the center of the pan. And scoop all the masala paste all over the cauliflower to cover it completely.


There will be some watery fluid around the cauliflower due to the tomatoes , add some water if the tomatoes have dried up. Cook covered on very low flame so the cauliflower soaks up all the flavors while cooking together. All the fluids are dried up when cooking is complete. Otherwise cook without lid for a while so it becomes dry.

Transfer carefully to a platter and garnish with onion rings and coriander greens if you wish.


Use a pie spatula to cut through the cauliflower and to serve it . I actually thought there would be some leftovers but the two of us polished it off with plain whole wheat chapatis.

Onion rings are great with a spicy dish like this, although pickled onions or onions rings doused with lime juice will be better if you make the gobi musallam hot and spicy. This recipe made a very mild spicy musallam and the kick provided by the red onions was a great accompaniment to it.


A raita can be served as a side with chapatis and/or rice with it . We like it so much i never make a side dish with it if i am making it just for the two of us. A much repeated recipe during winter months, we eat seasonal vegetables only and eat minimal meats during summer months.

I have another recipe of keema with a summer vegetable which is our favorite too and i make it whenever our plain simple meals of summer need a kick. Stay tuned in for the summer keema special.

This gobi musallam doesn't promise a quick meal but it's worth all the time it takes by slow cooking it for about 30 minutes. You can always make your chapatis, any other kind of breads or rice to go with it on the side as slow cooking gives quite some space to multitask.


How about a slice of a tree vegetable loaded with some meat ? And no , there are no vegetarian versions of this musallam.

Gobi musallam with just the spices is another thing....may be i make that soon take pictures and post it here :-)

After all that version is a childhood favorite while this one is something i improvised...to my taste...and it has won hearts. What about you?

Wednesday, November 9, 2011

puran poli made easy | step by step recipe of puran poli


puran poli recipe

A sweet stuffed flat bread that gives the cinnamon roll a run for its' money. That is puran poli for you, a step by step recipe so you can make this decadent soft flat bread for yourself..

Stuffed with a delicate mixture of chickpea and jaggery and lightly spiced with cardamom, rolled out to make a flaky crust encasing a melting goodness of a uniquely sweet filling. As simple as that.

This sweet stuffing is so tasty that it defies the fact that it is made using a simple and cheap ingredient. Actually when I made it for my MIL when I was a newly wed, she guessed it to be khoya and jaggery. The texture of the chickpea cooked with jaggery or sugar becomes almost like khoya and given the fact that a certain khoya paratha was a family favorite there, this sweet puran poli fell in the same category immediately.

I like my puran poli stuffed with a melt in the mouth kind of filling and not a dry crumbling type which makes it tough to swallow the poli without a slug of milk. I have a similar reservation about a certain daal ki puri too which is made with a savory stuffing of chickpea. This melt in the mouth kind of filling is not that tough to make my dear friends. Actually a lot easier than the dry filling. Let's see how to make the filling of puran poli....

puran poli recipe


ingredients...
(makes about 10-12 puran polis)
for the filling..
chana daal (split chickpea) 1 cup
jaggery powdered 3/4 cup (i used unrefined brown sugar)
green cardamom 2 nos.
water 2 cups
for the pastry..
whole wheat flour 1.5 cup approximately (depends upon how much filling you can stuff in each poli, it is a skill to stuff more filling in a small ball of dough)
pinch of salt
water to knead a dough

procedure for the filling...

Boil the split chickpea in pressure cooker along with the water indicated.
Cook for 7-8 minutes after the first whistle, lowering the flame after the first whistle.
Let the cooker cool down, open the lid and add the jaggery to the cooked daal.

puran poli stuffing with jaggery

Now cook the daal along with jaggery till the mixture gets a bit thick (about 5 minutes).

It is time to blend the mixture now. A hand held stick blender is a useful device for such things and helps in blending the mixture right inside the pot. I used the stick blender but the mixture can be transferred to the food processor to be blended smooth.

puran poli stuffing with jaggery

Return the mixture back to the cooker, if doing it in a food processor and continue to cook for about 5 more minutes to condense the mixture. Transfer to a bowl .

The mixture still looks a little loose consistency to make a chapati filling. But the secret to a melt in the mouth kind of filling is this consistency of the filling mixture. Almost like molten chocolate.

puran poli stuffing with jaggery

It has to be kept in the fridge so it gets a little harder and manageable when cold. It will be easier to stuff inside the poli after this, but when the poli is roasted on the pan the filling will again become soft and melting kind.

Look how it looks after a half an hour rest in the fridge. It is a small portion and needs lesser time in the fridge. For large quantities you will need to keep it longer in the fridge.

puran poli stuffing with jaggery

As I said, stuffing the mixture inside the poli is a skill but a few pointers can work wonders if you follow them carefully. I am not uploading any pictures of the stuffing process as the instructions will be enough to understand and also because the hands get really messy and clicking pictures during stuffing is not a possibility.

Just follow the instructions and note the pointers.

procedure for the pastry...

Knead a dough exactly when required, kneading enough to make it soft and elastic and a little softer than roti dough. Refrigerated dough does not behave well with a meting type filling.

The consistency of the dough should be exactly like the filling, so if the filling is soft, the dough should be as soft, or just a bit harder than that.

Use finer dusting flour to roll the poli, using maida for dusting is a good option as whole wheat flour does not stretch as much as maida.

Also, if you are making puran poli for the first time, use maida instead of whole wheat flour to make the dough as it will be easier to roll with such a tricky filling.


Pinch a small portion of the dough, make a ball and then make a depression in the middle to shape it like a bowl. Now spoon out a bigger portion of filling and place inside the dough bowl, stretch the edges and seal the bowl to make a ball again.

Use some dusting and flatten the ball with your fingers on the rolling board first before rolling it with the help of rolling pin. Some of the filling mixture may look like being exposed and it enhances the taste but take care not to let the filling leak out of the pastry. A thin even layer of pastry over a rich filling is what you have to work for.

Carefully lift the poli and flip it over the hot pan. Roast both sides till pinkish brown patches are formed and the poli is cooked through. Apply little ghee after taking the poli off the heat.

 Repeat to make more polis and keep them in a butter paper lined container. Serve hot.

puran poli recipe

See how the filling is exposed and yet held up together inside thin layer of pastry. A right consistency of the dough makes it possible and rolling it with soft even hands is also critical. The taste will anyways be great with such a flavorful filling but if the poli is rolled perfectly it will make the effort worth.

Such a dark color of the filling is due to the dark brown colored unrefined sugar I used. This kind of filling makes a really nice and soft puran poli whose puran doesn't get crumbly and scatter in the plate. It sticks to the pastry and melts in the mouth when you take a bite.

Use of whole wheat for the pastry and a dark brown colored filling makes a rustic looking puran poli, but the taste will blow your mind away.

We have always liked it this way, the way we were introduced to this dish in younger times.

Puran poli had come to our house through a marathi friend of my younger sister and this is the way they used to make it. We adopted it and it stayed with us the same way.

puran poli recipe

Leftovers polis reheated in the microwave are great for breakfast with a glass of milk or as a meal with a bowl of fresh yogurt Although it goes well with some sweet and sour kind of pumpkin curry too, we always try and have it in more than one ways whenever I make it....

The puran (filling) keeps well in the fridge and a freshly made dough is all needed to make fresh polis anytime.

Have you tried any flat bread with a sweet filling? Some friends tell me it tastes great with fresh coconut milk. I am yet to try that.


Saturday, November 5, 2011

daal bati chokha | making sattu wali litti , baingan ka chokha and arhar ki daal

daal bati chokha or litti chokha

Daal bati chokha or litti chokha aur daal as we call it, this kind of meal comes under the most favorite types in my household. A hearty meal with all the rustic flavors to appease the hunger, the taste buds and olfactory nerves all at once. Not to mention the fun cooking process.

For many people it has been an extensive work and a dreaded kind of meal because of long cooking time it is supposed to involve. Let me make it simple for you. I have been cooking baati and litti using my microwave and gas stove and it gets ready within minutes. Actually it is more convenient than making chapatis as it doesn't involve rolling and baking on the griddle. Daal and chokha are cooked conveniently too. Chopping some more garlic than usual would be well worth if you are anticipating daal baati chokha for dinner or for a weekend lunch.

Recently, during my Banaras visit i prepared daal baati chokha twice for extended family and friends and it was a baati masterclass for a few people out there ... I have taught many people to make litti and baati this way and it has become the only way to make it in many families around me since then. Very few of my real family and friends know about a litti post i did long time back on this blog, they get live demonstrations so they don't value written words on these pages...i don't mind that though :)

litti chokha arhar ki daal

We wanted another round of daal baati chokha after coming home too, this is an addictive kind of meal believe me. The more you have it, the more you want.

The pictures are not very god because it was made for dinner and artificial light does make it look dull and lifeless, so do not go by the looks here as the taste is legendary. Time tested, tradition evolved and loved by all. For me, if a particular kind of dish is made in many regions of the country,  it is a testimony to it's being really good. This recipe is different from Rajasthani baati and more close to Bihari litti chokha , daal baati chokha of UP has a different identity of it's own. I have loved daal bafla of MP too, but that is also quite different from this.

Talking about the difficulty level of this recipe, you just need to concentrate over the daal and chokha and both of them are regular kind of recipes.

Daal is a mix of many lentils cooked conveniently in pressure cooker and tempered with chopped garlic, onion and tomatoes. Simple.

Chokha involves fire roasting the eggplants and tomatoes over gas flame but that can be done in an oven conveniently too. I somehow find it more convenient on gas stove as it is quicker and fun. Just some peeling the burnt skin and mashing with some chopped onion and the chokha is done. Simple.

The whole process of cooking the 3 of these for 2 people takes about 30 minutes. Including roasting , chopping , kneading the dough and assembling everything together.

ingredients and procedure for the baati.... 


Whole wheat flour without any shortening is what i normally use but you can go for a 1 tsp ghee shortening per cup of flour. Knead the flour using water and a little salt making a medium stiff dough. Make balls and flatten the balls to make about 1 cm thick batis , these ones are 5-6 cm diameter , you can make smaller or a bit bigger.

Now grease a MW safe plate with ghee and arrange 6-7 baatis in it and microwave on high for 5 minutes. I made 4 baatis and cooked for 3 minutes.

Place a wire rack on the gas stove and cook the baatis directly over the gas stove immediately after taking them out from the MW. This step has been posted with pictures here.

This flame roasting is to ensure those burnt spots on the surface and it gets a nice crust after this , while the insides are soft and crumbly. You can stuff 1/2 tsp ghee in each of the baati to make it softer and more flavorful too.

Smear ghee, keep them in a covered bowl and serve hot.

Cooking the baati should be the last step in assembling this meal but i wrote it first so you would know how easy and quick it becomes with this technique. Otherwise, making baati is the most tedious job, once this process is made easy you can now think of doing it happily. All the steps of making baati can be handled while cooking the daal and chokha simultaneously.

ingredients and procedure to make the daal...
(2 servings)
toor daal (arhar daal) 1 tbsp
mung daal 1 tbsp
masoor daal(red lentil) 1 tbsp
urad daal (skinned and split black lentil) 1 tbsp
turmeric powder 1 tsp
salt to taste
 for tempering...
ghee 1 tbsp
asafoetida powder a pinch
cumin seeds 1 tsp
minced (not paste) garlic 1 tsp
diced onion 2 tbsp
diced tomatoes 1/2 cup
red chilly powder 1 tsp or to taste
chopped green coriander to garnish
minced ginger 2 tsp

Wash, drain and cook the daals in pressure cooker with salt, turmeric and 4 times water by volume. Cooking time should be 5 minutes after the first whistle.

Heat ghee and add the asafoetida and cumin and wait till the cumin splutters. Tip in the minced garlic and let it brown lightly.

Now add the onion and fry till translucent. Add the tomatoes and a lil salt and cook till the tomatoes are pulped. Add red chilly powder and let it cook for a dew seconds and pour all of this to the cooked daal, let it simmer for a minute, add the minced ginger and chopped coriander, mix well and serve.


litti chokha aur daal

ingredients and procedure for the chokha...
(2-3 servings)
one eggplant round variety (approx 200 gm)
2 tomatoes
one medium sized potato
finely diced onion3-4 tbsp
minced garlic 1-2 tsp
minced ginger 2 tsp
minced green chillies to taste
salt to taste mustard oil 1-2 tsp
chopped green coriander as per taste

Roast the eggplant and tomatoes over gas flame or in the oven till cooked.
Keep covered for 10 minutes so the skin can be removed conveniently.
Remove skin and mash both eggplant and tomatoes with cooked potato and mix with all the other ingredients.
Serve hot or warm or cold .


litti chokha recipe

If you want to do it within 30 minutes you should start with placing the eggplant and tomatoes on flame the very first thing. It needs to be turned and rotated every few minutes but you can do the daal preparations side by side. Kneading the dough for 2 servings and assembling the baati is a 10 minute job which requires your hands' involvement constantly.


I hope you found a simple way to enjoy a daal baati chokha whenever you want. A few friends have been asking for a recipe and although it is there on this blog since ages, i wanted to put a fresh post about the beauty of this meal.

Enjoy...

Thursday, November 3, 2011

the famous lassi of banaras.....pehelwan ki lassi...


Banarasi lassi is very different from Punjabi lassi. While Punjabi lassi is a frothy drink with a blob of fresh white butter floating on top, banarasi lassi is more like a dessert drink.

I remember having a frothy fresh punjabi lassi served in huge metal glasses when i was a kid . That lassi used to be lightly sweetened and a little thinner too. I liked the kachhi lassi (which is actually fresh buttermilk) more as i like all things savory. In punjab villages lassi, seet or savory is always served with some fresh white butter floating on top.

Lassi of banaras is poles apart from that refreshing drink of punjab. It is more a filling meal in itself, a dessert meal in fact. Thick and sweetened with a topping of malai on top and a generous blob of rabdi over it. How much more sinful it could get? The mithai loving people of Banaras have reinterpreted the lassi for sure.

The curd for this lassi is made with reduced milk so the lassi gets a nice creamy texture . The curd is set in to wide vessels called parat as seen in the picture here so it gets a larger layer of malai on top.


Look how the shop owner is pouring lassi straight from the matka in which he jut churned the lassi using a wooden mathani (an Indian whisk) . I remeber in olden days these parats were not used to set the curds and there used to be nice earthen vessels of the same shape and size. I am not sure if the milk is boiled in the same vessels as when the milk cools down  all the fat floats on top and makes a nice and thick layer of malai . The same malai is scooped off to top the lassi when served in earthen kulhads.

Yes, these kulhads make this lassi even more special.I am so glad these kulhads and dried leaf plates and bowls are still used in some of our cities. Look at the dried leaf bowls they use to serve those syrup dripping lavag-lata . Lavang-lata is a very sweet fried pastry stuffed with clove flavored khoya( reduced milk) and dipped in a very thick sugar syrup. A bengali version of this sweet is lavang-latika which is smaller in size and delicate in folding pattern, the bengali version includes some coconut too in the stuffing. This particular place is famous for it's lavang-lata too and you can see there stock is almost over by afternoon.


And now is the time to introduce you to the special place where you can get this treat. This is pehelwan ki lassi situated at Lanka crossing. This area is close to the Banaras Hindu University and if you are coming from the university side you can spot this shop on the right side of the crossing, flanked by a hardware shop.


The lassi here is one of the best in Banaras , a few places in chowk and Ramnagar make great lassi too but it's very easy to get duped for a glass of lassi in banaras. Banaras is known for it's thugs too you must remember so you need to spot the right place to try the famous and talked about specialties of the city. Many of my friends in the past have had lassi from nondescript places and have got upset stomachs as many of the shops use synthetic milk and yogurt so beware. When something is famous from a place, there are more chances of imitations or cheaper versions available to dupe the tourists. Same goes for Banaras silk but i am not talking about that right now.

This lassi would surely make you want to come back to this shop several times during your visit i am sure. There are other nice places for good lassi too and i would share those places whenever i get an opportunity.


Oh the lassi...did i describe the taste for you?

It is actually better than any ice cream of the world. That granular looking rabdi is unsweetened to balance the intensely sweet lassi below and that piece of malai should be devoured slowly. One because it is so laden with fat that it fills your palate and two because it is so yummy you would want it to last till the lassi lasts in your kulhad....so have a spoonful of rabdi and take a sip of the lassi then take a spoonful of malai and take a sip of the lassi...and do not laugh at the way i am describing it as i have learnt it the hard way how to eat and drink this lassi at the same time....when you try to drink it straight away those edibles block your sip and you get confused what to do.... those small wooden spatulas are there for a purpose.

Some foods are served attractively but feel a little weird on how to eat or drink them....watch the way how the locals do it or invent your own way .....

Go to Banaras or recreate it ...lassi is a natural healthy drink , often a meal in a drink for me. Try the bada kulhad (a large portion) here and see what i mean. This one was a chhota kulhad ( smaller one) which cost us 15 Re each....can you believe it?

Enjoy...

Tuesday, November 1, 2011

pizzeria of banaras....one of the best pizzas of the world..


And I am not the only one to say that. Yummiest of pizzas , pastas and unforgettable apple pie served in the most unpretentious way. Head towards pizzeria vatika (what a nice fusion name, meaning garden of pizza :)) at Asi ghat amidst greenery and chirpy birds. You are blessed if you choose the time of sunset.

If you are fascinated by the idea of an open air eatery overlooking a beautiful river this is for you. A peaceful place to sit and relax under lush green trees of Neem and Amda , dry leaves fallen on the floor and a few flies for company. Lots of house sparrows and parrots would make an evening musical for you.

Supernatural surroundings , great ambiance , touching the soul of a city known for it's wanderer spirit. Yes I was in Banaras for almost three hectic weeks. I am glad I could squeeze some time to visit some of my favorite places around town.

This is pizzeria of Banaras offering authentic pizzas and pasta dishes . Some freshly baked cookies , challahs, cinnamon rolls, apple pies and brownies are enticingly delicious and the secret is, fresh ingredients and a wood fired oven. Can it get any better?


Displayed in a very basic looking glass window these goodies might look very ordinary but they are fresh and delicious and quite cheap when compared to big city bakeries. This pizza oven was set up by a group of enthusiastic Italian students of music who used to sit on the ghats of ganges ( assi ghat to be precise) for their musical jams.The restaurant was run by a Gopal Krishna Shukla, serving mostly to the students as assi ghat is frequented by university students all the time. So these Italian students requested this restaurant owner to let them set up a wood fired oven for a weekend and bake some pizzas for a friend's birthday party . The pizza fever caught on since then.

The owner learnt it from them and started baking pizzas on his own too and soon the pizza substituted samosas and kachoris at Asi ghat .... much before the pizza hut and dominos reached this sleepy ancient city.


This wood fired oven looks as basic as a dhaba oven , flanked by platforms on both sides and a huge pizza spatula , the inner compartment of the oven looks like a small room.


Having chosen our table, I found a bunch of these fruits dangling on the branches as I looked up to find some birds.These fruits are used to make chutneys and pickles, called amda in Hindi and probably Carribean plums in English.


While we were entertaining our niece of 2 years by making boats and rockets with pink tissue papers the pizzas arrived. We had ordered a Margarita, a Mushroom and an Onion and mushroom pizza for 4 people . These 9" thin crust pizzas were enough for 4 adults with a kid nibbling small bits too .


Well balance flavors of the toppings and a right blend of herbs . I needed a sprinkling of red chilly flakes over it but for all the others it was great as it is.

No overwhelming amount of cheese dripping and making my hands messy and tongue scalded was my point of a big plus. You can always order for extra cheese or toppings if you like it that way but for a thin crusty base with smokiness of a wood fired oven, you wouldn't like to spoil it with overwhelming cheesy flavors.

But if no amount of cheese is too much for you, go ahead and order for an extra cheese pizza. I wanted to try the aubergine pizza there but as no one else was interested in aubergine, and no way i could have finished one whole pizza by myself, so went by other's choices.


This onion and mushroom was a favorite of majority while i loved the margarita most . Unspoiled taste of a great pizza . I am actually drooling talking about it now and i know i will end up making one tomorrow or day after. Pizza dinners are very common during winters at my place (if it's not a huge bowl of soup with a home baked bread) as the oven is comforting in my tiny kitchen and the bread aroma comforts more than anything else in the world.Winters are loved for more than one reasons :)

We wanted to have a slice of apple pie too, which is also the much talked about thing there but we didn't have any scope for solids so we just had huge mugs of espresso watching the flowing Ganges beyond those palm fronds...

It's a nice place to sit if you are not bothered by a few flies here and there.
It's anyways hard to find an open air space around the lanes of any Indian city without the omnipresent houseflies , wherever there is food being served or handled i mean.

If you think beyond that, this is the place for a quite evening with friends or alone.
Many foreigners sitting alone with a book or a kulhad of chai around this place is a testimony to what i say. There are several nice book shops around this place too...a place with a good promise.
Absolutely.

Saturday, October 1, 2011

sama ki khichdi : Barnyard millet now i know...

The name was told by an anonymous reader on my sama ke chawal ki idli post . It was only then i got to know it's botanical name too, it is Echinochloa colona now that i know, thanks to my well informed readers.

 I have been overwhelmed seeing the hits on my blog since the last week or so. The vrat ka khana recipes are getting great numbers of hits and many readers are interested in knowing whether sama/samak and buckwheat are healthy options. Yes these are very healthy grains and our fasting days are an excuse to make ourselves educated about these super foods.
As i have mentioned earlier buckwheat is also a very nutritious grain and should be consumed frequently , not only during the navratri fasting.

A tomato based soup with buckwheat groats can be a great fasting food too, if sendha namak is used instead of table salt.

Fritters or savory pancakes made with buckwheat flour are great fasting options too , made healthy wth vegetables they are perfect healthy food..

Motivated by the flurry of hits to my vrat ka khana recipes, i made a sama ki khichdi today so that my readers can get all the variety to the fasting menu. That was all i needed when i used to fast few couple of years ago. Variety. Sama ka chawal, singhare ka atta and kuttu ka atta and whole kuttu or kuttu ka daliya used to be my staple those days. Saboodana is crime (read empty carbohydrates and that to the most refined type) during fasting and otherwise too , although saboodana khichdi is what most people prefer when cooking for fasting food.

Saboodana khichdi is very common and there are many recipes available on the internet for that. But we should be aware that sago pearls are refined carbs and should not be used abundantly.Saboodana is crime (read empty carbohydrates and that to the most refined type) during fasting and otherwise too , although saboodana khichdi is what most people prefer when cooking for fasting food.

These sama ke chawal is a whole grain full of complex carbs and fiber too and can be used for daily cooking . I have made dosas, idlies , kheer and khichdis with sama and all of them taste great.

ingredients...

sama ke chawal soaked overnight 1 cup (it gets doubled after soaking)
chopped tomatoes 1 cup
a few springs of curry patta
chopped green chillies and ginger as per taste
salt n pepper to taste (use sendha namak or lahori namak, called rock salt in English)
ghee 1-2 tbsp
cumin seeds 2 tsp

procedure...


Heat the ghee in a pan ( i use my iron kadai) and throw in the cumin seeds, wait till they splutter.

Add the ginger, green chillies and curry patta let them fry for 30 seconds or so. Add the chopped tomatoes and salt and fry till the tomatoes are mushy.


Add the soaked and drained sama ke chawal , 1/4 cup of water and cover the pan. Lower the flame and cook covered for about 5 minutes.


Check if you want it softer , add a tbsp or two of more water if required n cook again. Otherwise fluff up and serve immediately.


This khichdi , although i would like to call it a tahiri or tomato rice, keeps well in the fridge for a couple of days and tastes great after reheating in the microwave with a sprinkling of water.

Sama or samak ka chawal or Echinochloa is the quinoa of India. Doesn't it look inviting?

This kind of khichdi or tahiri can be made using any vegetables and any flavors you like. Keeping some soaked grains in your fridge will help you to assemble it quickly.

I had promised a friend to post a singhade ke atte ki roti (water chestnut flour flatbread) , that i am planning to do tomorrow . I have told this recipe on phone , on facebook chats and even like a story telling too .... you must be aware i like talking about food ...and many of my friends have tried this recipe with great satisfaction. This singhare ke atte ki roti is a soft and hearty chapati made with water chestnut flour and can be a great option for gluten intolerant people, specially those who crave for chapatis.

Stay tuned in....Enjoy navratri fasting....Or an excuse to eat some healthy grains right now....

Monday, September 26, 2011

jeere wali gobi ...cauliflowers infused with cumin ...


This is how the simplest of flavors can make a vegetable worth on your table. Cauliflowers are great healing foods and if made in a low oil stir fry it can be a nice side dish or a meal in itself. I used to have a large bowl of this stir fry during navratri fasting as i wanted to have more and more vegetables for my meals. Vegetables and fruits are allowed and some grains like sama and kuttu or rajgeera too. So this jeere wali gobi makes a nice vrat ka khana (fasting food) during navratri or a stand alone dinner for you any time...

And if it comes together in 15 minutes flat, you would go for it without any second thoughts. I like it more with chapati , wrapped in a chapati or otherwise....i am one of those people who can eat dry stir fried well with chapatis too... And of course as a stand alone meal too i prefer such crunchy and slow roasted vegetables...I can't get enough of it...

ingredients....

cauliflower florets 3-4 cups
new potato one medium sized
finely chopped ginger 2 tbsp
chopped green chillies 2 tsp
whole cumin seeds 1 tbsp
cumin powder 1 tsp
black pepper powder 1 tsp
turmeric powder 1 tsp
chopped coriander leaves with stems1/2 cup
ghee 2 tbsp


procedure ....

Microwave the potato in the covered bowl without water , then cube the potato in 8 pieces or more...Or use the potato raw , you would fry it for some more time in that case...

Heat the ghee and tip in the cumin seeds , wait till they crackle.

Throw in the chopped green chillies and ginger , let them fry for some seconds and then add the cubed potatoes , salt and turmeric powder , stir to coat them all well.

Add the cauliflower florets too , along with the cumin and pepper powders , toss and stir to coat all the florets well . Flash fry for a few seconds and then lower the flame and cover the pan for about 5 minutes or so.

Open the lid , check if you want the florets to be more tender , they are a bit crunchy in my recipe....fry (bhuno) a bit more stirring frequently.

The florets are not browned but still have a well roasted flavor and you would notice a few reddish spots here n there...

Sprinkle chopped coriander , take the pan off heat and serve immediately. A total of 10 minutes cooking time is all this stir fry needs.


I use unpeeled potatoes for it and that makes any bhuni subzi (vegetables stir fried this way) much more flavorful...

Ginger , cumin and fresh green coriander make the flavoring really interesting  i like it a bit hot . Ginger , pepper and green chillies have enough heat to make it too hot for some people , so use these ingredients according to your taste and tolerance.


This stir fry can be a nice navratri fasting one pot meal when vegetables are allowed. Adding sendha namak (rock salt) instead of regular table salt will make this stir fry suitable for fasting days too.

Otherwise it makes a nice stuffing for grilled sandwiches or just with plain chapatis as i said earlier...

Saturday, September 24, 2011

shami kabab awadhi style...


Kabab is minced meat patty spiced delicately to bring up an aromatic finesse to a melt in your mouth texture of meat. I cannot come up with any other fitting description for this simple looking food. It has transcended generations and has perfected it's form over time.

Some variations of kabab have come to the point of perfection and have stopped 'getting perfected'. Shami kababs and Galouti kababs of Lucknow come in the same category. While shami kababs have a soft bite, galouti are absolutely melt in the mouth texture. Eating kababs in any of the old Luckow eateries can give you a taste of how a centuries old recipe can take you to heaven, talk of the famous Tundey ke kabab or any other joint around the place....

We sometimes try and touch a fraction of that tradition and thank ourselves to be able to feel the heavens with eyes closed. Kababs are such food, served as starters, main course or even snacks you can't deny when a platter has a possibility of hitting your table any time of the day...

For a meal these kababs are served with ulte tawe ka paratha (a thin layered flatbread baked on an inverted round bottom pan and smeared with ghee while being baked, pressing it all the while), along with some green chutney and slices of onion. If you are eating at Tundey kabab or any other joint in old Lucknow...

At home we like it with thin chapatis, rolled with some sliced onions with a dash of lime juice...

The kababs are delicious always, you rarely make mistakes while making shami kababs, just the minced meat mixture should be perfect. Lightly spiced so the meat flavors are not overpowered by other elements and still some aromatic spicing to enhance the delicate meat. Chana daal works as a binder which is almost neutral in taste when boiled along with the minced meat ...

I normally boil the minced meat with chana daal and grind it beforehand so the making of kabab when required is convenient. The boiled mixture is ground to paste and kept inside the fridge so it gets a bit thicker in consistency, to be able to shape into patties. So if you plan to make it for dinner, do the boiling and grinding in the morning and if you like it as a weekend brunch, like we had it, do the preparation in the previous night. The ground paste can stay in the fridge for a couple of days so you can use it accordingly.

ingredients....
( makes about a dozen kababs)
minced meat (goat meat) 300gm
chana daal(split chickpeas) 2 tbsp (about 30-40 gm)
salt to taste

To be ground with boiled meat...
black cardamom 1 medium sized
green cardamom 2
cloves 4 nos
cinnamon stick 1/2 inch pc.
shahi jeera(caraway seeds) a generous pinch
black peppercorns 15 nos.

To be mixed with the paste...
finely diced onions 1/3 cup
finely dices green chillies 1 tbsp
finely chopped ginger 1 tbsp or more if you like
finely chopped green coriander leaves 2 tbsp
finely chopped mint leaves a pinch

ghee to fry the kababs (3-4 tbsp will be enough for these many kababs)

procedure....

First of all wash the chana daal and dunk it in the pressure cooker along with minced meat and salt to taste. Add 3/4 cup of water and pressure cook for 5 minutes after the whistle blows, turning to low heat after the whistle. Let the pressure release, open the lid and cook without the lid till all the water evaporates...


The ground or minced meat can be cooked in a covered pan too, it will take more time to cook in that case and you might need to check it in between and add water if required.

Now, grind the cooked mixture with the spices listed for grinding with the paste.

It's time to tell you my little secret, normally people do it the way I told but I boil all the whole spices listed here along with the minced meat and chana daal and that makes the kababs much more delicate. This way the spices are just perfectly mild and aromatic and blended well with the base...


Empty the paste into a mixing bowl and keep in the fridge so that it gets a bit thicker in consistency ... It should hold it's shape when scooped with a spoon...


You need the chopped onions, green chillies, ginger and coriander and mint leaves not at the time of shaping and frying the kababs. You can use lesser onions if you like but chopped green chillies and ginger add a lot to the final taste. As does the green coriander and a hint of mint.


Add these chopped bits to the paste, shape into small flat patties and shallow fry using ghee.

No other oil should be used for kababs as it makes a lot of difference in final taste. Commercial joints use hydrogenated oils to get the crisp texture, beware of that....at home ghee is the best bet...


Turn when the kababs get browned on one side, shallow fry both sides till they get a nice brown crust, a crisp crust and well set but softer interior makes a great kabab...you may want to turn them 2-3 times both sides for repeated slow browning....medium heat is a must...


Serve with lots of onion rings and lemon wedges...with parathas or plain chapatis...


A green chutney made with coriander leaves, mint, green chillies and some garlic is an optional dip served with kababs. We like it just with a squeeze of lime and lots of onion rings most of the times ....

Wrapped in a chapati, it makes a nice kathi roll ...... we had a nice and warm mug of thin tomato soup to go with it....


Kababs are not a privilege of non vegetarians only. You can make kababs with soy granules or with zamikand or yam (elephant yam) if you are a vegetarian, other mixed vegetable kababs do not come close to it. Only the brown pulp of zamikand makes a nice vegetarian kabab if it is not soy granules . Although that is strictly my own opinion.....many people like kababs made with cauliflowers and other vegetables also.

Hara bhara kabab or hariyali kabab is another vegetarian kabab I like which is made with boiled green peas and a generous helping of steamed spinach leaves...that reminds me it's been ages since iImade a nice hara bhara kabab. Come winters I am game for a hara bhara (all green) season :)

What kind of kababs do you like?