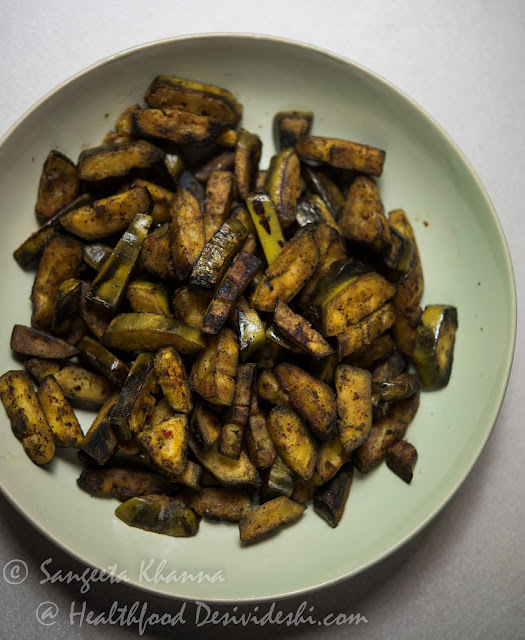
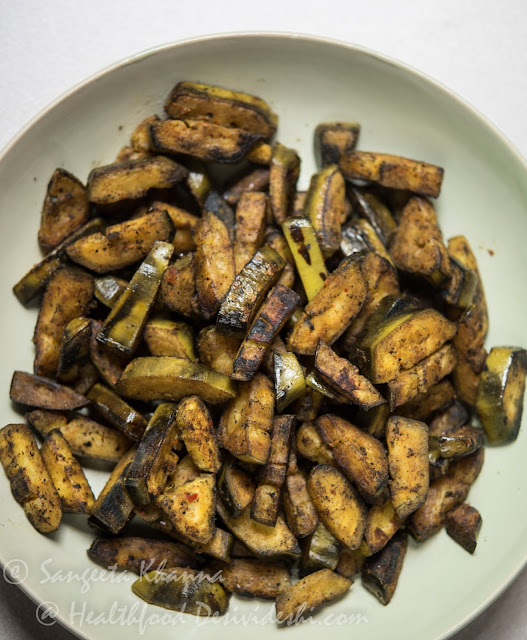
Showing posts with label everyday subzi. Show all posts

Sunday, January 7, 2018

shalgam matar ki sookhi subzi


Turnips are not the favourite vegetable of many people I know, including my husband but there are some people who wait for winters so they can eat turnips. I have got some great feedback about the turnip recipes I have posted here, especially the shalgam alu matar ki subzi and shalgam bhien matar ki subzi that many of my readers have started cooking regularly every season.

shalgam matar ki sookhi subzi

Bringing you another shalgam matar ki subzi for you today and this one is a unique shalgam subzi that was shared generously by a lady who was buying turnips along with me and I sensed she loves turnips going by the way she was choosing them. The recipe is something I could never have imagined existed, with loads of coriander leaves and a hint of sugar, this turnip subzi has become my favourite now. I have already cooked it three times in three days to get this shalgam matar ki subzi well entrenched into my memory.

I love the recipe exchange that happens in the weekly vegetable market I visit. Most of the the times it is me who ends up giving recipe suggestions to people when they see me buying unusual vegetables like these turnip leaves for shaljam patta gosht or mongre (rat tailed radish), red cabbages etc. and end up asking how do I cook them. But I have realised that it happens both ways as I always feel free to ask people about how they are planning to cook something they are buying. There are smiles exchanged instantly as a reward and then the recipes just tumble out for our pleasure.

shalgam matar ki sookhi subzi

This shalgam ki subzi is a typical everyday punjabi recipe that is made without any onion and tomatoes, the lady who shared the recipe told me specifically that she loves this recipe because it is devoid of onion and tomatoes. She just suggested to dump everything together and cook covered till done. The generous use of dhaniya patta and this quick method was enough to make me try the recipe just as I reached home that day, armed with all the fresh ingredients needed. The only change I made in the recipe is the addition of peas and use of green garlic instead of regular chopped garlic she had suggested, both types of garlic work well I realised after the three trials I did.

ingredients 

(serves 2-3)
300 gm or 2 large fresh turnips (I doubt if the recipe will work with mature or shriveled turnips)
1 cup chopped coriander leaves with the stalks
1/2 cup freshly shelled peas (optional)
2 tbsp chopped green garlic or 2 tsp chopped garlic cloves
1 tbsp grated ginger
chopped green chilies to taste
1 tsp everyday curry powder (coriander, cumin, pepper and tejpatta powdered together)
1/2 tsp turmeric powder
salt to taste
1/4 tsp sugar
1 tbsp mustard oil

procedure 

Clean and cube the turnips. Keep aside.

Heat the mustard oil in a pan and tip in the dry spice powders along with the chopped garlic, green chilies and ginger at once. Cook till everything gets aromatic, just about 30 seconds or so.

Add the cubed turnips along with peas and chopped dhaniya patta (coriander greens), mix well. The amount of dhaniya patta will feel too much at this stage but don't be alarmed as this is where the taste comes from.
shalgam matar ki sookhi subzi

Add the salt and sugar, mix well and cook covered at lowest temperature till done. It takes about 8-10 minutes to cook.

You can add some water to make a thinner curry and can add a dash of lime juice if you would like a little tartness. You won't need it if the turnips and peas are fresh because the quality of ingredients is a determining factor in this recipe.

shalgam matar ki sookhi subzi

This is one of those recipes of turnips that even the turnip haters would approve of, just as the husband did. This subzi pairs well with crisp hot parathas, khameeri rotis, kulchas and plain roti but I think we would love it with khichdi, rice and dal type of meals too.

Make this shalgam matar ki subzi now and let me know if you liked it as much as we did.


Thursday, August 17, 2017

okra and baby potatoes with butter garlic sauce


This okra (bhindi) and baby potatoes with butter garlic kept ringing in my head until I made it at home the very next day after meeting Bridget White Kumar. This Anglo Indian recipe is being served at the J W Marriot Aerocity right now where she has curated a menu around this cuisine, I loved it so much that I had to share it with you all too.

okra and baby potatoes with butter garlic

Note that this version of okra in butter garlic is my recreation after tasting it at the festival and not the authentic way Bridget makes it, there might be a minor variation in her original recipe of okra in butter garlic.

ingredients
(2 servings)

300 gm tender okra (bhindi), caps removed and cut in one inch pieces diagonally
300 gm baby potatoes, boiled, peeled and halved
100 gm or a large onion sliced
one large tomato chopped finely
50 gm butter
2 tbsp finely chopped garlic
salt and pepper to taste
1/4 cup milk (optional) 

preparation

Heat a pan and add the butter and garlic together, let them sizzle while stirring till the garlic gets aromatic.

Add the sliced onions and baby potatoes and toss well to coat evenly. Keep cooking for a couple of minutes.

Add the chopped okra, salt and pepper and toss well to coat. Keep tossing or stirring lightly for 5 minutes, add the tomatoes, mix well and cover to cook for 5-7 minutes on medium heat. The okra should be cooked by now, the onions a nice shade of pink and the tomatoes completely mushy.

Cook a few minutes more if the okra is not cooked well. Add milk, stir and cover to cook for a minute, adjust consistency by adding a little more milk if you wish. Check and adjust seasoning.

Serve hot with soft rotis or bread rolls.


Monday, July 17, 2017

kundru alu tamatar ki subzi

 
I like kundru (Ivy gourd or tendli) a lot although my mom used to cook it only like this kundru ki lehsuni bhujia. I remember my research guide Dr. Maya Goyle used to bring a really nice kundru ki subzi and as she would always pack a lunch box for me as well, I have enjoyed a lot of her cooking too. A senior in my lab also used to bring some Tamil style food and that also had some kundru sometimes, the reason was that everyone cooked whatever was in season back then. I have been blessed indeed in matters of food. 

Later when I made some other versions of kundru in my own kitchen, the flavours were the reminiscences of those lunch boxes we enjoyed together, exchanging recipe notes most of the times. 

Recently when I tried adding kundru to the potatoes my husband loves in his lunch box, I thought of adding some tomatoes to make it a saucy subzi that can be eaten on its own with boiled eggs. He has stopped taking rotis or rice in his lunch box to keep it light, he thinks a full meal makes him feel sleepy in the office. I agree to that.


The saucy kundru ki subzi turned out to be so flavourful that I have been repeating it whenever I see some fresh kundru in the market. 

Ingredients 
(2 large servings) 

250 gm kundru sliced thickly 
One large potato (100 gm or so) boiled, peeled and diced
2 large tomatoes (150 gm approx) diced 
2 tsp minced garlic 
1/2 tsp red chili powder or to taste or paprika powder
Salt to taste 
1/4 tsp turmeric powder 
Pinch of pepper powder 
1 tbsp mustard oil 
1/2 tsp seeds of fenugreek 

Procedure 

Heat the mustard oil in a deep pan and tip in the fenugreek seeds. Add the minced garlic as soon as the fenugreek turns deep brown and aromatic, tip in the sliced kundru over it and toss to mix. 

Now add the cubed potatoes, toss to mix well. Add the salt, turmeric, pepper and chili powders and mix. Keep tossing for 3-4 minutes till the vegetables look glazed. Now add the tomatoes, mix and cover to cook for 5 minutes on low flame. 

The tomatoes should get pulpy by the end of 5 minutes. Mix well and sprinkle some water if you need to make it more saucy. 

Serve as desired. It makes a nice subzi to be served with roti or dal chawal meals, we usually eat it with boiled eggs as a salad for our lunch. The instagram picture will give you an idea how we prefer eating many of subzis.

Kundru ki subzi with potatoes and tomatoes is the simplest of recipes I have made till date. Sometimes I just add everything together and cover for 8-10 minutes and give it a good stir in the last step. The subzi tastes great every time. The garlic, chili or paprika and tomatoes make a flavourful base for kundru, which is a slightly tart vegetable and has a great texture too. 


Saturday, July 15, 2017

how to make arbi ki kadhi


Arbi (Colocasia) corms are not a frequent ingredient in my kitchen though we love Arbi leaves pakodas known as rikwachh. I get some arbi whenever I see fresh and plump corms as this arbi ki sookhi subzi and ajwaini arbi helps break a routine of an overload of greens everyday.


arbi (colocasia)

Arbi (colocasia) ki kadhi can also be called as dahi wali arbi but since the consistency and taste of the final dish is similar to a regular kadhi, it is known as arbi ki kadhi. I guess this dish has a Marwari origin but I am not sure, it could be a Kayastha traditional as well. I don't know where did I pick up this recipe as I have been making it for almost two decades. It is quite possible that the recipe was different when I started cooking it and it changed with my own preference. 
 
arbi ki kadhi

I know at least one family in Banaras who makes alu ki kadhi in a similar way and we make a version of dahi wale alu too but that recipe is quite different in taste and feel.

I had stopped making this arbi ki kadhi as well for some reason. The preference is always some green seasonal vegetables so the root vegetables get ignored in my kitchen. Recently I realised the cook who works part time for me is always happy making kadhis and makes nice Sindhi kadhi, tamatar ki kadhi, punjabi kadhi and my version of Banarasi kadhi as well. 
 
I was reminded of this arbi ki kadhi because of her and then I decided to teach her this version too. I have been teaching her the simplest of recipes so she can cook my kind of food, else the cooks make some punjabi mishmash most people like and have become dependent on ready made masala and sauces. 
 
Coming back to the arbi ki kadhi, it is made without any besan (chickpea flour) in it mostly. But you can add a teaspoon of besan or wheat flour dissolved in water to prevent the yogurt from curdling if you feel so, this process was called as Aalan lagana in older times. 

Ingredients 
(2-3 servings) 
200 gm arbi (colocasia) boiled and peeled
1 cup yogurt, preferably sour 
1/2 tsp turmeric powder
1/2 tsp cumin powder 
1 tsp coriander powder 
Salt to taste 

For tempering 
1 tbsp mustard oil 
Pinch of asafoetida 
1/4 tsp fennel seeds 
1/4 tsp small mustard seeds (Rai)
10-12 seeds of fenugreek 
2 dry red chilies broken in 3 pieces each 
3 cloves 
1/2 inch piece of cinnamon 
1 lightly crushed black cardamom 
1 tbsp of crushed Kasuri or Nagori methi (optional)
slit green chilies (optional)

Procedure 

Chop the boiled and peeled arbi in thick slices and keep aside. 

Whisk the yogurt with turmeric powder, cumin and coriander powder, salt and keep aside. 

Heat the oil, add asafoetida and other tempering ingredients one by one in that order, keeping the flame low. Once the tempering is aromatic add the sliced arbi and stir to mix. 
 
Cook while stirring and mashing some of the arbi so it becomes a little pasty. Note that you want only some of the arbi to get mashed and keep most of the arbi slices intact. The mashed part of the arbi will help thicken the kadhi. 
 
Add the crushed Nagori methi and mix well.

Now add 1/2 cup of water and let it come to a soft boil. Keep the flame low and pour the yogurt mix slowly. Simmer for 10 minutes, adding some water if required. 

arbi ki kadhi

Serve hot with a little ghee on top and a few slit green chilies if you wish.. You can finish the kadhi with a final tadka or red chili powder heated with ghee. 

This arbi ki kadhi tastes great with plain roti or boiled rice and makes a great side dish for elaborate Indian thalis. 


Friday, June 23, 2017

recipe of methi papad ki subzi


What if I say methi (fenugreek) seeds make a great subzi and it is not bitter at all? Very few believe this and I know a few who make this subzi after removing the soaking water, boiling it in pressure cooker and removing even the cooking water to 'remove' the bitterness. Trust me you are not supposed to discard the soaking water at all and the methi seeds do not taste bitter in this subzi. 
 
Sharing a methi papad ki subzi today, a unique flavour that brings a just a light hint of methi bitterness and the alkaline taste of raw urad dal papad that gets balanced with yogurt. 
 

Methi papad ki subzi was not made in my parents home ever. I know my mother would have scoffed at the idea of methi seeds in a subzi though she would love papad in any form. We occasionally used to make papad ki subzi with the sour buttermilk sometimes just to finish the weekly stock of buttermilk that was leftover after the ghee making excercise back home, normally used for making kadhi or dahi wale alu. 
 
But that was the end of anything to do with papad in a curry, methi was used in the tadka though, just 1/2 tsp of it. The hint of bitterness methi seeds bring into a dish when used in the tadka is quite a subtle flavour that enlivens many a curries in the eastern part of India I must add. 

Using methi seeds in bulk to make the curry was not something my family would have taken to. One of my Marwadi friend during school used to talk about this subzi but I am sure in that age we are not too sure to serve such unusual food to guests, so I never got to taste methi ki subzi while I loved the kanji vadas and the kair sangri pickles and many types of sweets that her mom made. 

I was actually surprised to taste methi papad ki subzi in a roadside dhaba in Rajasthan couple of years ago and it was not bitter at all. I was so intrigued that I asked the dhaba owner and he shared a useful tip to make this subzi. He told me not to touch the methi once it is soaked, just tip them directly into the cooking pan when cooking the subzi. 

He mentioned if the methi seeds are punctured after soaking they turn bitter, else they remain good. I tried the subzi as soon as I was back home and this subzi has been a regular since then. Even the husband likes it, probably more because he tasted it in a roadside dhaba for the first time but that is good for me. 

Ingredients 
(for 4-6 servings)
1/4 cup methi seeds 
5 urad dal papads broken into bite size pieces
1 cup yogurt 
1 cup water 
1 tbsp coriander powder 
1 tbsp cumin powder 
1 tsp red chili powder or to taste 
Pinch of asafoetida or hing 
1/2 tsp turmeric powder 
1 tbsp mustard oil 
Salt to taste 
Generous amount of chopped coriander leaves

Procedure 

Soak the methi seeds overnight in a cup of water.  Do not disturb once soaked. Remember you are not supposed to touch the soaked methi seeds and puncture its mucilage layer.
 
Whisk the coriander and cumin powders in the yogurt, add water and whisk again to make it smooth. Keep aside.
 
Heat the oil in a deep pan, add the asafoetida and let it get aromatic. Not take the pan off the heat and add turmeric powder and chili powder, mix well and let them get aromatic. 
 
Pour the yogurt spice mix slowly into the pan and whisk, take the pan back to the stove and whisk to keep it cooking evenly. 
 
As soon as the curry starts simmering, pour the soaked methi seeds along with the soaking water and simmer for 10 minutes. 
 
Add the broken papads, simmer for a couple of minutes and take the pan off the stove.
 
Sprinkle coriander leaves and serve hot with chapatis or parathas. The best combination with methi papad ki subzi is ghee soaked bajra roti if you like, this methi papad ki subzi makes a great side dish for a big Indian spread as well. 

Make this methi papad ki subzi next time when you are entertaining guests. Add some raisins and may be some fed cashews to make the subzi a bit rich. Raisins actually give methi papad ki subzi a nice dimention. 
 
It is great for diabetics, is a very good alkalising food but most of all it tastes great. The traditional recipes that have survived the test or time are here to stay. The only grudge is that we don't know them all. It is good till I keep getting acquainted with them one after the other. A slow learning curve is better that never getting exposed to such great food. 


Wednesday, June 21, 2017

everyday subzi : raw papaya stew | kachhe papeete ka ishtoo


Raw papaya is an interesting vegetable. While it becomes a table fruit once ripe, the raw fruit makes wonderful salad, raita, paratha, chutney and even curry. The neutral taste of raw papaya makes it a perfect candidate for any flavour you want it to acquire.

raw papaya stew | kachhe papeete ka ishtoo

This kachhe papeete ka ishtoo is actually a stew that everyone loves with all types of Indian breads. I remember we used to love it with do pad ki roti, poori or crisp parathas. Kachhe papeete ka ishtoo is spicy, aromatic and yet very light so it can be a part of light meal with thin chapatis and makes a paratha meal comparatively light too.

ingredients  
(3-4 servings)

500 gm raw papaya peeled, seeds removed and chopped into big chunks
250 gm red onions sliced thinly
100-200 gm potatoes peeled and cubed (optional)
4 green cardamoms
2 black cardamoms
12 cloves
2 sticks of Indian cinnamon
1 tsp pepper corns
1/2 tsp whole cumin seeds 
3 tejpatta leaves
4-6 whole dry red chillies
12-15 cloves of garlic peeled and smashed
1 tbsp thin julienne of ginger
2 tbsp mustard oil
salt to taste 

preparation 

Heat the oil in a deep pan keeping the heat low, a handi or pressure cooker that can be used with or without the pressure lid. Add the whole spices, dry red chilies and smashed garlic at once and wait till they all become aromatic. It takes less than a minute.

Add the sliced onions and potatoes, mix well and cook till both look a little glazed. It takes just 2-3 minutes. You don't need to brown the onions but a few brownish streaks are okay.

Add the papaya chunks, toss to mix well. Add salt and mix. Cover with a well fitting lid and let it cook on dum till everything gets cooked well. The papaya chunks will start disintegrating and the onions will almost dissolve. You can add a few spoons of water in between to keep the dish moist at all times. This dum cooking can take about 30 minutes but if you pressure cook it gets faster. Take care to switch off the gas just after the first whistle blows.

raw papaya stew | kachhe papeete ka ishtoo

The onions and raw papaya has enough water in it to make this stew watery enough but you can add up to 1/4 cup water to make the cooking easier.

This kachhe papeete ka ishtoo is quite aromatic and delicious and can be made with bottle gourds too. Some people like it just with potatoes but use more onions in that case if you try.

The kathal ka dopyaza is a similar recipe with minor differences but the taste of kathal ka dopyaza is very different from this one. Some people call it kachhe papeete ka dopyaza as well.

Do try this recipe and serve with any regular chapati or roti you eat. This stew pairs well with light flat breads and not too much with millet breads but we like it with our mixed grain rotis too.

I have shared a basic recipe of this kachhe papeete ka stew with dal bhari poori here. It is actually a versatile subzi and can be served with whatever you like.


Monday, April 17, 2017

everyday subzi : alu parval ki rassedar subzi


Alu parval is a summer time subzi that is on our table at least once a week. Alu parval bhujia is a popular recipe on this blog and even the parval ki mithai gets great feedback but strangely the alu parval ki rassedar (with a thin gravy) subzi has not been shared on the blog as yet, even though I make a few versions of it.

A few people pointed out at this lapse a few months ago but it was not parval season back then, though it was available in the markets, we don't eat any vegetables out of season as a rule so this recipe also comes when parval is well in season.

parval or pointed gourd

This version is alu parval ki patle rasse wali subzi (आलू परवल की पतले रस्से वाली सब्ज़ी) is suitable for summer dinners, keeping it light and soupy, to be consumed with thin rotis.

alu parval ki rassedar subzi

Made in pressure cooker, this one is a simple recipe inspired by the subzis made by the poori subzi stalls where the vegetables are not fried before currying keeping it light yet flavourful, frying the vegetables and bhuna masala separately is a normal practice in home cooking.

ingredients 
(2-3 servings)
300 gm small sized parvals (pointed gourd), preferably heirloom variety
2 small potatoes boiled, peeled and crushed by hands (not mashed)
1 tbsp everyday curry powder 
1/2 tsp turmeric powder
2 tsp ginger paste or minced ginger
1/2 tsp chopped green chilies
1/4 tsp red chili powder (optional)
couple of tejpatta 
1 tbsp mustard oil
salt to taste
1/4 tsp amchoor powder (optional)

procedure 

Scrape the parvals using a paring knife, removing just the waxy layer, not peeling the green skin. Cut into halves length wise if the parvals are small, else crosswise.

Heat mustard oil in the pressure cooker pan, add all the spices, except amchoor, at once and stir to mix and cook. Wait till the spices get aromatic, add the parvals and toss and cook for 2 minutes.

Add the crushed potatoes and salt, toss to coat everything together. Pour 300-400 ml water, depending on how thin you want the curry, cover with lid and pressure cook till the whistle blows.

Switch off the gas and let the pressure release on its own. Open the cooker, adjust seasoning and add amchoor powder if needed.

alu parval ki rassedar subzi

Serve hot with thin rotis, some tomato chutney and some raita or plain dahi. This alu parval ki rassedar subzi is mildly spicy and very flavourful. We generally don't add coriander leaves but you can add if desired.

These subzis never need a garnish as I feel the herb garnish changes the taste. Some people like a sprinkle of bhuna jeer powder topped over this subzi over each individual serving. Try that and let me know if you like it.


Tuesday, February 21, 2017

sagga pyaz ki subzi recipe | spring onion stir fry UP style


Sagga pyaz is just another name by which spring onions or hara pyaz are know as in UP, eastern Uttar Pradesh to be precise. Sagga pyaz literally means greens of onion or pyaz ka saag and even a saag (stir fried greens) type recipe made with this is known as sagga pyaz.

Spring onions start appearing in the early winters and keep coming to the markets till spring. There are many winter recipes that use spring onions and the alu hare pyaz ki subzi is one of the favourites. Carrot and spring onion paratha is another recipe we love, it is added to our everyday omelets and scrambles by the handfuls. Spring onion and potato soup is a regular too every winter, sagga pyaz ke pakode takes the cake whenever one craves for some pakodas during winters. .

sagga pyaz ki subzi

Someone was talking about sagga pyaz on Instagram when I was reminded of this subzi known as sagga pyaz, a quick stir fry that is replete with the rustic flavour of spring onion, often quite sharp when it is the spring of red onions. But it is a much loved subzi because of this sharpness for some people, we like to tone down the sharpness by adding some new potatoes of the season to sagga pyaz.

ingredients 
(serves 2-3)

400 gm spring onions, preferably small bulbs and fresh green leaves
one small poato
chopped green chillies to taste
1/2 tsp fenugreek (methi) seeds
1/2 tsp turmeric powder (optional but recommended) 
salt to taste
1 tbsp mustard oil

procedure 

Clean and chop the spring onions in small bits, keeping the white and green parts separate.

Clean and chop the potato in small bits too. No need to peel the potato if it is clean and unblemished.

Heat mustard oil, add the fenugreek seeds, chopped chillies and let them get aromatic before proceeding. Add the chopped potatoes, salt and turmeric powder and stir to mix.

Cook for 2 minutes before adding the white parts of the spring onion and cook for a couple of minutes while stirring it all.

Now add the green parts of the spring onion, mix well and cook only till the greens get wilted. The sagga pyaz subzi is done. Serve hot or warm or even at room temperature, this subzi is a great side dish for Indian thali meals.

I remember this sagga pyaz subzi used to be our lunch box meal sometimes with parathas, during the school days. I remember eating this subzi with bajre ki roti and white butter too and sometimes just rolled up in a roti to make a quick snack.

We use our subzis in so many ways if we like them.

Sagga pyaz is one of those in my home, although I have met a few people who are intolerant to the strong aroma of the onion in the spring onions and can't eat it at all. Make some sagga pyaz ki subzi if you like it, else capitalise on other greens of the winter season.


Wednesday, February 15, 2017

alu sowa ki bhujia | a warm fragrant stri fry with potatoes and dill leaves


Sowa or Soya is Dill leaves and is also known by the name of Shepu, a fragrant winter herb that is used liberally all over UP. Sowa methi is a popular combination of flavours and works great when making a sookhi subzi with alu, even the sowa methi ka paratha is so good you never get bored of this herb. But the most popular will be this alu sowa ki bhujia and even alu sowa ki subzi with minor variations.

dill leaves or sowa bhaji

We have been enjoying a lot of sowa this season too and had alu sowa in many variations. It will not be fair if I don't share all those alu sowa recipes here.

Here is the alu sowa ki bhujia to start with. It tastes great with Indian meals in general, great with plain hot parathas, dal chawal meals but you would be surprised to see the response when you serve it like a warm or even cold salad. Potato and dill salad like this can be had on its own and can become a sandwich stiffing.

alu sowa ki bhujia

Alu sowa ki bhujia 

ingredients 
(served 2-4 depending on side dishes)
2 large boiled potatoes cooled to room temperature or refrigerated
1.5 cup chopped dill leaves (1 cup is good too)
1 tbsp mustard oil
1/4 tsp cumin seeds
1/4 tsp methi (fenugreek) seeds
chopped green chillies to taste
1/2 tsp turmeric powder
salt to taste
amchoor powder a few pinches (optional)

procedure 

Peel and cube the potatoes in bite sized pieces.

Heat oil in a pan or kadhai. Add the cumin seeds and methi seeds and wait till they turn aromatic and pinkish brown. Add in the green chillies and the cubed potatoes in quick succession. Toss and fry on low heat till the potatoes get some brown spots and get dehydrated a little.

Add salt, turmeric powder and toss and stir for a couple of minutes, add the chopped dill leaves and keep tossing and mixing till the dill leaves get wilted completely and coat the potatoes well.

Adjust seasoning.

Sprinkle amchoor powder as per taste if using.

Serve hot right away or serve it cold. It is great any which way.

The other type of alu sowa ki subzi is cooked using raw potatoes and is more of a creamy mash infused with lot of dill leaves. I use all the tender stems of dill in this version too.

Alu sowa ki subzi

ingredients 

2 medium sized potatoes peeled and cubed
1 cup chopped dill leaves
1/2 cup tender dill stems chopped roughly
chopped green chillies to taste
1 tbsp mustard oil
1/4 tsp methi (fenugreek) seeds
1/2 tsp turmeric powder
1/4 tsp pepper powder
salt to taste

procedure 

Heat the mustard oil and tip in the methi seeds. Wait till it becomes aromatic. Add the green chillies and cubed potatoes, mix salt and turmeric powder, cover with a filling lid and cook on low flame for 6-7 minutes or till the potatoes are cooked.

Now add the tender stems of dill, mix well, add pepper powder and cover again to cook for 2-3 minutes.

Add the dill leaves, toss and mix. Thrash with a wooden spatula a few times to make the potatoes mush up a little. The dill flavour will infuse beautifully in the potatoes. 

alu sowa ki subzi

Serve hot or cold, as a subzi or a salad or any which way you want.

Served with some grilled piri piri chicken wings we loved it for dinner last week. The leftover was used in alu paratha the next day and that was great too.

Make some alu sowa ki bhujia or alu sowa ki subzi while the season lasts. Dill freezes well in ziplock bags so you can save some of the season's bounty but the new winter potatoes cannot be saved.

Make some alu sowa now, bhujia or subzi you can decide according to your taste.


Thursday, August 11, 2016

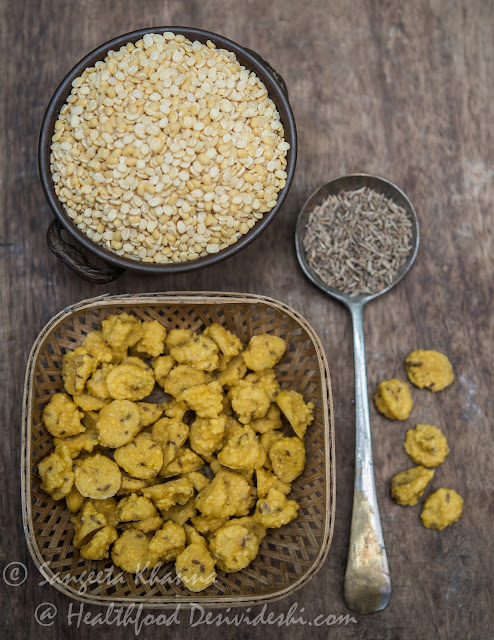
mungodi made from scratch | how to make mungodi at home and guar mungodi ki subzi


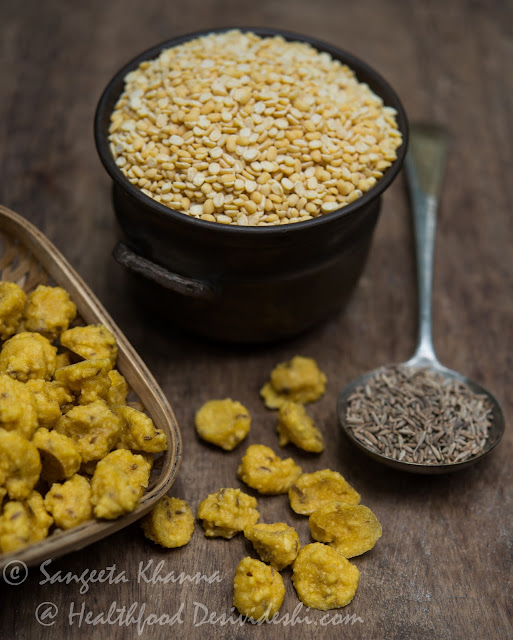
Mungodi is made of mung dal (skinned mung beans) after a paste of mung dal is dropped into small pellets and then sun dried to make little nuggets of lentil, it can be spiced or plain. Badi is the generic Indian name for these lentil nuggets and the specific name changes with the kind of lentil used. If it is made of mung, it is Mungodi.

how to make mungodi

There are several names for these Mungodis or generic badis (or wadis) all over the country but in Bihar and eastern UP it is always prefixed with the type of lentil used. So there is Mungodi made of mung, Urdouri or Adouri made of urad dal, Masurouri made of masur dal, others are called as badi simply.

The other significant variety is called Kumhrouri which is made of urad dal and white pumpkin (Ash gourd) which is also called as kumhra, so the nomenclature has a clue to the origin of the badi. I love talking about these with the older women who never tire of sharing their wisdom with anyone. Sepu badi of Himachal is a different type of badi

When I posted about alu mungodi ki subzi many of you asked for the recipe of mungodi as no one makes these at home now and these are not even available in many places. Moreover, the quality of the ready made mungodi is not always good. I have been my grandmother's apprentice for long enough to recreate thing on my own, so here is the recipe of mungodi that can be made at home without much fuss, if you make a small quantity.

Note that making mungodis at home 'used to be' a humongous task but it was so because such things were always made for friends and family too. Huge dabbas were sent to kith and kin, badi, papad and achar were always exchanged between families and friends. Social bonding was real and tangible.

The good old days.

Let me tell you there is one encouraging fact, that we can make the mungodis fairly easily at home. For mungodis it is only one ingredient mostly as these are always made without any spices. But cumin seeds are sometimes added to bring a hint of spice in them.

ingredients
1 cup of mung dal
1 tsp cumin seeds

preparation

Soak the mung dal for one hour.  

Note that soaking the mung dal for longer will result in more water content and flat mungodis that do not soak up the curry flavour when cooked.

Drain the water. Make a coarse paste with the cumin seeds, without adding any water. The paste should look like this.

how to make mungodi

Now make a cone using a plastic bag, reused or fresh. Or use a piping bag with a small hole depending on the size of mungodis you need.

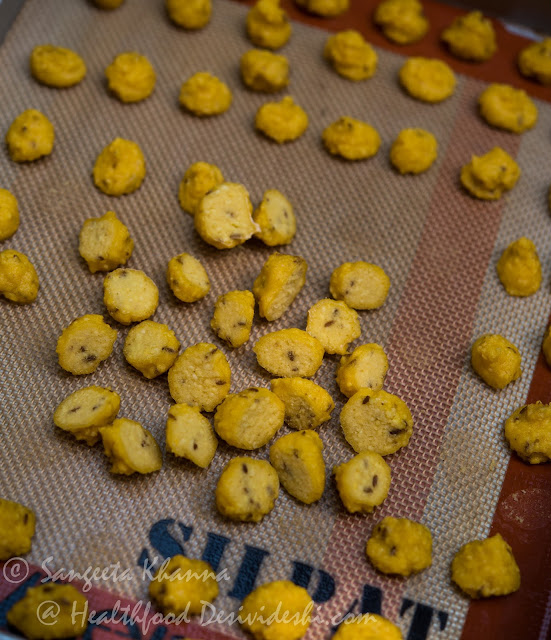
Fill the mung paste in the piping bag, secure the top and start piping mungodis on a smooth surface.

I used a silpat sheet because it is much easier to take the mungodis off the surface. They may stick on plates even if you grease them.

My piping skill needs some brushing up. I have decided on more mungodis now, no cake icing please. 

how to make mungodi

My grandmother used to make mungodis on old muslin saris so it was easier to sun dry them and once the mungodis are dry they peel off easily from the thin cloth. And she used to shape each single mungodi with her fingers, piping them perfectly, using three fingers and thumb.

Time your soaking, grinding and piping in such a way that you lay out the mungodis in good sun at the start of the day. It took me 2 minutes of grinding and 5 minutes of piping the mungodis for this quantity. 

And of course the whole day of fun watching the mungodis dry, updating a few instagram pictures in between.

Once dry enough the mungodis can be flipped. It took an hour this time. Flipping the mungodis ensures faster drying and I was concerned because it is the tail end of monsoon season here and I did not want the mungodis to stay damp.

how to make mungodi

You see I made the mungodis on a whim and the monsoon showers couldn't deter me. It took 2 days to sun dry them while keeping an eye on the sudden showers that are characteristic of this season. I had to bring the mungodis indoors a few times but thankfully there was strong sun in between the showers.

Once dry, the mungodis are lighter and make a rattling sound when tossed around. Damp mungodis wont rattle.

how to make mungodi

Make sure the mungodis are not damp, as it catches fungus really soon.

Note that the mungodis made during the rainy season wouldn't last the whole year, in all probability, it has the tendency to get damp even if dried completely.

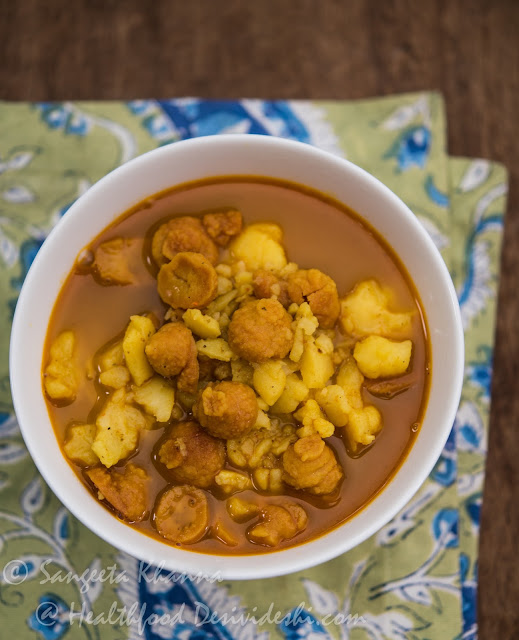
If for some reason, for example rains, your mungodis are not sun dried well, try and deep fry them to dehydrate well and keep in air tight containers. The mungodis can be used directly in that case. Else we need to fry them before currying them like in this alu mungodi ki subzi or Guwar mungodi ki subzi which has a hint of fennel.

ingredients for guar mungodi ki subzi 
(2 servings)

1/3 cup mungodis
250 gm guar cleaned, stringed and chopped in small bits
1 medium sized potato peeled and quartered 
1/4 cup whipped yogurt
1 tbsp everyday curry powder 
1/2 tsp fennel powder 
1/2 tsp turmeric powder
1/4 tsp red chilli powder
1-2 broken chopped green chillies
1 tbsp minced or grated ginger
salt o taste
1 tbsp mustard oil

guar mungodi ki subzi

procedure 

To make the guar mungodi ki subzi, heat the mustard oil in a pressure cooker, shallow fry the mungodis in the oil and once the mungodis are light pink and fragrant, remove the pan from the burner for a minute and add the everyday curry powder (or any light subzi masala of your choice), turmeric powder, red chilli powder and fennel powder in that order. Toss and mix while the spices get aromatic.

Return the pressure cooker pan to the burner, add ginger, whipped yogurt and stir to mix.

Now add the chopped guar, potatoes and green chillies, mix well an top up with 1/2 cup water.

Cover the lid and pressure cook till the whistle blows, lower down the heat an cook for a couple of minutes. Let the cooker cool down, open the lid and crush the potatoes with a ladle to make the curry a little mushed up.

Serve hot with drizzle of ghee with our Indian rice or roti meals..


Sunday, August 7, 2016

everyday curries : alu mungodi ki subzi | sattvic khana


Alu mungodi ki subzi is stuff made of nostalgia. Such simpler curries have become so rare these days thanks to the deluge of 'butter masalas' and 'navratan kormas' of the vegetarian world, and of course because no one makes Badiyan or Mungodi at home any more.

No restaurants serve it either. 

alu mungodi ki subzi

Thankfully we do get mungodi and badiyan in the markets, made by small scale industries and home based units and some of them are really good.

Badiyan making is an age old tradition all over the country. Badiyan or dried lentil cakes, if I try to translate this unique wonder, are made of lentil paste with is fermented, then mixed with some grated gourd type vegetable according to the regional choice, some spices and then the paste is shaped like small pellets to sun dry. The pellets puff up to become planoconvex shaped while they dry and then are stored for the whole year. 

Badiyan are generally made of urad dal paste and are made into several curries like this pyaz badiyon ki subzi and even a badiyon ki chutney. I have always believed the badiyan brought the umami factor in Indian curries, the process of making badiyan ensured the lentil paste gets a flavour boost when fermented and sun dried.

Apart from the Badiyan, there is a type called Mungodi which is made of plain mung dal paste and is not spiced. The mungodi has a flavour of its own, something like when mung gets a mild hint of umami and yet retains its mungness. You know what I mean. 

mungodi

Mungodi can be sun dried or even can be made fresh for some curries. This mungodi wali lauki is made with freshly made mungodis. But freshly made mungodi lacks the umami kick, please note.

The alu mungodi ki subzi is preferred by those who like eating no onion garlic curries or is made often for meals after a puja at home.

One of the kachori walas in Banaras makes such a delicious mungodi ki subzi that I often crave for it. I know I have to recreate it soon.

I shared that the hawan at Kiradu temple complex commenced with a sattvic meal and how much I loved that meal. Alu mungodi ki subzi was on the menu apart from the mirchi ka kutta and I couldn't help but make it again at home. My mother in law used to make alu mungodi and lauki mungodi a lot and I actually started loving it a lot after having tasted her version.

After having a slightly different but equally delicious version of alu mungodi by Suryagarh chefs, I decided to make my MIL's version as that is what makes it more homely for me. 


ingredients 
(2-3 servings)

2 large boiled and cooled potatoes (about 250 gm)
1/2 cup dried mungodis
1 tbsp everyday curry powder 
(or a mix of coriander, cumin, peppercorns and Indian bay leaf powder)
1/4 tsp red chilli powder
2 green chillies broken
1 tsp turmeric powder
pinch of hing (asafoetida)
1/4 tsp cumin seeds (optional, I don't use)
1 tsp crushed or minced ginger (optional, I use it always) 
1/4 tsp amchoor powder 
1.5 tbsp mustard oil
salt to taste 

preparation

Crush the boiled potatoes with fingers. It should break into uneven pieces, and some completely crushed coarse mash.

Heat the mustard oil in a deep pan and shallow fry the mungodis in it till lightly browned. Remove from the fried mungodis from oil and keep aside.

Tip in the hing and cumin seeds if using, in the remaining oil. Once the oil is well infused add the crushed ginger. Stir to cook for a couple of seconds.

Now take the pan off heat for a moment and add all the powdered spices at once, stir to mix well so the spices infuse but do not get burnt. Within seconds dump all the crushed potatoes in the pan and stir well to mix. Return to heat and stir for a couple of minutes.  

Add salt to taste, 2 cups of water and all the fried mungodis. Let the curry come to a rolling boil. Now lower the heat and let the alu mungodi subzi simmer for about 20 minutes, covered with a lid, or till the mungodis get soft and almost double up in size.

Finish with amchoor powder, adjust seasoning and consistency, serve hot with rotis, pooris or plain parathas along with other side dishes if required.

alu mungodi ki subzi

Some people add tomatoes to the alu mungodi ki subzi but I like this version with amchoor. You may want to garnish it with green coriander leaves but please refrain as it interferes with the delicately flavoured mungodis. But if you love your dhaniya patta go ahead and top it with some greens.

This kind of badi or mungodi subzis were a staple during rainy season when other green vegetables were not easily available in older times. That is the reason there is no tomato or dhaniya patta used traditionally for alu mungodi ki subzi but there are versions made in winter season when mungodi is paired with spinach and cabbage too.

One can always adjust this alu mungodi ki subzi to taste. The Suryagarh version is cooked with raw potatoes and it had a different consistency and slightly different taste too.


Friday, July 29, 2016

wild mushrooms | Katarua or Indian truffles | subzi and biryani recipes using Katarua


Last month I was lucky to get hold of some wild mushrooms brought by my brother. He was driving from Lakhimpur and I had requested him to bring some of these foraged wild foods.

I had tasted several varieties of wild mushrooms during our days in Dhanbad, my maid who belonged to Munda tribe had introduced me to many of these wild foods, and the memory of those freshly foraged wild mushrooms sometimes makes me crave for them. Especially during the rainy season as I am reminded of how the local haats (vegetable markets) will have at least 3-4 mushroom sellers during this season.

Sometimes my maid would bring a fistful of Termite mushrooms that she had found on her way to my home in the morning, the fresh aroma of those mushrooms is unforgettable. She would always tell me these can be eaten raw as well but I never tried that, blame it to my urban sense of hygiene.

So when two bundles of wild mushrooms arrived one day wrapped in newspaper, the way the foragers sell these, I opened the bundles instantly to see what were those. One of them was this wild mushroom called as 'Dharti ka phool' and had a pleasant smell to it.

The other one was so stinky I felt a bit hesitant to cook with it. A similar looking wild mushroom called Rugda from Jharkhand was not smelly at all as much as I remember. Or was it my help who used to clean it? But the big question was I had to clean it all by myself this time.

wild mushrooms Katarua

This pebble like wild mushroom is known as Katarua in Lakhimpur and as Phutphut in Dehradun I got to know. Covered in layers of black mud these had to be rinsed repeatedly to clean.


Katarua or Phutphut is identified as Astraeus hygrometricus (source) which grows mostly around Sal trees  and erupts in rainy season every year.

After a good wash the Katarua looks like this. These are Indian truffles, closely related to other truffles of the world and very flavourful.

wild mushrooms Katarua

These have a cartilaginous cover and a pulpy center and need to be halved for cooking into curries. I decided to pressure cook first because the stinky mud had made me sick. Some great foods test your patience truly.

After pressure cooking for about 10 minutes (after one whistle) the Kataura mushrooms were cooled down, chopped into halves and curried. The taste was so good it makes me crave for it now. Very meaty taste, cartilaginous capsule and soft egg yolk like center.

I cooked it with potatoes once as it flavours anything that is cooked with it.

wild mushrooms Katarua ki subzi

The recipe is not much different for this spicy curry as I followed the bhuna masala method, where the masala is prepared first and then the mushrooms are simmered with the bhuna masala and some water for about 10 minutes. Note that the Katarua has already been pressure cooked. It takes well to prolonged cooking as the cartilage like outer cover is quite hard.

Next time I kept the gravy a little thin as I love the way the soupy curry carries the flavours.This one we polished off with sourdough kulchas.


And then I made biryani with the Katarua wild mushrooms because I thought the rice grains will take to it's flavour really well. The biryani really proved to be worthy of all the effort. Unfortunately I was trying out an organic rice that was sent to me by a farmer and it turned out to be too mushy for biryani but the taste was great. 


wild mushrooms Katarua ki biryani

To make the Katarua biryani, follow the steps as suggested below.

It is not a true biryani but something that will make you think positively about vegetarian biryanis trust me.

1. Make the curry with bhuna masala like above.
2. Boil basmati rice with plenty of water, few tejpatta leaves and few peppercorns. Cook the rice only till the rice is half done. Drain the water and reserve rice, rinse with chilled water briefly.
3. Now layer the Katarua subzi and half cooked rice in a thick bottomed handi. Pour the gravy over it and some additional water, some mint leaves (optional) and a tbsp of ghee. The water used at this step has to be enough to cook the rice while on 'dum'.
4. Cover the handi and cook on 'dum'. Keep a tick griddle below the handi and let it cook slowly on low heat for 25 minutes. This is how 'dum' cooking results into aromatic biryani.
5. Serve the biryani as soon as the dum cooking is over.

We normally serve raita and salad with biryanis but since it was the rare flavour of Katarua we decided to make a plain kachumber of tomatoes and onions. It was such a delectable meal to remember.

Next time I get hold of these wild mushrooms called as Katarua, I am going to experiment some more and see if it pairs well with the western recipes.


Saturday, June 18, 2016

kachhe kele ki bhujia | green plaintain stir fry with chilli garlic


kachhe kele or raw plantains

I cannot resist when I see a fresh looking bunch of kachha kela in the vegetable market and end up buying the whole bunch. The kachhe kele ki bhujia being the most frequent subzi that I make, it is shocking that the recipe has not come on the blog yet. I dug out a picture this time and here it is for you.

This kachhe kele ki bhujia is a dry stir fry that tastes great with plain dal chawal or mung ki khichdi but it becomes a great tea time snack too if you make it with lesser chilli heat. I have even served this bhujia as an appetizer too but I like to chop the raw plantain in wedges in that case. You know it makes a great substitute to potato wedges.

Another plantain stir fry with curry patta is a nice fasting recipe we love as a snack too.

I must add that I prefer cooking the kachha kela or raw plantain along with the skin. Choosing the plantains with spotless skin is better when buying, but one can always scrape off the blackened portions and save the peel that is undamaged. The skin of the plantain (and even bananas) is more nourishing than the flesh inside.

If you don't like the peel in the subzi you can make a delicious plantain peel chutney too. 

Imagine how convenient it becomes to cook it along with the peel. Just chop off the two ends and slice before cooking. Peeling vegetables is not the best thing most cooks like doing. 

kachhe kele ki bhujia

The skin on kachhe kele ki bhujia is so good that it flies off the platter when served in a gathering. I make a few variations of this bhujia and kachhe kele methi ki subzi and kachhe kele sem ki subzi are a few of those variations.  You can always make more variations according to taste.

ingredients 
(2-3 servings with dal chawal or khichdi)

4-5 raw plantains (about 400 gm)
4-5 cloves of garlic
2-3 green or dry red chilies 
salt to taste
1/2 tsp turmeric powder
2 tbsp mustard oil
1/4 tsp methi (fenugreek seeds)

procedure

Remove the stalk and the tip of the raw plantain, make a cut lengthwise and then slice. The thickness can vary according to preference. Thinner slices get crisp when cooked on low heat but turn chewy when cold. Keep the slices meaty.

Make a paste of chilies, garlic and turmeric powder and keep aside.

Heat the mustard oil and tip in the methi seeds and wait till they brown a little bit. 

Add the plantain slices, salt and stir fry on low flame. Let it cooked, stirring or tossing every couple of minutes to ensure even browning all around.

It takes about 15 minutes to get cooked this way. Add the chili garlic paste after about 7-8 minutes and keep cooking till the flavours get absorbed and the plantain slices are cooked through.

kachhe kele ki bhujia

Serve hot with dal chawal meals or khichdi as I mentioned. Some bharta, chokha or raita pairs very well wit such meals. Kachhe kele ki bhujia actually makes a nice roti wrap too along with some raw onion slices.

This recipe of kachhe kele ki bhujia has a pronounced garlicky flavour and the texture is meaty. It actually tastes really good when hot or warm but starts getting a little dry when cold. Having said that, we don't mind it even cold and sometimes Arvind takes this bhujia to his lunch box too.

The bhujia doesn't refrigerate well as it gets drier but once reheated it gets better, though not quite like the freshly made bhujia. To use up the leftover kachhe kele ki bhujia I recommend making kachhe kele ke kabab by mashing up the leftovers along with some chopped onions and may be a mashed potato and some chopped nuts or seeds.

Raw plantain is an easy and versatile vegetable to cook with. Tell me what all you cook with these.

You might want to try this quick scramble of raw plantains for a breakfast some day. If you love kachhe kele ke kofte then you might have bumped into this recipe sometime.


Tuesday, June 7, 2016

sookhe alu | a slow cooked potato stir fry with everyday curry powder


recipe of sookhe alu

Potato is the most underused vegetable in my kitchen even though the husband is very fond of potatoes. In winters the new potatoes make great alu paratha but we don't eat potatoes in summer at all. Some alu parval ki bhujia is made sometimes but apart from that there is no potato on our summer menu.

This recipe of sookhe alu becomes an exception sometimes and we both enjoy having it with a relaxed weekend brunch. Our weekend brunches are invariably relaxed and simple meals, something  weboth like.

This sookhe alu was made a few weeks ago when I noticed I had not used the potatoes that I had grown in my garden. This recipe became the excuse to eat the home grown potatoes. I remembered my research guide Dr. Maya Goyle a lot when I was cooking it. Her step daughters in Denmark used to love this and call this as brown potatoes because of the brown masala used. The brown masala is nothing else but the everyday curry powder that has prominent notes of coriander, tejpatta and cumin with mild heat of black pepper. With a tart hint of amchoor and aromatic kasoori methi this sookhe alu becomes a treat for the senses. 

Incidentally, I always end up making this sookhe alu whenever I grind thee masala mix of my everyday curry powder. The aroma of this freshly milled spice blend always reminds me of this dry stir fry and I give in to the indomitable pleasure of potatoes.

I think sooke alu made with boiled and cooled potatoes is a genius recipe and I can't take credit at all. It is the recipe I learnt from Dr. Maya Goyle and its taste still connects me with her, now that she is no more in this world.

recipe of sookhe alu

ingredients 
(2 large servings or 4 regular servings)

400 gm potatoes (boiled with skin and cooled, preferably refrigerated for a day)
handful of kasoori methi
(the best you can find, else skip this. Do not substitute with fresh methi leaves)
2 tbsp everyday curry powder 
1/2 tsp amchoor powder 
1/2 tsp red chilli powder (or to taste)
1/2 tsp turmeric powder
1 tbsp mustard oil
1/2 tsp whole cumin seeds 
salt to taste

procedure

Peel and cube the potatoes.

Heat oil in a pan and throw in the cumin seeds, let them splutter and get aromatic.

Tip the cubed potatoes with salt and turmeric powder and stir fry on medium heat till they turn golden brown. The slower this step is the better the potatoes taste. So take your time, make this sookhe alu when you are doing something else too in the kitchen.

Add the curry powder and red chilli powder once the potatoes looks adequately browned and fry some more till the masala becomes aromatic, sprinkle amchoor powder, mix well and it's ready.

Serve with paratha and pickle or eat as a snack. Trust me this sookhe alu mostly becomes the appetizer in my household.

Here you see the sookhe alu with pyaz ka paratha and a Gujrati pickle called Methiya athanu. I will post the recipe of Methiya athanu soon.

sookhe alu

The slow cooked potatoes with this spice blend becomes magical if you trust me. There is no onion garlic in this recipe and the flavour is absolutely rustic and robust, kasoori methi giving it a slight bitter whiff. This is far better than any French fry of the world, and you don't even need any tomato ketchup with it.

This sookhe alu tastes great even if stuffed in a grilled sandwich. Actually this was the most common grilled sandwich we used to make with evening tea back home.


Saturday, November 7, 2015

everyday subzi: palak paneer recipe | 3 ways to make palak paneer


I never thought I should be sharing a palak paneer recipe on my blogs. It was too ordinary everyday recipe that I thought everyone would know. After all you don't need any special skill to make palak paneer, that is what I thought. And then someone asked me whether I have palak paneer recipe on the blog when I suggested it in her meal plan.

palak paneer recipes

I realised such regional recipes have become popular because of their popularity in restaurants and people relate these recipes with heavy and rich curries they eat at those restaurants. The simpler homely deliciousness of palak paneer and such recipes stays limited only in their respective regions. That was enough reason for me to think about posting some of the very ordinary but popular recipes so whoever wants to try the homely version of palak paneer gets a chance to taste the original flavour. Although the original or authentic taste may be an illusion as every family has it's own recipe, my intention is to get the unspoiled taste of spinach and paneer in the curry.

Also, as I learn more about the complex recipes I realise we need to have exact and accurate recipes of the simpler food too as a simpler recipe is more likely to get lost for the lack of seriousness attached to it. If we know the simpler version we can always add on our own twist to it according to seasons and taste. Like I make a palak paneer tahiri sometimes with leftover palak paneer or add some sweet corn kernels to the plain palak paneer to make it more interesting.

Note that palak paneer can be made in a jiffy if the palak (spinach) has been cleaned, rinsed, chopped and steamed already. This is the way I store my spinach mostly. Once the greens are chopped and lightly steamed, it refrigerates well for 3-4 days and freezes well for months. I keep it in a container for 3-4 days.


Alternately, cleaned unwashed spinach also keeps well for a week, if wrapped in brown paper or cloth napkin. Just rinse, chop and use as required.

My simplest palak paneer recipe has been the most popular with any guests and even kids. Even my daughter used to love the simpler version of palak paneer. So the first recipe is the plain palak paneer that gets ready in just about 10 minutes if you have the steamed spinach ready in the fridge.

Note that you can use the stems of spinach too for palak paneer if the leaves are tender, but if the spinach leaves are mature and the stems are hard, it is better to remove the stems as it may make the curry slightly bitter.

Plain palak paneer recipe (no onion garlic)...

ingredients
(2-3 servings)

2 cups steamed spinach
100-150 gm paneer cubed
2 tbsp ghee
1/2 tsp cumin powder
salt 1/3 tsp or to taste
1 tsp pepper
1/4 cup whisked fresh yogurt

procedure

Puree the spinach and keep ready.

Heat the ghee lightly and tip in the cumin powder. Pour the spinach puree as soon as the cumin powder starts sizzling. Take care not to burn the cumin powder.

Stir and cook till spinach puree starts bubbling.

Add the other ingredients and simmer for 2-3 minutes. Serve right away.

This recipe is a fasting recipe that we used to eat during navratri a lot. You can have it with plain boiled buckwheat groats or sama ke chawal too.

spicy palak paneer recipe 


This recipe takes about 15 minutes if you have the chopped and steamed spinach ready. This is more close to the restaurant style palak paneer but way more healthier homely version of it.

ingredients (2-3 servings)

2 cups steamed spinach
150 gm or more paneer cubed
2 tbsp finely chopped onion
1 tbsp ginger garlic paste (or minced)
1/2 cup fresh raw tomato paste (freshly chopped tomatoes liquidised in mixie)
1 tbsp everyday curry powder (or curry powder of your choice)
1/2 tsp turmeric powder
1/4 tsp chilli powder or to taste
dash of garam masala powder (optional, depends on what curry powder you are using)
2-3 tejpatta
1.5 tbsp mustard oil
salt to taste

procedure 

Grease a griddle ( I use my cast iron dosa tawa mostly) with ghee or oil and grill the paneer cubes both sides till lightly browned. This step is optional but enhances the flavour, you can deep fry the paneer if you are making large quantity. Dip all the fried paneer cubes in a cup of hot water, cover and let it rest till required.

Puree the spinach and keep aside.

Heat mustard oil and tip in the finely chopped onion and fry till golden brown. Add the ginger garlic paste and salt, fry till oil releases.

Add the powder spices with a tbsp of water and bhuno on medium flame till it looks glazed.

Add the tomato paste and bhuno again till it dries up. Add the spinach puree and let it bubble once.

Add the fried paneer cubes along with the soaking water, simmer for a couple of minutes. Serve hot.

This version of palak paneer lends well to palak paneer wali tahiri. I usually make some extra rice and refrigerate the leftover. This way we can make a quick meal with leftover things. For a cup of cooked rice you can use up 1.5-2 cups of leftover palak paneer, just mix both the rice and palak paneer well and let it cook covered on very low flame for 10 minutes or so. In our case it is usually half the quantity and I cook it till it start looking like this.


I usually make a quick stir fry with this kind of meal too. Here it is a radish stir fry we love a lot. Will share the radish stir fry recipe soon.

Another palak paneer version is my way of making creamed spinach mostly. It is a practical way to eat greens and make it workable for a roti subzi kind of Indian meal too.

Creamed spinach with paneer recipe (creamed palak paneer) ...


ingredients
(2-3 servings)

2 cups of chopped steamed spinach (or raw chopped)
1/4 cup cream (heavy or light as you wish, I use whatever I have or add 2 tbsp of malai)
100-120 gm paneer cubed in small pieces
salt to taste
black pepper powder to taste
pinch of nutmeg powder (optional)
pinch of garlic powder

procedure 

Basically everything can be put in a pan and cooked till the spinach wilts and the cream get a greenish hue if you go by what I do. But wilting the spinach forst with added salt and then adding everything else and cooking it all covered for a few minutes does the trick. That's all.

The 'curry' style creamed spinach and paneer is so convenient for me sometimes it saves me on hectic mornings. We have had it with plain boiled rice, roti, paratha and even with plain boiled pasta. Try it once and you would know what I am talking about.

Hoping that making palak paneer will not be difficult any more,e if you have palak paneer in restaurants all your life. Try making these versions and tell me which one you liked more. Each one has a different flavour and you would plan these with different kind of meals once you start making them in your own kitchen.

The home made paneer could be of great help if you wish to keep the fat content of paneer in check.