Monday, January 30, 2012

Til gud, Tilgul, Til ka laddoo or Til ki chikki | the desi Sesame brittle with loads of ginger


Til ki chikki is one winter treat I always look forward to. And I amke it minimally sweet just as my dadi used to make them. Yes, this is one sweet treat where you don't have to worry about the portion size at all. The sweetening is so minimal and that too with natural brown sugar or jaggery, that it's just a hint of sweet and you get a rich nutty taste of sesame all the way. A rich taste that satiates big time.

Til ki chikki (sesame brittle)

This recipe always brings back memories of my grandmother. She used to make huge quantities of this Til ke laddoo and it used to be the happiest of the times. My mother never made these but I used to watch my grandmother make them perfectly year after years, roasting the sesame, bubbling the jaggery and then mixing them together before binding them into laddoos (balls) which was the toughest task as the hot mixture would hurt the palms and the sticky nature of hot jaggery would make it really difficult to roll the balls. She would wet her hands in cold water n make small balls tirelessly. She was the most happy when she made such treats for us. Worth mentioning that she lived a hundred and six years all because of healthy food, active life and a very positive attitude towards life that she had. Fond memories.

til ka laddu

I started making these laddoos as soon as a started missing them in winters. That was just after we got married 13 years ago. The husband loves all types of sesame and jaggery preparations going by the names like Gajak from western UP, Til ki patti from eastern UP, Tilkut from Bihar and Tilgul from Maharshtra and Til-mungfali ki patti found all over the country I guess. He used to bring home all such sesame brittle in large quantities and I would always tell him they were not good as I had tasted better things at home.

Til ki chikki (sesame brittle)

As a new homemaker I was a bit apprehensive to try such a difficult looking recipe but my craving for that nostalgic taste and the husband's love for everything Til and Gud made me try this in my own little kitchen. The first attempt was not that great as I could not bind the balls perfectly and almost half of the mixture got cold and had to be eaten like a crumble. The taste was perfect as I have an innate sense of bringing the  flavors right. After a little practice I learnt how to bind the balls well and what else to do when  want to save time. I started making bars with the mixture.

ingredients...

500 gm white sesame
200-250 gm jaggery (I use 200 gm or even less)
2-3 tbsp finely grated fresh ginger root
1 tbsp of plain water (sometimes I even use about 100 ml water and cook the syrup longer*)
ghee to grease the baking tray or plate

procedure...

Dry roast the sesame in a pan on low to medium flame, stirring it all the while. It will be ready in about 10 minutes or as soon as a nutty aroma starts emanating and the color of the white sesame turns a nice golden brown.

Now mix the grated or curled (using a paring knife) jaggery and grated ginger in a heavy pan or kadhai. I use a trusted iron kadhai or a thick base aluminium one for this.
If the jaggery is in small pieces it can be used directly.

Til ki chikki (sesame brittle)

Heat these ingredients on high flame with just a tbsp of water and watch the melting of jaggery. The jaggery and ginger mix would cook together, first melting to make a syrup and then bubbling to become a frothy mass.See the picture to get an idea. the mixture gets frothy and smells of caramel and ginger. Looks glossy and makes a string when you drop it through the spatula.


This is the time when you have to tip in all the roasted sesame to it and mix quickly so every grain of sesame is coated with the sticky syrup of jaggery. It is quite an easy thing to do as the minute seeds of sesame get mixed really well. This has to be done quickly and then is the time to either wet your hands with chilled water and shape small balls with the medium hot mixture or to make bars with it.

If you find it difficult to shape balls you can always grease a baking tray or plate with ghee and spread this mixture over it evenly. Press the mixture firmly and smoothen it using a cold and greased knife so it becomes smooth. Here I used a silpat lined baking tray and pressed it using a wooden block. Use butter paper for lining the tray or plate for convenience.

Let the brittle cool down completely, invert on a wooden work surface, peel of the silpat (or butter paper) and cut in desired shapes, using a sturdy knife.


Til ki chikki (sesame brittle)

 It makes a really tasty and healthy sweet treat even if it doesn't bind well into bars or balls. You can enjoy it like a loose crumble. As it is or sprinkled over your oatmeal or any other porridge breakfast.

It is a typical winter delicacy. Made mostly during Makar Sankranti...but can be enjoyed all through winters.

Binding the sesame seeds with minimal quantity if jaggery needs a lot of practice but it's worth practicing this. It is not a very time consuming process if you make a small quantity like this. Took me half an hour to make a dozen balls and nine huge bars this time.

A new learner might need some more time and may be some more jaggery to start with. You can use as much jaggery as you want. Going up to equal to sesame.


Til ki chikki (sesame brittle)


I wrap these bars or squares in butter paper if we are traveling during winters as it makes a nice snack while walking and shopping.... peeling off the butter paper and smelling these bars makes one hungry at once. 

Posting this recipe while we are still enjoying our winters so you can try if still wanting to get a healthy Calcium and iron boost. This is essentially winter food , rich and nutritious.

Sesame is nourishing food. Include it in curries if you don't do it already. Or make chutneys with it.

Tuesday, January 24, 2012

baking pans and other baking utensils in Delhi ..


It's a difficult task for some to attempt baking. Especially in our country. But it becomes all the more difficult if you do not get baking utensils easily in the market. This section of utensils, that is Bakeware, is still an unorganised market even in bigger cities like Delhi. We get a few odd things here and there but finding a one stop shop is still difficult.

Many of us home bakers find it really hard to get something when required . I have myself never found when I search for something. There are very few shops in Delhi where you go and find all types and all sizes of pans, aluminium ones as well as the silicon or the non stick variety.

I have collected my own bake ware by random shopping through the years. Whenever I see a kitchenware shop I can't stop myself from checking it out. Just pick up something or the other and one by one I have collected some functional wares. The silicon pans and muffin pans have still not entered my kitchen as I am quite wary of how safe they are at such high temperature in contact with my food. They definitely look cute in bright colors.

I have seen some unnamed shops in Old Delhi selling good quality bake ware, mostly of he industrial kind but it is a lot of work to go find them again if you need something. Some more shops are there in karol Bagh area, one is Dev Crockery just a few meters from the metro station on the left side if you go to Ajmal khan road. This shop keeps many interesting crockery and bake ware but still lacks the whole spectrum.

Another shop in Karol Bagh area is a cluster of shops named Virmani brothers, passing through the Ajmal Khan road when you reach the Gaffar market area, this cluster of shops will be on your right hand side. The second and the third shop have a good variety of baking wares and other utensils and crockery.

I found this new place in INA market which I had seen once in a disinterested manner, this time I went ahead and inquired about everything and found that they stock quite an impressive collection of things. The place is so convenient as it is just opposite the metro station exit. I can hop on to the metro and go there whenever I wish and wouldn't be disappointed when I need something specific.

The name of he shop is Bharat Crockery Corner and the address is ,
197, Mohan Singh Market, I.N.A. Colony, New Delhi-110 023

Their phone numbers are 011 24617656 and 011 24633108

Have a look on what all they have...

Small tart pans, mini bundt pans and different shapes of mini cake pans too...

bakeware in Delhi

And here is a pack of scalloped edge cutters of different sizes for crackers, cookies or pasta etc.

baking utensils in Delhi

The bigger rectangular and square pans , round and hexagons , pie plates, bread pans and all...

baking utensils in Delhi

Some more bundt pans, jelly molds and cake pans and jumbo muffin pans...

baking utensils in Delhi

The brightly colored silicon baking trays and muffin pans...

baking utensils in Delhi

Many shapes and many colors...

baking utensils in Delhi

They have synthetic chopping boards in all sizes, even industrial sizes ...

baking utensils in Delhi

Non stick bread pans in different sizes...you can see a steel steamer in the top left ...

baking utensils in Delhi

And huge industrial size Teflon baking pans ... good for a large family too..

baking utensils in Delhi

Details of the size and price...

baking utensils in Delhi

See some kitchen tools and those colored silicon muffin cups...

kitchen tools in delhi

Some more tools...

kitchen tools in delhi

Shaslik sticks and chopsticks...

kitchen tools in delhi

All types of wooden ladles and spatulas. Balloon whisks of all sizes, very sturdy and even the industrial sizes available...

kitchen tools in delhi

Some more ladles, all sizes , shapes and wooden handles too. These wooden handle ladles are all industrial sizes...A meat hammer is in the frame too...

kitchen tools in delhi

It seems like a one stop shop till now. Let's see if I need something specific and do not return empty handed sometime. That is my test for a well stocked store, this one seems to fulfill my criteria. I haven't needed anything that was not there in this store...it would definitely be my shop from now on.

Edited to add : This is not a sponsored post. I keep doing my own surveys and this was one such experience. The address and phone numbers of the shop comes from their business card.

Wednesday, January 11, 2012

Two recipes with okra... a dahi wali bhindi (okra in a curds tomato gravy) and a ginger okra stir fried ....

Some of my favorite recipes never see the light of the day on this blog unfortunately. My being lazy and sometimes the pictures being unsatisfactory are few of the reasons. But my long time readers and friends would know that I never bother much about the pictures as long as the recipe is represented well and it tastes good. So when Shail Mohan asked for a few okra recipes on facebook I just checked and saw two terrific recipes with okra in my drafts folder , this dahi wali bhindi was written completely and the adraki bhindi or ginger okra stir fried had just a dark picture and the ingredient list.

I have also posted a Kashmiri masale ki sookhi bhindi (okra stir fried with a Kashmir style fennel spice mix)
and a Ghee fried peppery okra on my other blog.

Many times I make some recipe for dinner and take pictures anyways hoping they will turn up good or mediocre or I will brighten them up on picasa. I never bothered about even cropping and brightening my pictures back then, so these pictures come to you straight out of the camera, the recipes are both terrific and all okra lovers will be glad to try these.


The dahi wali bhindi is richer and can be served as a standalone subzi for your dinner chapati , I never tried it with rice but many of you might find it good with rice too. I can eat this subzi on it's own too ...I do that with many vegetables anyways :-)


ingredients...

Bhindi / okra 250 gm (tipped and cut into inch long pieces)
fresh curds 1 cup
fennel powder 2 tsp
black pepper powder 1 tsp
finely chopped ginger 1 tbsp
tomatoes chopped lengthwise 1 cup
green chillies slit lengthwise 2-3 nos.
2 cloves
2-3 petals of star anise
1 small black cardamom or half a fat one
salt to taste
mustard oil 1 tbsp

procedure..

Heat the oil in a kadai or pan and tip in the whole spices , wait till they crackle and then tip in the chopped ginger and green chillies .

Wait for a few seconds till the chillies change color and the ginger is fried , throw in the cut bhindi ( okra ) and fry till the bhindi pieces are slightly browned in the corners..

Add the tomatoes and salt to taste and fry till the tomatoes wilt ..

Whip the curds ( at room temperature ) with powdered spices ( fennel and pepper powders ) and some red chilly powder if you like it hot . Pour this mixture over the cooking bhindi , mix well and allow a gentle boil .

Take off heat and keep covered for a couple of minutes for the flavors to blend.

Serve hot with chapatis or as a side dish ...


The spice level can be adjusted if you like it mild or hot , it is a great blend of sour hot and spicy with dominant aromas of black cardamom , star anise and fennel .... curds and tomatoes as a base are great together .

The okra doesn't get slimy if you fry it well till the surface is almost dry ( so that the juices are sealed in ). There is no turmeric powder used in this curry so the color remains a nice creamy red , although the pictures look yellowish because it was cooked for dinner and clicked in artificial light...

adraki bhindi or ginger okra stir fried...


ingredients...
okra cut in two pieces and slit lengthwise taking care not to slit all the way 400 gm
ginger julienne 2-3 tbsp or more if you like ginger the way I do
5-6 garlic cloves peeled and slit into two halves
turmeric powder 1 tsp (optional)
black pepper powder 2 tsp or more if you like
amchoor powder 1/2 tsp or to taste
salt to taste
mustard oil or any other oil of your choice 2 tbsp

There are no chillies in the recipe as the heat from ginger and black pepper is quite high, you can throw in a few slit green chillies if you like. Sometimes I use the less hot varieties of green chillies for this stir fry as the flavor of the green chillies enhances the overall taste.


procedure...


Heat oil in  a kadai and tip in the ginger and garlic first. Let the ginger get a little cooked and almost caremalised , the garlic is cut in bigger chunks so it doesn't get browned before the ginger cooks. The ginger just needs to release some flavor in the oil and get fried.

Add the cut okra and toss to fry . Cooking is done on high heat in this case and you have to keep tossing or stirring with a spatula. Do not brown the okra, just a few brownish specks here and there and about 3/4th done okra is what we are aiming for.

Sprinkle the salt and turmeric powder if using, mix in to cook then sprinkle the black pepper powder and toss well to mix. In these 2 minutes the okra cooks some more. Take off heat.

Sprinkle the amchoor powder , mix well and serve hot. You can choose to sprinkle some chaat masala over it  if you like. Its a hot tangy dish and makes a nice side dish for traditional Indian lunch or dinner.

For me it can be a salad too ...Yes, I told you I do that :-)


cheers...

Friday, January 6, 2012

mungodi waala matar ka nimona | green peas nimona recipe with mung dumplings


A soup like thin gravy made with a paste of fresh green peas, spiced delicately with a few mung dumplings to bite into. It is basically a curried soup made using a coarse paste of green peas. The mung dumplings are made freshly for the nimona but the recipes is not as complicated as it sounds. Just to make 2 different pastes in the grinder and it takes about 30 minutes to cook. Some rice or chapati cooked on the side and a salad or a stir fry can make the meal really special. I made a quick begun bhaja with it, fried slices of brinjal with a melt in the mouth texture. The roti for me was a hearty jowar roti while the husband enjoyed it with plain boiled rice.

I have posted details about Matar ka nimona here and here and this nimona with mung dumplings is another version. A tasty curry with tastier dumplings, soaked with the spiciness from the gravy.

The mung dumplings can be fried in a batch and can be frozen for later use. I make them more easy by frying large sized mungodis (fried mung dumplings), and cutting them in to 3-4 pieces when cooking them in the nimona. This way they are bite sized and soak the juices well.

ingredients and procedure for the mung dumplings....

split mung beans 1 cup soaked for 2 hours
cumin seeds 2 tsp
green chillies 2 or to taste
salt to taste
mustard oil or ghee to deep fry

 Drain the soaked mung and make a paste of all the ingredients together without using any water. A coarse paste with specks of green chillies and cumin seeds is expected, so do not make a smooth buttery paste.


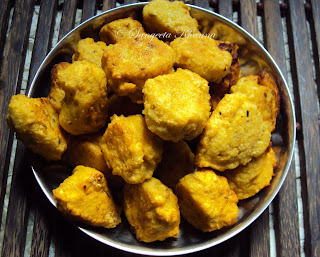
Traditionally , this paste is scooped between the fingers and small amounts are dropped in hot oil to make small fried dumplings of a size exactly similar to soaked garbanzo beans. But that is a time consuming process to make that tiny dumplings . I just scoop out spoonfuls and drop them gently into hot oil , these make irregular shaped dumplings but can be chopped to size when being cooked in the curry. My ways to cut short the cooking time so I can enjoy all these traditional fare more frequently. The fried dumplings look like this.


I used only 5-6 of these dumplings and the rest of them were frozen for later use. Makes a lot of sense for me...

ingredients and procedure for the green peas gravy...
green peas 1.5 cups
chopped ginger 1 tbsp
green chillies 1-2
every day curry powder 1 tbsp
garam masala 1/4 tsp Or to taste
whole cumin seeds 1 tsp
asafoetida a pinch
ghee 2 tbsp
1/2 cup of chopped coriander leaves to finish


Make a paste with the first three ingredients , the paste should be coarse and not very smooth and no water should be added while pulsing it.


Heat the ghee in a pan and tip in the cumin seeds and the asafoetida powder. Wait till the cumin crackles and then add the every day curry powder with a sprinkling of water along with it. Pour in the paste immediately and stir fry, the paste becomes lumpy first and then starts getting crumbly and sticks to the base. Cook on low flame till now.


Add the garam masala powder and mix well, stir and cook for a minute before adding about 4 cups of water. Mix well and let it come to boil.


Tip in the cut pieces of the fried mung dumplings, add salt to taste and simmer for about half an hour on very low heat. Add chopped coriander leaves to finish in the last few minutes of cooking and serve hot when the dumplings turn spongy and curry thickens to your desired level. You might like to add some water if you want it thinner. The mungodis absorb a a lot of water making the curry thicker.


Serve with chapatis or rice as I said. Hot curry like this can be nice warming winter meal any time of the day...I served it with a few slices of Begun bhaja, a bengali specialty that goes with any spicy meal. The eggplant slices turn buttery from inside when fried like this , with just a little crispness which dampens within minutes of frying it. Almost sweet and caremalised while frying and balances the meal well.

Egg plants are sliced and marinated with salt , turmeric powder and red chilly powder for about half an hour and then fried in hot oil or shallow fried on a hot griddle.


A warming hearty meal not too high on fat even when it has some fried components. A Jowar roti balances it well. I love such meals and can have loads of vegetables if served like this .... reminds me that I still have those frozen mungodis and might cook it tomorrow for lunch...


Who wants to join me for this ?

Thursday, January 5, 2012

Motorshuttir kachuri aar alur dom...green peas kachori and aloo dum, bengali style...


I remember having a sumptuous meal of this motorshutir kachuri at my friend Mrs. Sinha's home for the very first time.It was some 11 years ago and both of us were just smitten by it's taste. The kachoris were so delicate, thin and soft and so tasteful that overeating didn't feel like offensive. Although it sits heavy on the stomach after an hour or so, the lingering taste would still fool you to believe you did the right thing to eat that much. Mrs. Sinha treated us with this delight many a times and I learnt making it from her.

Later I saw the professional cooks making it and learnt how they make the green peas stuffing perfect every time even when they have to make huge quantities. And then me being me, I altered the cooking process of the peas paste a bit to my convenience, preserving the taste absolutely. Although when I tried making these kachoris with whole wheat flour, the delicate soft texture changed completely and the character of the kachoris changed with it. So now I cook it with all purpose flour (maida), thinking there is so little maida going to be used in the kachoris anyways as we never eat more than two for a meal.

The aloo dum that goes with these kachoris is something to die for. Some of bong friends have been reminded of their mothers when they had it at my place and I realised Mrs. Sinha's recipes was actually a winner. So no change in the recipe . Just the cooking technique of the green peas paste tweaked to make it a little low fat and a little time saving. All those who have been fearing to try this classic and for those who are seeing it for the first time this is the way to start cooking it for yourself.

ingredients and procedure .....


For the kachoris...
green peas 500 gm
green chillies 3-4 or to taste
chopped ginger 1 tbsp
coriander, cumin and black pepper powders 1 tsp each
dash of garam masala powder(optional)
roasted chickpea flour (sattu) 1 tbsp or a bit more if required
salt to taste

maida(all purpose flour) for the pastry and oil or ghee to deep fry

Make a paste of green peas, ginger and green chillies first, without adding any water. The paste should be a little coarse.


Empty the paste into a microwave safe bowl and add the powdered spices and salt, mix well.

Microwave for 2 minutes and mix well again.


Now add the roasted chick pea flour , mix well and microwave for a couple of minutes more. The mixture gets cooked and dehydrated a bit so it becomes drier and can be stuffed inside the kachoris.

Actually this is the tip I learnt from the professional cooks. They add this chickpea flour to make the stuffing bind well without altering the taste. Also the stuffing is fried (bhunoed) in a pan to cook and thicken traditionally, I do it in MW to shorten the process and shave off the oil content.

The mixtures becomes a bit darker in color. Microwave it some more if you feel it is too loose to be stuffed into the kachoris. Although the softer stuffing and equally softer maida dough make really soft kachoris. So dehydrate till it reaches a comfortable level to work with. I had to microwave for 2 minutes 4 times...mixing it well in every break.
Now is the time to make a dough using the maida(APF) and plain water. Make the dough keeping the consistency as close to the stuffing as possible. You need a dough which stretches well and makes a thin even layer over the stuffing. Knead well and make small balls for individual kachoris.

The stuffing has to be like as much as you can stuff inside each of the kachoris. Making sure you do not puncture the kachoris while rolling them... Use ghee or oil instead of dusting flour to roll the kachoris thin and smooth. This is the part where your stuffing skills will play a role....otherwise too you get the taste but miss the perfect texture the perfect thin soft kachori brings.


Fry them in hot ghee or oil til pinkish but not browned. This helps them stay softer again. A nice crisp surface and soft interiors. Much like puran poli but deep fried. And these are large sized kachoris unlike the small khasta kachoris of UP or Rajasthan...more the size and texture of bhatooras.

ingredients and procedure for the aloo dum...
baby potatoes 500 gm (boiled and peeled)
cumin seeds 2 tsp
turmeric powder 1 tsp
mustard oil 2 tbsp

to make a paste..
chopped ginger 2 tbsp
red chilly powder 2 tsp or to taste
curry powder (I use my every day curry powder) 1 tbsp
cloves 3
green cardamom crushed 1
chopped tomatoes 250 gm

salt to taste and chopped coriander leaves to garnish.


Heat oil in a pan and add cumin seeds, wait till they crackle. Add the boiled and peeled baby potatoes, salt and turmeric powder and fry till they turn pinkish brown.


Add the paste made with all the ingredients suggested in the list. Mix well and fry it all together, keeping the flame low to medium.


Let the spice paste dehydrate and coat the potatoes well, while keeping the flame low and stirring occasionally, mixing well. The potatoes absorb the flavors well this way and the spice paste turns aromatic.


Just as the spices turn aromatic and cooked well, add about a cup of water and chopped coriander leaves, mix well and let it simmer covered for a couple of minutes. The water will be absorbed by the dehydrated fried and slow cooked potatoes and coriander leaves will lend it's flavor too.


Serve hot with the kachoris. The aloo dum stays well in the fridge but not in the freezer. It makes a nice leftover curry and actually improves the next day in taste. Some people like these matar kachoris too the next day more.


We generally have slices of tomatoes, cucumber or radish as salad with such fried stuff too, not at all required on the side as this pairing of kachoris with this rich potato curry is just perfect. The inclusion of a raw salad is just to ensure there is no impulsive overeating. Which is a very strong possibility in this case.

Control your portion size with this meal or else you will be swallowing some antacids after a couple of hours, even if you do not worry about your clogged arteries.

Having said that, this is a meal you would look forward to be made every few days. It can be made with frozen peas too but the green peas in season and the new baby potatoes work best for this recipe. So It is essentially a winter food....a season to indulge in heavier food anyways.


This bengali matar kachori was made after 2 years this time but it has been almost twice every winter meal for us. Or if some guests, especially my siblings request me for it, another UP style kachori has not been made for ages now. A friend of mine has been reminding me of that for a long time.

I will be posting that recipe for UP style matar ki kachri very soon and that would make the difference between these two very very clear. Both use almost the same ingredients but are poles apart in taste and texture both , actually the whole experience of the meal. The only common thing is, Kachoris make a heavy meal...so we never serve any more side dishes with it...just the kachoris to be enjoyed fully...

What are your favorite winter foods?