Showing posts with label traditional meals. Show all posts

Friday, March 13, 2015

kathal ki sookhi masaledar subzi made with minimal oil


For some reason Kathal (jackfruit) ki subzi is a Holi tradition in many vegetarian families in Eastern UP. The hardcore non vegetarians cook a spicy mutton dish to set off the gujhia nd malpua sweetness that the festival brings in. Kathal is vegetarians meat and if cooked the same way it actually tastes really good and serves the purpose of being paired with many many sweet dishes on the festive menu.

Although jackfruit fruits all year round in the southern peninsula, the Gangetic plains have a distinct season for jackfruit which starts around the spring time after the harsh winter. This could be a reason why jackfruit is associated with Holi tradition in many vegetarian family in this region. Those who love this meaty vegetable keep cooking till the season lasts and even pickle it. My mom used to make a pickle of jackfruit slices with raw mangoes and I remember we used to like the kathal ka achar (jackfruit pickle) more than kathal ki subzi. Now I don't care for the pickle and gave away a huge jar to my maid.

Coming to kathal ki subzi, this is not one of my favourite subzi to be honest, I like it occasionally for a change. But one or two odd requests about kathal ki subzi have been coming to me and considering kathal is available throughout the year here in Delhi I feel guilty of not cooking it even if it is occasional. It so happened that one day while my weekly vegetable shopping I came across this subziwala who was cutting very fresh medium sized jackfruit and I bought it just because it looked fresh.


New potatoes in the season also make this kathal ki subzi special because the floury sweetish summer potatoes just spoil this spicy curry. Skip adding potatoes if you don't have new potatoes.

Note that most people deep fry the kathal and use a lot of oil to fry the masala paste too when making this subzi traditionally, I avoided kathal ki subzi for the same reason for several year as I had seen my mom cooking it with loads of oil floating in it. Later I figured how to cook kathal with minimal oil and still retain it's flavours. This recipe is my adaptation of the flavours of UP style kathal ki subzi using minimal oil.

This is a pressure cooker recipe to ensure even cooking of jackfruit and letting it absorb the spices without deep frying it.

ingredients...
(4 servings )

peeled and cubed jackfruit 300 gm
boiled peeled, cooled down completely and halved new baby potatoes 200 gm
salt to taste
mustard oil 2 tbsp
hing a pinch or strong hing solution 2 drops
nutmeg and mace powders 1 pinch each

to make a coarse paste..
chopped onion 2 tbsp
dry red chillies 3-4

to make a smooth paste ..
garlic cloves 4-5
ginger slivers 1 tbsp
whole coriander seeds 1 tbsp
cumin seeds 1 tsp
peppercorns 1 tsp
black cardamom 2
green cardamom 2
cloves 5
cinnamon stick 1/2 inch
tejpatta 3
turmeric powder 1 tsp


procedure..

Heat the oil in a pressure cooker pan and tip in the hing, wait till the hing floats up or the oil gets aromatic with hing. Now tip in the coarse paste along with salt and brown it on medium flame.

Tip in the smooth paste and bhuno it all for about 6-8 minutes on medium heat or till it gets aromatic and looks glazed.

Add the cubed boiled potatoes and jack fruit cubes into the masala mix and toss to coat. Stir fry while tossing it till edges of jackfruit and potatoes start getting golden brown. It takes some time as the amount of cooking oil is less but in a pressure cooker pan it doesn't stick to the bottom thankfully.

Add the nutmeg and mace powders in the last and mix well. Then add 1/2 a cup of water, close the lid and let the pressure build up till the first whistle. Lower the heat and cook for 5 more minutes. If the jack fruit is very fresh and tender it might cook sooner, hard jack fruit mat take some more time.

Let the pressure cooker cool down before you open the lid. Serve hot with or without a garnish of coriander greens. In older times kathal ki subzi was made mostly during summer months, the peak season of jack fruit, and coriander greens were a winter produce so it is not a normal garnish for kathal ki subzi. Even tomatoes are not used in all summer subzi recipes traditionally for the same reason.

The kathal absorbs the spices well owing to it's fibrous porous nature and the texture is quite meaty. So if you add spices similar to meat curries it gives a feel of meat to vegetarians apparently. I have never found it comparable to meat personally but all vegetarians consider it to be the vegetarian's meat. I never question that :-)

Poori is a favored pairing with kathal ki subzi during the spring season and specially holi but in summers it is always served with a cooling cucumber raita, sliced and vinegar soaked onions and plain thin chapatis.


Friday, January 23, 2015

chukandar gosht | mutton stew with beet roots and leaves


Chukandar gosht or mutton stewed with beet roots and leaves is one dish that looks really good on the table. Meats stewed slowly with vegetables is a Muslim way of cooking meats as much as I understand and that might be because it might have been the only way to eat vegetables in a primarily meat eating culture. I had never seen such meat stews being cooked in my family with added vegetables although spinach and fenugreek leaves were occasional additions to the meat curries cooked at home, sometimes a potato would be added for someone who doesn't like too much meat. Gobhi keema musallam and keema matar was common but any mushy vegetables were not at all considered for meat. I was a vegetarian back then.

chukandar gosht recipe

Later when I learned about shalgam gosht, arbi gosht and bhindi gosht etc being cooked regularly at some of my friends places, I figured that would be a better way to eat meats. Then I started adding one odd vegetable to the Indian style meat stews but was not confident with adding a strong tasting vegetable to the meats. Then I started cooking rajma with beetroots some 6-7 years ago and everyone used to love it although I am guilty of not sharing the recipe of that rajma too.

Bringing beetroots to the meat stews was the next step and we loved this new avatar of Indian meat stew with beetroots and leaves. So much so whenever I find beets along with the greens attached, I think of a mutton stew. I sometimes cook this stew with just the leaves and sometimes add cubed beet roots as well. I must admit the version with just the leaves is appreciated more by majority of people I have come across.

This recipe is not quick but is fairly simple to cook. Cook this chukandar gosht when you have more work to do in the kitchen and this stew keeps cooking on the sly. I had learnt this recipe long back reading some Pakistani blog written in a very casual way but it was so good after tweaking the spices to my taste that I kept repeating it and forgot where I picked up.

chukandar gosht recipe

ingredients 
(2 servings or 3 small)
mutton on bone (from shoulders or raan) 300 gm
beetroots with leaves 2 pieces (about 300 gm total)
tejpatta 3-4
ginger garlic paste 2 tbsp
dry whole red chillies 3-4 or more (keep it slightly hot to balance the sweetness of beetroots)
everyday garam masala 1 tbsp
yogurt 1/4 cup
special garam masala 1 tsp
mustard oil 2 tbsp or less if you can manage
sliced onions 2 (about 150 gm)
salt to taste
finely chopped green chillies and fresh ginger root to garnish

chukandar gosht recipe

procedure 

Rinse, clean and chop the beet leaves roughly. Peel, rinse and dice the beetroots. Keep aside. (You can choose not to add the beet root chunks if you think they will be too sweet for the stew. You would need to tone down the spices in that case).

Put the mutton, beet leaves and tejpatta in a large stockpot along with a liter of water and cook on low flame for an hour or more, till the meat is cooked perfectly. Add salt after skimming any greyish matter that floats on the surface initially. You can pressure cook this mix in one step if you find it convenient.

Once cooked, fish out all the mutton pieces, remove the tejpatta and liquidise the stock along with the cooked beet leaves. Keep aside.

Heat mustard oil in a pan (preferably cast iron kadhai) and fry the sliced onions till browned well. Drain and make a paste along with the everyday curry powder and yogurt. Keep aside.

In the remaining oil add the broken dry red chillies and let them sizzle for a while to release flavours into the oil. Now tip in the ginger garlic paste and fry till pinkish. Add the onion, yogurt paste and fry in low flame till it gets glazed well or releases oil (if using more oil).

Add the cooked mutton pieces and bhuno till everything gets mixed well and the mutton pieces get a nice browning. Add the special garam masala, the beet root chunks and bhuno for 5-10 minutes. Add the pureed mix, some water if required and simmer till the beet root chunks are cooked well. This step can also be done in pressure cooker, being cautious of overcooking.

Serve hot with chopped green chillies and ginger. It tastes great with khameeri roti or kulcha and some sirke wala pyaz or sliced mooli.

chukandar gosht recipe

Sometimes I cook mutton with spinach almost the same way, specially when the spinach is large and mature. This kind of masala suits well for added fibrous pureed leaves in the gravy. Basically a bit higher chilly and ginger heat to be toned down by the sweeter beets and yogurt. This curry has a unique taste that can convert beetroot haters. Some might not convert but most of them will for sure.

Please try this chukandar gosht and tell me if you like. Cook it with paneer or kala chana if you want a vegetarian version, you won't be disappointed.

Monday, January 19, 2015

everyday daal : chane ki daal bathue wali | sagpaita cooked with split chickpeas and chenopodium greens


Sagpaita is a name given to all lentils cooked with winter greens. Spinach, Chenopodium (bathua), Fenugreek greens (methi), Chane ka saag (chickpea greens) or a mix of spinach and dill leaves, fenugreek greens and dill leaves etc is cooked with any lentil to make a saucy daal rich with flavours of garlic, hing and cumin used for the tadka.

sagpaita recipe

Sagpaita is basically a winter food that is considered warming and hydrating for the body at the same time. The lentils used mostly for sagpaita are arhar ki daal (split pigeon peas), chane ki daal (split chickpeas) or urad daal (split black beans) but a mix of lentils is also used. Mung ki daal (split mung beans) is also cooked to make sagpaita but it is mostly with baby spinach or baby fenugreek greens.

All these sagpaita recipes are slightly different from each other despite being a mix of lentils and greens basically but the taste of each sagpaita tells you how and why each one is cooked differently.

We do cook lentils with purslane greens in summers too but somehow sagpaita is a name given to the ones cooked with winter greens only. No wonder, the daal can include a lot of spices and loads of ghee is topped over the bowls of sagpaita. It has to be a winter delicacy as the recipe is tuned to be eaten in winters. All parts of Uttar Pradesh get very chilly during the 2 months of winter and there are various foods made with fresh produce to stay warm.

This chane ki daal ka sagpaita with bathue ka saag is made differently in each family. Some would add a little urad dal to it and some would add some fresh green peas or 'harey chane' but the tempering will always have some hing-jeera-lasun and laal mirch along with mild spices like dhaniya, jeera, kali mirch powder and may be a couple of tejpatta. There is good protein in the daal along with a lot of greens, so the hing and garlic etc is added to allow proper digestion of the sagpaita.

I sometimes add es of paneer to my sagpaita to make it a one pot meal. Otherwise it is best enjoyed with plain boiled rice, some bhujia type dry subzi, raita and papad kind of Indian meals.

ingredients
(2-3 large servings)

For pressure cooking
chane ki daal (split chickpeas 100 gm (scant half cup)
finely chopped bathua (chenopodium greens) 300 gm (2 cups packed)
minced ginger 1 tbsp
salt to taste
turmeric powder 1 tsp
water 1.5 cup

For tempering
ghee 1 tbsp
cumin seeds 1 tsp
hing (asafotida) a pinch
chopped garlic 1-2 tsp according to taste
red chilly powder 1/2 tsp or more to taste
everyday curry powder 1 tsp (optional)

lime juice to serve.
Paneer cubes as per requirement.

procedure

Pressure cook the daal and bathua greens along with the ingredients listed. Wait till the pressure builds up and the whistle blows, then cook on low flame for 10 minutes.

Prepare the tempering by heating the ghee and then adding the ingredients one after the other in the order listed. Make sure the garlic gets pink in colour and turns aromatic before you add the chilly powder and then remove the pan from the stove and pour the ingredients into the cooked daal. Mix well and churn the daal mixture if you like the sagpaita a bit saucy.

Serve hot with some lime juice or hot melted ghee or butter on top. This can be served with all the usual Indian accompaniments for a meal as I mentioned.

When I add paneer cubes I usually let the sagpaita simmer for a few minutes to soften the paneer before serving. Sagpaita or bathue wali chane ki daal has a distinct aroma of hing, cumin seeds and garlic that we call 'hing-jeera-lehsun ka tadka' and a mild kick imparted by red chillies. The base is earthy with bathua and chana dal that makes this sagpaita a very uniquely flavoured daal.

You can cook this daal with arhar (toor or pigeon peas) ki daal as well. The recipe wont changeeven if you use a mix of chane and arhar ki daal. But mung and urad daals need a different treatment. We will talk about that when I share the recipe of sagpaita with those lentils.

Enjoy bathua chane ki daal ka saigpaita till then.

Thursday, January 8, 2015

bisibele bhath : the southern khichdi we loved even in the simplest way


Bisibele bhath recipe used to feel very complicated whenever I saw it on other blogs or when friends explained it to me. Roasting a lot of spices separately, powdering them and then cooking a few more things separately to mix them all together to make a khichdi that tastes divine, that was my impression of Bisi bele bhath or BBB as it is called by BBB admirers. Yes Bisibele bhath has admirers, you realise when you talk about it to someone who has grown up eating this. I used to feel really out of place even though I love everything that looks like khichdi, be it our bhuni khichdi, mung ki khichdi or risotto, the firangi khichdi. Even Haleem that we love so much.

Bisi bele bhath is no less than Haleem mind you. The dark beauty it is, packed with flavours that makes the meal deeply satisfying and worth admiring too. And this was a short cut recipe that my friend Nirupama typed for me in a hurry one night so I could make a decent Bisi bele bhath with the fresh Pigeon pea lentils she had packed for me during my Hyderabad visit 2 weeks ago.


Yes we were in Hyderabad for a week and experienced harvesting, cooking and eating a farm to table meal along with other things one does in a city seeped with history and old world charm. I met a few dear friends, made a few new friends and brought back some really good stuff home. I bought pickles and kalamkari fabric and my friend Nirupama packed some more foodie gits for me, one of the gifts was this bag of fresh pigeon peas that they call Kandulu in Telugu, Thuvaram in Tamil and Arhar phalli or Tuvar phalli in Hindi. I was amazed to see heaps of this lentil being sold on roadsides towards airport along with seasonal fruits, mainly papaya, oranges and pomegranate.

We never get to see this arhar ki phalli in north Indian markets, fresh green peas are very common during this season and hara chana (fresh green garbanzo) also starts coming but just imagine if we get fresh pods of all the lentils we grow. I think I will use one or the other fresh beans everyday in my cooking.


Fresh Pigeon peas are also called Toor lilva and is used extensively in Marathi and Gujrati cuisines. Some day I will cook all of those things for sure. A proper Undhiyo has been on my list for ever although I have cooked lame versions of Undhiyo a few times.

We had enjoyed this fresh Pigeon peas at Aiyor Bai farm by just boiling them in salted water and snacking on them warm. But this was the first time I was eating these lentils fresh and I wanted to experiment more.

Nirupama recommended the Bisi bele bhath, typed a recipe for me and I mustered the courage to make it for the first time. The divine tasting BBB did not disappoint me even though it was a simplified recipe that Nirupama told me so I could manage to make a decent one.

ingredients
(2 meal portions with some yogurt and papad on the side)

white short grain rice (or broken basmati) 1/4 cup
fresh pigeon peas 1 cup
dry grated or desiccated coconut 2 tbsp
whole coriander seeds 1 tbsp
2-3 Bedgi chillies broken
cinnamon stick 1 inch broken
sambhar powder (ready made from a packet) 1 tbsp
cashew nuts 2-3 tbsp
diced onions 1/2 cup
curry patta 2-3 tbsp
mustard seeds 1 tsp
hing 1 pinch
ghee 1 tbsp

chopped vegetables in bite sized pieces 2-3 cups (I used carrots, cauliflowers and brinjal)

tamarind extract to taste ( I boiled 1 tbsp worth of tamarind with a cup of water, mashed when cool, filtered and added the watery extract to BBB)

procedure

Boil the fresh pigeon peas along with a cup of water and salt to taste in pressure cooker. About 5-8 minutes under pressure (after the first whistle blows). Cool down, open the cooker, add the chopped vegetables and simmer till the vegetables are soft. Add some water if required.

Cook the rice with a cup of water till done. The rice will be watery even after cooking but this is intended.

In the meanwhile, dry roast the broken chillies, cinnamon, whole coriander seeds and the coconut together till they all become a little dark and aromatic. Add the desiccated coconut later if using, grated coconut can be roasted along with everything else. Add sambhar powder in the end and switch off the gas so the powder gets roasted in residual heat. Let them all cool down. Then make a coarse powder and keep aside.


In the same pan, pour ghee and tip in mustard and hing. Let them crackle before adding cashew nuts and fry them till pinkish brown. Add the onions and curry patta and fry till translucent.

Mix the powdered mix with the fried mix and stir well.

Add this mixture to the cooked lentils and rice together, add the tamarind extract, adjust seasoning and simmer for 5 minutes till everything comes together.

The resultant dish will be very aromatic by now. Fry or roast some papad and lay the table. You can't wait for long once the Bisi bele bhath is ready.


I had fried alu ka papad which is a Banaras specialty and a vadi made with puffed rice called Aralu sandige that Nirupama had packed for me. Such meals are enjoyed with extended family most.


I always feel we love such flavours best when there are more people around. People you have grown up with, have made memories together and have eyed the the last yummiest morsels of food from the table together.

Bisi bele bhath will be licked clean by the end of the meal no matter how much you serve. Even this short cut recipe thanks to Nirupama is a keeper and I will be cooking this version a lot. But I will be making the elaborate version of Bisi bele bhath very soon.

Feeling encouraged by the first success of my Bisi bele Bhath.


Sunday, December 21, 2014

gogji mutton | a simple stew with turnips and mutton cooked the Kashmiri way


I don't know if a true blue Kashmiri would approve of this stew but for me this Gogji Mutton curry speaks of winters. This simple stew is so good for a winter dinner, so warming that you would feel blessed if you get good turnips in your part of the world just for this mutton stew if not the vegetarian version called Gogji Nadir. I have adapted this gogji nadir according to my taste but I am sure the soul of the stew is not compromised with.

I have been cooking this gogji mutton for a couple of years and have learnt a trick to make the thin soupy gravy look almost milky in appearance and pack a punch of flavours that feels impossible with just three ingredients. Yes, apart from the mutton, there are only three ingredients that make the flavours so comforting. Mustard oil, green chillies of the thick skin variety (bajji chillies of Bangalore or Rajasthani pakoda chillies) and turnips. These three ingredients create magic in this stew trust me.

It so happens that I always cook this stew for dinners and once it is ready we both can't wait too much to be able to click decent pictures to be shared on the blog. But this time I sneaked a couple of pictures while cooking and one picture of the plate that I served for myself. The pictures are still bad but I wanted you all to create this simple Kashmiri stew this winter if you have not tasted it already.

Note how this recipe helps make an almost milky soupy gravy in this stew. The instructions typed in bold letters are the pointers. But don't worry even if the gravy looks watery, as the taste will not be affected much even in that case.


ingredients...
(2-3 servings, depending on what is served with it)

mutton on bone (curry cut) 200-250 gm
fresh turnips 250 gm
fat variety green chillies (Anahiem or any mild hot chillies) 3-5
mustard oil 1 tbsp
salt to taste
water 1.5 L

procedure...

Add the mutton and a little salt to the water in a deep stock pot (or handi) and cook on medium flame for an hour or till the mutton is almost done. Or pressure cook the mutton with a litle salt with 1 L of water.

Remove the stalks, clean and chop the turnips in irregular shaped thick slices. Try and not peel the turnips as some of the flavour will be lost if you do so. Chop the chillies in 1 inch long pieces and keep aside.

When the mutton is almost done, heat mustrad oil in a deep pan till smoking point. Now add the chopped chillies and turnips all at once and toss and stir fry till a few blisters appear on the chillies and the turnips look glazed and blemished.

This is the time the cooked mutton along with the hot stock will be poured right into the hot cooking turnips. By adding the hot mutton stock into the already sizzling turnips and chillies will make the stock look milky within seconds. Now check and adjust seasoning and simmer till the turnips are fully don, soft and disintegrate when pressed.

Serve hot with plain boiled rice. Some plain home made yogurt or raita works with it but we don't care about it when we need a hot stew in our hands, preferably served in bowls.


Less rice and more of this stew is my idea of a great home cooked meal on winter nights. Meals that we cook while watching TV and the home smells of a good stew being slow cooked in the kitchen. This stew is so aromatic that the neighbors can often get to know what is cooking, that too with such humble ingredients and not a single spice used. Simplicity brings the best from some foods. Gogji mutton is one of best example of such foods.

Hope you would try this recipe if it is not a family favourite already. There are more recipes of turnips cooked with mutton in the Mughlai way and that has it's own charm, suited for a different kind of meal but gogji mutton will always be my all time favourite light mutton stews.


Friday, December 19, 2014

Shahjahanabad ki sair ; a food festival of old Delhi's cuisine at Ssense, The Surya Hotel


It is always a privilege to be talking to someone who has raised foodie kids. That means you are talking to someone who has been foodie as a kid and has imbibed a lot of flavours since childhood, has adapted old cooking techniques with new ingredients and also has infused flavours of the past into the present day food. Albeit with a little complaint about the quality of meat and fish and everything else that we get in today's world, they whip up magic in their food day after day. Keeping a bit of history alive through food and flavours.


We met Mrs. Nazish Jalali the day before and was completely floored by the way she told stories of her childhood spent in the royal state of Rampur where she got to taste and replicate food cooked in the erstwhile royal kitchens. Brought those recipes to her marital home and learnt Old Delhi food here in the tutelage of her mother-in-law. She loves sharing these stories with whoever is interested in them.


Her son Osama Jalali, is a well known food critique and is compiling recipes of Rampur into a book these days, trying to revive the dying art of cooking slowly with love and real spices, treating the spices the way they are intended for the season. He talks elaborately about the meat cuts to be used in a particular kabab or curry and what would be the test of a wrong cut being used in kachhe gosht ka kabab etc and his mother chips in the with the little story about how he was enamored by a live tandoor in a family wedding and has been photographed peeping inside the tandoor, all at a ripe age of four. Yes, barely walking and smitten by food and it's making, that is Osama for you.


This 'Shahjahanabad ki sair' is a food festival on the lines of a pop up event where Osama and Nazish, the mother-son duo have curated the menu and have been cooking everyday along with the hotel staff to bring the accurate flavours of home cooked food from Old Delhi. Delhi in older times was known as Shahjahanabad and we did take a walk through the lanes hearing stories of a 24 hr clinic of Osama's father and how all the khansamas of old Delhi were his patients and often the gratitude used to come in the form of Korma or Nihari.

The first question I asked the Jalalis was about the difference between the street food of old Delhi served famously at Karim's and Al Jawahar and the home cooked food in the same lanes of the city. Pat came the reply clearing all my doubts. The street food was meant for the worker class that slogged hard during the day and needed a robust rich meal to nourish themselves. The worker class had little time and resources to cook for themselves and had almost no finesse to appreciate delicate flavours and light cooking. They relished the hot spicy and robust curries slow cooked by these khandani khansamas and found good nourishment too. That doesn't mean that the old Delhi street food is any less in it's popularity, we have been going there to relish the robust richness quite often ourselves.

On the other hand home cooked food has always been lighter and a delicate blend of spices differentiates it from the food we find on the streets. Many of these meat curries are cooked with vegetables and those Bhidi Gosht, Arbi Gosht, Lauki Gosht, Shalgam Gosht etc we wouldn't find anywhere in the old Delhi shops.

The vegetables cooked in old Delhi homes would never be served on the street shops. This Parval ki subzi was so good I ate it like a salad. Tomato infused masala with mild spices and the parval cooked just right.


We got to taste this Alu Gosht that was so good it felt like potatoes were born to fall for this slow cooked meat curry. We had very small portions to taste because we had to taste a lot of food, else I would have loved this curry on it's own as a full meal.


But before that we had a taste of the Kabab platter that had chicken and mutton seekh along with a Kachhe Gosht ka Kabab that was a class apart. Made using 'raan ka gosht' (meat from the thighs) this kabab was all meat infused with cardamoms and light garam masala. The seekhs also had prominent notes of Badi elaichi but very balanced spicing.

Then came the Nihari that was enriched with the bone marrow from goat shank and we could taste the richness imparted by the marrow. Nazish starts cooking Nihari first thing in the morning and slow cooks this meat for 6-7 hours so that you get the gelatinous gravy and melt in the mouth meat.


We loved the Mutton Korma and the Hari mirch ka Keema which is richly infused with the chilly flavours of the thick skinned fat chillies from Rajasthan but you wouldn't find any chilly heat in it. It was quite different from the Lasun Mirch wala keema that I cook.


Biryani was well done with meat cooked to perfection and the grains of rice infused with the flavours of meat and spices, just as it should be. The Biryani in old Delhi is served with a red chilly chutney that I liked a lot, even after being partial to Awadhi Biryanis cooked with basmati rice.

Desserts were Zarda and Sewaiyyan. Both done well though I don't eat desserts much.

We all had a paan and enjoyed it to the last bit. This was one shahi dawat that felt like being served in a cozy private dining room in heirloom 'tin plated' copper ware, even water being poured out of antique jugs. See how I am chewing pan even in the picture we got clicked to call it a day.


More than the momentary pleasure of the sensory faculties, this dawat was an education that will be with us forever. Thanks to Osama and Nazish Jalali for hosting us and treating us with the stories to remember.


Sunday, August 8, 2010

fara, goojha or peetha : the steamed lentil stuffed dumplings from UP

fara, goojha or peetha (steamed dumplings)

 Cooking a traditional recipe always warms me up. I love the nostalgia it brings with it, I remember how my grandmother used to make it and then my mother and how all of us siblings would huddle up in the kitchen and be curious. No wonder all of us siblings (two brothers and three sisters in all) are foodies and great cooks. Though when it comes to try the more labor intensive and time consuming recipes it's yours truly who plays granny. And I love doing this and I love when I see happy faces around me. Food always succeeds in spreading happiness. This goojha as we call it at home is a family favorite. It is called fara (singular) or Farey (plural) or pitha in different parts of UP. Bengalis make a sweet version of the same dumpling with a jaggery and coconut stuffing.

I find the fara one of the many dumplings that are made in south-east Asia. Momos, steamed bao, Tingmo or siu mai are all staple foods wherever they are cooked and people find excuses to make such meals even in modern kitchens that trashes the belief that only junk fried foods are liked by all.

I had promised this fara and many of you took interest in this ( I love you all for this )...... an anonymous reader (why anonymous?) said that he/ he will be happy to see if it is with the rice outer shell. I wanted to fulfill this wish so I made the rice flour at home, and tried to cook the rice dough which is a tricky process. Normally I just make a dough of 1:1 ratio of rice and whole wheat and that is good enough to make the fara shells. It took me the whole day rinsing and drying the rice, grinding it and then cooking the dough. Okay about 6 hrs to be precise. It was about about 2 hrs on the kitchen counter and the time spent, the muscle work done was all worth it. We got a whole lot of fara to last a week.


To make the rice flour at home you need to wash the rice (I used basmati tukda or broken basmati) , drain well in a colander and spread it on a news paper to get a bit dry for about 2 hrs in shade. Test by taking a handful and crushing it in your fist, it should get crushed to smaller bits. Now it's ready to be ground in the dry grinder of your mixie.
You can use ready made rice flour too if available.


The right side heap of rice is crushed by hands to test for readiness.........

chana daal and urad daal were also soaked for 4-5 hours and ground wet in the mixie with appropriate spices.....

Now see the ingredients for the filling...

for urad dal filling 
urad dal soaked 1.5 cup
red chilly powder 1 tsp
asafoetida 1 pinch
aromatic garam masala 1 tsp
salt to taste

grind everything together with minimal water .

for the chana daal filling 
chana daal soaked 2 cup
green chillies 5 nos.
garlic cloves 5-6 nos.
ginger 2 inch piece
cumin seeds 2 tsp
black pepper corns 2 tsp
salt to taste
salt to taste
turmeric powder 1 tsp

grind everything together with minimal water.

ingredients for the outer shell ..

rice flour 2 cups and some more
whole wheat flour 2 cups or as needed
salt to taste

To make the whole wheat dough you just mix whole wheat flour n rice flour in equal amounts, add salt to taste and make a medium soft dough by adding appropriate amount of water. Adding the rice flour to the wheat dough makes the fara have a nice bite, and it is more moist even when cold.

Making the rice dough is tricky. But rest assured it is very forgiving and you can always nip and tuck the mistakes.....
first of all measure 2 cups of water and salt to taste (for 1 cup of flour) and boil the water covered in a pateela or preferably handi.  Don't use a wide pan here.

Click to enlarge the image below to read instruction on it.

fara, goojha or peetha (steamed dumplings) stepwise recipe

As soon as the water comes to rolling boil open the lid and pour the rice flour at once and cover the lid immediately. Do not stir the mix and let it cook for 4-5 minutes or till the water spills off a little. Check that the rice flour lump will look glazed, it reveals rice flour in powder form when poked but that is how it needs to be. Take the pot off the flame.

Now use a large fork or a sturdy ladle or a wire whisk to mix it vigorously.

It may appear lumpy first but be patient and add more rice flour if it's too sticky, don't worry about the lumps as you have to knead it with hands once it is cold enough to handle.

Knead with your hands when it is cool enough to handle.

Make a pliable medium soft dough which you can roll easily, more rice flour can be added but the dough should become smooth. You can oil your hands while doing it.

Now is the time to shape the faras, pull out small portions of the dough, roll small disks about 1 cm thick and place the dal mixture over it, fold and make a semi circle and seal the top leaving the corners open .....

I make them in different sizes and shapes and I prefer filling urad dal mixture in the rice dough and the chana dal mixture in the wheat dough. You are free to have your own combination .

The bigger faras take less time to assemble but more time to cook, I prefer slicing them and frying them for a nice crunchy tea time snack.

There are two ways to cook the fara or goojha, you can either steam them over a steamer plate or boil them in lots of water like you boil pasta. The steaming over a porous plate is explained in the collage above. And boiling in a wide pot with lots of water is explained below.

While you are shaping the faras, boil water (with a little salt and a tbsp of oil) in a big wide pateela, when the water starts boiling slip the faras into it taking care not to scald yourself.
All the dumplings will be submerged in water at once, but they will start coming up as soon as they start cooking. Let it cook for another 3-7 minutes after they float on the surface, 3 minutes for the smaller ones and 7 minutes for the bigger daddies.


Take out one of them and prick with a pointed knife, if it comes out clean it's cooked.

Use a slotted spoon to fish them all out, you may need to boil them in two batches but this is the easiest step and you'd feel like popping one of them in your mouth as soon you fish them out.......

fara, goojha or peetha (steamed dumplings) They can be served right away if you want them steamed and it makes a filling satisfying and yummy dinner. I have fond memories of having a large platter of these on the dining table,  just out of boiling water and all of us sitting and eating them as if there is no tomorrow.

This time I halved one of the bigger ones and had it just when the second batch was cooking.

fara, goojha or peetha (steamed dumplings) It has such a wonderful bite, the covering is a perfect wrap for a soft crumbly spicy filling, a bite into the doughy shell leads to aromatic spicy interiors. A perfect alternative to daal roti, healthier and exotic desi.

I don't even need a chutney with it I like it so much.
A green chutny or even a sonth chutny is a great accompaniment, but I prefer making the filling spicy and no accompaniments whatsoever.

Yeah it is a different story with the fried ones. I generally fry the refrigerated ones, you know I make them for a week as I can't have enough of them in one go.

fara, goojha or peetha (steamed dumplings)

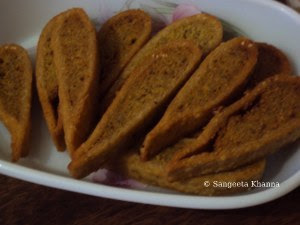
It keeps very well in the fridge and you can fry the smaller ones whole and the bigger ones can be sliced and fried to make exotic tea time snacks. They don't absorb oil and as you drain them on tissue paper any oil clinging to the surface is also absorbed by the tissue.

We had these for the evening tea.

fara, goojha or peetha (steamed dumplings)

These are so filling that you are free for 4-5 hours after having 2-3 of the smaller ones .....

The covering becomes a bit hard and crunchy after frying, without taking any oil and we love it.

It is after years that I have made them, though I was thinking of making these for a long time. Ravioli pasta and other types of dumplings I used to make a lot but these fara (goojha) brought many memories along and that made the meal even more special.

The urad daal and rice combination is softer and milder in spice level. I used just a hint of garam masala and the hing flavor combines very well with urad daal, making it tastier and easier for the tummy as well. I like the urad one more but Arvind likes the chana dal one. Tell me which one you'd like to have ....

fara, goojha or peetha (steamed dumplings)

PS : In our home it is called goojha as it is shaped like a gujhia. I have seen many people in banaras call it fara and bengali friends and a few bihari friends call it peetha. Now this anonymous reader has come up with another name, gointha. It was great to know this name and hilarious too, as gointha is a name for cow dung cakes used as fuel in the rural areas. They are made into the same shape and may be the name is inspired by that.

What's in a name when the end product is so yummy. You make it for a week and enjoy it any way you like Warm it with a sprinkling of water in microwave and enjoy it steamed for dinner with a soup may be, or fry them for a snack.

A blogger friend says that the best way to learn is to share your knowledge. I experienced it when I shared the recipe of patode. I knew only about the gujrati patra till now and after posting the recipe I came to know about the konkani and mangalorian pathrode as well. Many of your comments indicated that there are so many versions of this recipe and it is so heart warming to see this diversity with the same ingredients. I am sure that I will be knowing many more types of peethe too now, I know there is a different version in almost every state of India. But I have known only about the bengali peethey so far. What about your kind of peethey or any such dumpling ?? Had you known this Fara or goojha? Or you also know it as pitha or peetha?

Come on tell me. Iwelcome your links too if you have posted the recipe already on your blogs.

PS once more : I made these fara or pitha again for a get together ta home and decided to click more pictures. Uploading this post with a few better pictures so the process and the texture of this goojha of my home town is more understandable to someone clueless about pitha, or fara, or goojha or goitha :-)