Showing posts with label mithais. Show all posts

Saturday, October 29, 2016

recipe of sooran ke laddu | a sweetmeat made of elephant foot yam, Diwali special mithai


Sooran ka laddu is an unusual recipe of mithai. Even I heard of sooran ka laddu quite late but being in Banaras I wouldn't have stayed ignorant for long. One or two tiny sooran ke laddu used to be served as part of the elaborate prasad in one of the temples in Banaras that my mother used to go and later I got to know that Sri Ram Bhandar would make sooran ke laddu every Diwali for their elite patrons.


Note that Sri Ram Bhandar is the oldest known sweet shop in Banaras and it has been patronised by aristocrats for more than a century. Read more about it here.

Sooran or zamikand is an underground corm that is used as a vegetable almost all over India. It is considered very good for gut health and several recipes like sooran ka chokha, sooran ki subzi, sooran ki chutney, sooran ke kabab and sooran ka achar are relished in eastern UP, Bihar, Jharkhand and even Bengal. Sooran ke kofte and sooran ka bhuna bharta is also made by several families.

I had not seen this vegetable elsewhere till I tasted a dish called sooranache kaap in Maharshtra several years ago and then I understood how popular this vegetable is in other parts of the country too. More recently I tasted a recipe called senai kizangu poriyal in Tamilnadu too. Everyone seems to be liking sooran going by the way it is served with a little extra pomp.

A native variety with several small bulbils on it's surface is quite tasty when cooked right. But the native sooran variety is very itchy while chopping it and even after cooking if it has not been cooked with proper method. It needs a lot of sour elements in the curry to neutralise the itchiness caused by oxalate crystals.

The smooth skin variety of sooran is called as Bambaiyya sooran in UP and is mildly itchy sometimes and that one is used to make this sooran ka laddu.

I have used milk powder to make khoya for this recipe as getting pure khoya is not possible anymore. You can reduce milk to make khoya if you wish.

ingredients 
(makes about 2 dozen laddus)

200 gm sooran peeled cleaned and grated into shreds
200 gm milk powder
1/4 cup milk 
100 gm desiccated coconut
60 gm sugar or powder jaggery or more as per taste (I used organic powdered jaggery)
a generous pinch of green cardamom powder (optional, I did not use)
80-100 ml ghee

procedure 

Heat the ghee in a kadhai and add the grated sooran in it. Fry it in low flame till the grated suran turns brown and crisp. Strain the sooran with the help of a perforated spatula and crush it. you can blend it in the mixer if needed.

In the same kadhai, in the remaining ghee, add the milk and milk powder together keeping the flame low, and cook till the mixture becomes khoya. Brown it lightly.

Now add the crushed sooran and sugar or jaggery and bhuno a little more to combine. Add the desiccated coconut slowly to bring the mixture to a consistency that can be easily made into laddu.

Cool a little and make laddus. Roll them in desiccated coconut and arrange in the container you are planning to store the laddus.


These sooran ke laddu keep well at room temperature for 2 weeks.

You don't really get to taste much of sooran in these laddus but it was a way of mithai loving Banarasis to eat sooran as a ritual on the day of Diwali.

I hope you try this recipe this Diwali.

I like the traditions not just because they make our festivals bright and happy, some of these involving food produce also have helped conserve a particular plant species too. Think about it, the way we are getting produce from all over the world, everything available round the year and the way food is dictated by fashions and trends, the rituals could revive the native flora in a fantastic way.

Buy some sooran this Diwali and make sooran ka laddu. 


Wednesday, December 17, 2014

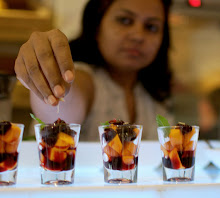
orange rasgulla recipe | traditional rasgulla soaked in fresh orange juice, served with orange slices


I don't eat much desserts but rasgulla and rasmalai is one of my favourites among Indian sweets. And like other desserts of my choice I like them really mildly sweet. That is the reason I prefer making them at home because no known source of rasgulla or any other mithai for that matter, makes them mildly sweet. Homemade rasgulla can be made as much sweet as you want and mine are always floating in a very watery syrup. But this Orange rasgulla is something more than just being mildly sweet and to be without any added sugar in the recipe. The only sugar this orange rasgulla has comes from the oranges and the orange juice used instead of sugar syrup in this recipe.

I know a particular rasgulla shop around the lanes of assi ghat in Banaras who used to make 'orange flavoured  rasgullas' fresh everyday. The quality of the rasgulla was very good owing to the freshness and of course the skill level of the halwai, but those rasgullas were too sweet for me and they had orange essence and orange colour in it. I tasted them only twice and decided I would make better real orange rasgullas at home. This was about 15 years ago and what I did at that time was to just make the regular homemade rasgulla, squeezed all syrup from each one of them and soaked them in fresh orange juice. The idea was good but it could be improved and I did improve when I experimented later, and the orange rasgulla made it's way to our table a few times after that. Always when we had someone visiting or for a formal get together. Otherwise we rarely eat any mithais.

One of these get togethers we did last year and cooked Awadhi food including shami kababs, awadhi biryani, safaid korma and a few more things for main course, I made these orange rasgullas for dessert. Luckily I clicked a few pictures too but then got busy with something and forgot to share it here on the blog.


And then I had a food trail of Delhi with Chef Johnny Iuzzini some time ago and he tasted rasgulla and addressed it as 'the sponge whose syrup is squeezed out'. That was a familiar but funny description of a rasgulla to hear as I know many people who squeeze out even the last drop of syrup form the rasgulla and eat the dry sponge. Oh even I do that but soak them again in plain whole milk with some cream and then eat it. Yes I am picky like that :-)

This incident reminded me of the best rasgulla I like and I decided to share it with you all. Although you may make the rasgulla the normal way and then squeeze and dip them in orange juice, but cooking them in plain water and some orange zest results in better flavours of orange seeped into the rasgullas. See how to do it.

ingredients 
(for 30 medium sized rasgullas)

2 Liters milk ( I used 3% milk from Amul) the best is to use raw cows milk for the best rasgullas
2 Liters orange juice ( I used cartons of Real)
3-4 fresh oranges to garnish
zest of orange or thin strips cut from the peel 1 tsp or as desired

procedure..

First of all heat up raw (or pasteurized) milk to just below boiling temperature (around 92C) and curdle the milk by adding diluted white vinegar or lime juice adding half tsp at a time. Wait till the milk splits into the curdled chhenna  and whey and then strain the whey through a strainer. Collect the chhenna and rinse it well under running water.  Squeeze and knead the chhenna well to make a very smooth mass that doesn't crack when rolled into small balls. If the chhenna at this stage is not smooth, do not proceed to make rasgulla, use the chhenna to make paneer bhurji or paneer paratha instead. The trick to make suitable smooth chhenna for rasgulla lies in splitting the milk slowly at a temperature just before boiling.

Detailed procedure of splitting milk for making chhenna suitable for making rasgulla is described in my homemade rasgulla post. Please refer to that if in doubt.

Now take enough water in a wide pan or pressure cooker to accommodate 6-8 rasgullas and bring the water to boil. Take care that the rasgullas expand about 4-5 times of their starting volume so keep room for that too. Add the orange zest and the chhenna balls, cover the lid and cook till the pressure builds up, one whistle.


See I had overcrowded the rasgullas and they have lost thier round shape, but not to worry if this happens. The rasgullas will be fine albeit the shape.

Let it cool by itself and open the lid, take out the expanded rasgullas out, squeeze them one by one and dip in fresh orange juice (or from a carton) kept in a wide bowl.

Note that there was no sugar in the cooking medium and the sponge for these rasgullas were cooked in plain water infused with orange zest. This causes a few cracks on the surface of the rasgulla but it doesn't affect the taste and texture. A fairly saturated sugar syrup doesn't let these cracks appear while cooking but we don't mind a few cracks on rasgullas.


Slice some fresh oranges and dip them along with the orange rasgullas and chill before serving. If you want more concentrated flavours of orange you can reduce the orange juice by cooking it for some time but I don't feel any such compulsion to make the orange juice sweeter or thicker.


This fruity citrus laced rasgulla is something I can have a lot. Arvind can have them for a meal and he loves some shrikhand over them sometimes. I love the was the orange slices look and feel with the rasgullas and eating them both together is the real treat.

I one had rasgullas paired with mishti doi in a Bengali wedding and love that version too. Try some of these variations with rasgulla and let me know which one you like better. I know if you have lived around Odisha or Bengal you must have experienced these delights already. Orange rasgulla is for you to try in any case.

PS : A very dear friend Suranga Date wrote a poetry when she saw these pictures on my fb page. Depicting the pain that the milk went through to make the chhenna and then the rasgulla that meets orange juice to make a delicious smile :-) I feel blessed to share this with you all.

Traumatic sour times,

and parental separations


steeped in


a meeting


of those that remained


curdled but unbowed. 

A gentle hand


recouping them,

 
and putting them together again,


and a smoothening of life


with a cleansing 


in orange steam,


as they, 


tensionless,


feel relaxed once again.

The signs of struggle


remain visible,


on the face of it,


but the mind 


rejoices


at the welcome


by the juicy youn


g oranges

inviting them 


into the juice.

Some time later,


quietly enjoying


the seeping in


of a new life,


the orange rasagullas smile.


Wednesday, October 22, 2014

easy diwali mithai : kaddu ka kalakand or pumpkin kalakand recipe


My Diwali greetings to you all with this easy recipe of pumpkin kalakand. May you find more light, fight darkness successfully and lead others towards light too. Diwali brings that kind of vibes if we are open to it. And there is some mithai, some diyas and candles after a mandatory spring cleaning exercise. The woollies will be out soon and we will soon eat some chooda matar with the fresh tender green peas. Every banarasi starts dreaming of chooda matar breakfasts as soon as there is the first sign of winter.

I have been away for quite a long time, was traveling for the good part of it and then got caught up with pending work that had to be finished on priority. Thank you for writing back to me and let me know you all were missing my posts here. I shall try and write more regularly and bring the food we love. Will come back with storied from Mysore too.


I hope you would like this pumpkin kalakand. Kalakand is a soft cheesecake like dessert with granular solids of lightly curdled milk if I have to describe it, but the good thing is that kalakand can be made with many shortcut methods with very minute difference in the resulting taste and texture. Since the milk is reduced first and curdled lightly in the traditional method of making kalakand the texture is richer with the traditional method. But then we make the recipes suitable for a modern lifestyle, to be able to cook them in lesser time, make them healthier etc etc. and try and replicate the original.

This short cut kalakand recipe that also includes some good fiber and carotenes is very close to the texture of original kalakand with added taste of ripe pumpkin and a hint of nutmeg. I had made an apple kalakand (in microwave) last year and many of my friends and readers had made that at home within a couple of days. And I remember how I kept getting requests regarding how the recipe can be adjusted to stove top method and if one could replace the milk powder with something else.

In the last year I have made that apple kalakand several times both in microwave and a heavy bottomed pan and recently I taught that recipe to the volunteer Chefs at ISKON Mysore as well. Even they wanted an alternate recipe of such an easy and tasty mithai so I decided to work on another kalakand recipe that is fairly easy and takes a little more time than the apple kalakand.


Using grated pumpkin was on my mind for some time and I had to do it. I did two trials and found that precooking the grated pumpkin works better. I microwaved a cup of grated pumpkin for 2 minutes before using it for kalakand and used freshly made paneer for it. Minimal sugar to sweeten it as always.

Total time that this recipe takes would be around 30 minutes of grating pumpkin, making paneer (chhena) and cooking again and about an hour of refrigeration to set the kalakand properly.

ingredients
(for 16 regular sized kalakand)

grated pumpkin (use the orange fleshed ripe pumpkin) 1 cup packed
whole milk (6%) 1 kilo
fresh cream 3 tbsp
lime juice 2 tbsp diluted with 2 tbsp water
nutmeg powder 1 pinch
sugar to taste. I used 4 tbsp
chopped pistachios to garnish (or any other nuts)

procedure

Microwave the grated pumpkin for 2 minutes or cook them till they get limp and soft but not mushy. Keep side.

Heat the milk in a large pot till a thin film of fat starts forming on top. Wait till the point where the milk is just about to boil. Add the lime juice 1 tsp at a time at this point and keep stirring the milk. Stop adding the lime juice as soon as you see curdled milk and clear whey.

Line a strainer with muslin and keep it over another pot to collect whey. Pour the milk into the strainer and let the whey separate (the whey can be used to knead bread dough). Collect the milk solids and crumble it using a potato masher nicely.

Now place this crumbled paneer (or chhena) into a pan along with the half cooked grated pumpkin and sugar and cook for about 5 minutes on medium flame. It would release some water and start drying up. Add the fresh cream and nutmeg powder together and cook till it is all dry but moist.

Empty the contents on a greased tray or plate and flatten the mixture using a flat knife. Make the edges smooth and shape it so you can cut uniform pieces. Or just use a suitable square dish to spread the mix. Sprinkle chopped nuts and press them so they stick well.


Refrigerate this plate for an hour or so. Cut pieces and serve as required. This kalakand stays well in the fridge for 4 days easily. Keep it in an airtight container lined with butter paper.

The texture of this kalakand is crumbly as it should be but it binds well and doesn't break into your hands. If it breaks while lifting it means it needs some more cooking so cook it again and let it dry a bit more and let it set again.


You can add any spices of your choice to this kalakand as pumpkin takes spices really well in desserts. You would be surprised at how well it works with this kalakand. A mild hint of nutmeg and a deep rich taste of pumpkin with taste and texture of a regular kalakand. That's how this pumpkin kalakand tastes.

Make this diwali healthier with home made mithai I must add. We never buy any mithai during festivals as there is a lot of spurious stuff added to them during season of high demand.

Ever wonder how much milk production do we do in the country not to disrupt regular milk supply and still convert the world into a big mithai shop during festivals?


Wednesday, September 18, 2013

Besan ki pinni | a chickpea flour fudge with almonds, gum tragacanth and pistachios | Indian homemade mithai

besan ki pinni recipe

I grew up eating this besan ki pinni. And it used to be a round huge ball dripping with ghee, interspersed with few nuts and I remember my tiny hands would be full struggling with this pinni. Well, it's weird talking about my tiny hands as I have really huge hands as an adult, but those days are etched in my mind. This used to be a school lunch box thing and I remember I used to wait for the turn of besan ki pinni in my lunch box. I still remember that aroma more than the ones I cook now. Such are memories and such are the ways we connect with our food.

Besan ki pinni was made freshly those days. It was a way to fortify a warming sweet besan ka halwa, and to keep it for longer duration too probably, as there is not much difference in the ingredients apart from the tragacanth gum (gond) and the amount of nuts used. Some recipes use added khoya or evaporated milk in it and that makes the pinni quite rich. I like the roasted besan flavours more so no khoya for me. Moisture in pinni is definitely lesser than the halwa.

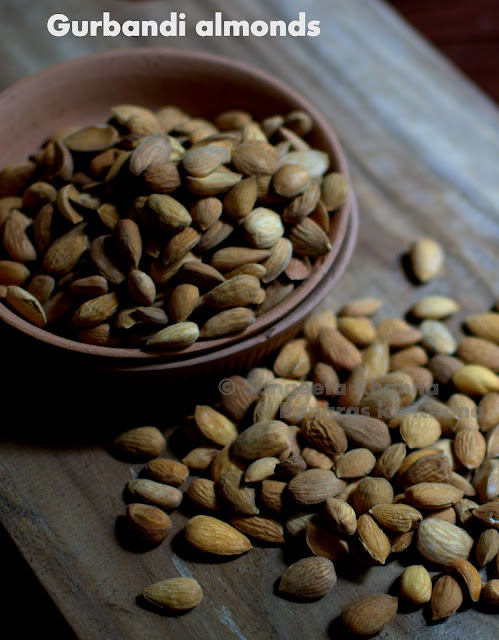
I like adding the gurbandi almonds (small, more rounded variety with high fat content) to such desserts as the flavour is much better than regular almonds.

gurbandi badaam

These are some of the desi desserts that I like. I love anything made using besan (chickpea flour) by the way. I saw the besan ki pinni transforming as I grew up. It was being made into bars or squares, looked like a yellow nut studded fudge and was easier to shape. I adapted this shape when I started making pinnis, as it was easier to set in a flat tray rather than making balls with hot cooked pinni mix.

And when we recently tasted pinni again at The Claridges dhaba, I reminded myself to make some pinni soon. And here it is.

ingredients :

Besan (chickpea flour) 250 gm
ghee 100 gm
almonds 100 gm (I used Gurbandi almonds, small in size and higher fat content)
pistachios 10-15 gm
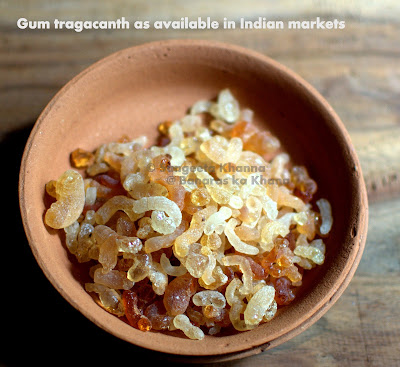
*gum tragacanth 40 gm (optional)
sugar 100 gm (I used 60 gm as we like it very mildly sweet)
milk 1/3 cup

*Gum tragacanth adds a nice bite and mouth feel to the pinni and has health benefits as well.
In folk medicine it has been used for a laxative, persistent cough, diarrhea, and as an aphrodesiac. Modern pharmaceutical uses include an adhesive agent for pills and tablets, and for emulsifying oil droplets in lotions, creams and pastes. Its superior water absorbing qualities make it an excellent thickening agent. Gum tragacanth is used in many everyday commercial products, from cosmetics and toothpaste to jellies and salad dressings. ~ source.

edible gum

procedure :

Fry the gum tragacanth (gond, if using) in hot ghee and let them fluff up. Remove using a slotted spoon and save. See how it looks after frying.

deep fried edible gum

Let it cool and crush lightly.

Make a coarse powder of the fried gum and almonds in food processor or mixie.

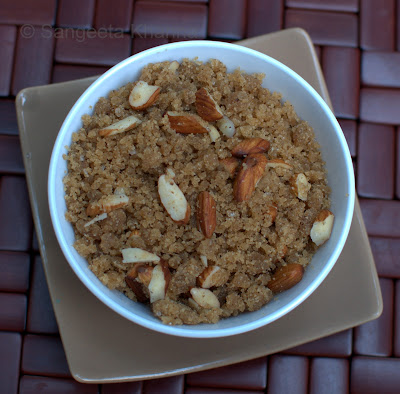
crushed almonds

Now heat the remaining ghee and dump the besan in it. Roast the besan on low flame till nice and brown, the sign is the aroma of bhuna besan (roasted chickpea flour) and you see the ghee starts separating from the roasted besan. If using lesser ghee like this recipe, you start with a dry sandy mixture while roasting the besan, and then it starts coming together while it gets roasted.

You can mix the besan with ghee nicely, rubbing with your fingers and bake in the oven at 180 C for about 20 minutes or till it gets browned. Stirring the besan a couple of times in between.

Add the sugar and the coarse powder of gum and almonds to this mixture and stir to mix well. Now add the milk slowly and keep folding the slightly wet mixture so it all comes together like a crumbled cake. You might use up a bit more milk that suggested in the recipe.

 Dump it all into a flat tray or plate, whatever is convenient and press using a wide blade of knife or the back of a steel plate.

Sprinkle chopped pistachios over it and press down again, I used a small wooden chopping board that fits inside this tray. Let this tray rest overnight, or at least for 2 hours, cling wrapped or covered properly.

besan ki pinni recipe

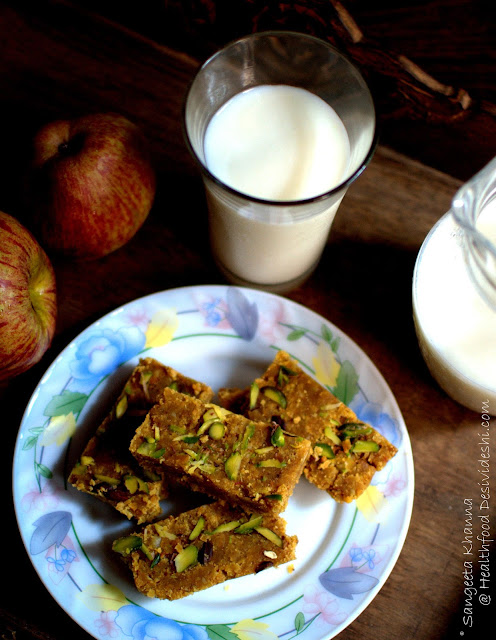
It gets set and looks like this.

besan ki pinni recipe

Cut this set pinni in desired shapes and enjoy at room temperature. It keeps well for about 3 days at room temperature and for about 2 weeks when refrigerated. You would like to warm it up in microwave if refrigerated, before you serve it. Warm is better for me, the ghee in the pinni hardens it when refrigerated. Some like it hard too, so you can decide for yourself.

Besan ki pinni is a traditional breakfast dish also, taken with milk and some fruit it makes a healthy choice. A desi gluten free granola bar I would say. Lightly sweetened and studded with healthy nuts.

besan ki pinni

 Either in the shape of such bars or laddoos, these are a sweet treat everyone would like and at any time. But I would recommend it in small portions as a dessert.

For a breakfast you can have a large portion as it is a protein rich bar that way. I have a cheats recipe with this pinni as well. Sometimes I just dunk one bar in a very hot glass of milk and dissolve it. It makes a nice warming drink when you are not well. Or a porridge consistency if not a drink.

besan ki pinni

Try that, You will be surprised with how it comforts you. And do you realise it is one of the best gluten free Indian mithais that can be made at home? It can be made lactose free too if you skip using milk.

Do let me know when you try this besan ki pinni. This is one healthy dessert if you keep the sugar minimal. I would have used raw sugar but I had used up my stock when I decided to make besan ki pinni.

Next time raw sugar it will be, darker pinni, richer taste. And this pinni is not the ghee dripping types, much leaner I would say :-)

Tuesday, March 26, 2013

a rose flavored sugar free kaju katli and a regular kaju katli...


Yes two ways with Kaju katli, the famous Cashew nut fudge that is the most loved mithai all over India.  Probably more so because it has a better shelf life than any other good mithai. Stays well for a month or so. And both these versions of kaju katli are microwave cooked.


I made this no sugar added version which has some lactose in the form of the milk powder I added to bind, this one is flavored with rose petals and rose water. Lactose sweetens the kaju katli lightly. Rose petals and rose water make this kaju katli quite fragrant.

 The other one is a regular sugary kaju katli but with less sugar than the commercially available ones, no flavor is used in this one because the flavor of Cashew needs to shine when it's on it's own.


 Lesser sugar means poor binding and darker color. Sugar binds the cashew paste really well and makes it lighter in color after cooking, but this dark looking kaju katli has great cashew taste, sweetening is medium to light I would say. For some people it will be light, to me it is perfect.

Even the milk powder and cashew version, is lightly sweetened, with a hint of milk too. I personally do not like milk or khoya burfi or fudge so this one would not be my favorites, but the husband likes this milky one better. Different choices you see.

ingredients for rose flavored, no added sugar kaju katli...


broken cashew nuts 4/5 cup or 87 gm (see the picture on weighing scale)
milk powder 3/4 cup or 66 gm
rose water 2 tbsp
full fat milk 1/4 cup
dried rose petals 1 tbsp or more

procedure...

Powder the cashew nuts finely, it might start getting lumpy and oily in the end so take care not to make it cashew butter. Just stop when the powder starts getting crumbly.

Add the weighed milk powder and about 1/4th cup milk and a tbsp of rosewater in a microwave safe glass bowl, mine was a Borosil one.


Mix everything well. The milk powder slowly dissolves and allows a sticky paste to be formed.

Now microwave for 1.30 minutes, the paste will fluff up in the microwave. Take out and stir and mix well again. See how it looks in stages. The mixture is microwaved for 1.30 minutes each time, taken out and stirred with a spoon. Repeated 3-4 times till the paste forms a ball.


Add the rose petals in last, mix well and let it cool till you can handle it with bare hands. It becomes very oily as the fats separate.

Keep a parchment paper ready folded like a book. Place the ball of cashew paste on one half of the parchment and cover with the other half. Roll out with the help of a rolling pin.


You would want a perfectly square or rectangular sheet of rolled out fudge so make sure you fold the parchment paper inwards from the open edges. See pictures to understand. Roll out the fudge to fill in the corners as well. The thickness should be the same all over.

Lift this rolled out fudge along with the parchment paper casing, place it on a appropriately sized tray and refrigerate till cold.

Measure with a scale if required and cut into squares or diamonds.


There is a hint of milk in this kaju katli, and that's where the rose saves it.
Rose flavored kaju katli with a hint of milk that you might miss if uninitiated.

ingredients for the regular kaju katli...

broken cashew nuts 2 cups or 220 gm
sugar 3/4 cup or 100 gm
you might want to add green cardamom or saffron, but I like it unadulterated cashew flavor

procedure....

This one is a cashew and sugar fudge, the regular kaju kali. Sugar helps in binding the paste and since I have used minimal sugar the texture is not very smooth. But taste wise it is a better version of a commercially made Kaju katli. A very intense taste of cashew just lightly sweetened.

The cashew nuts are soaked in water, just enough to cover them all, for 2 hours minimum.

Then they are blended till they make a smooth paste, add some of soaking water.


Now add the sugar and cook it in a thick base pan or in a wide glass bowl in microwave. If cooking in pan, keep stirring and cook till it becomes a sticky ball. If doing in microwave, take out and stir every 2 minutes for about 5 times and then every 1 minute 2-3 times.


Stirring and mixing each time you take the mixture out. It should make a sticky ball in the end, and when smoothened with the back of a spoon, it should get a smooth surface. See picture.


Let it cool till it can be handled with bare hands, Make a smooth ball place on a parchment paper covered with the other half and roll out into a rectangle.


Now on the rolling out steps will be like the rose flavored kaju katli. Refrigerate to cool and then cut into desired shapes.


A little darker, a little softer kaju katli that you would get in stores, but a lot tastier that that. And the bhang ki thandai in the picture is also coming soon on the blog..


Wishing you all a happy holi with a colorful post.


Do let me know which one you tried. The good thing is, you can cook them both in pan also. Do shoot me a question if you want to cook this in a pan, I'll let you know what to expect. It's easy any which way.

Cheers..

Wednesday, November 14, 2012

Sankatmochan wale besan ke laddoo and some festivity.......


Wishing you all a very happy Diwali, the festival of lights that brings with it a couple of more festivals,  Dhanteras that preludes Diwali and then Bhai dooj and Govardhan pooja to follow. Several sweetmeats are made in Indian homes and there is a round of worshiping several Gods in this season. I am not a religious person but like to soak in the festive mood by cooking something that has been a family tradition. Lighting the diyas and candles, spring cleaning the house and spending time with loved ones as it is a national holiday too. Some memories of childhood are revived and some new are formed. We generally stay away from crackers and pompous gifting traditions associated with this festival, enjoying the home made sweetmeats and homegrown happiness is much more worth.

Sankatmochan wale besan ke laddu

Besan ka laddoo and Shakkarparey are the two things my MIL used to make on the day of Dhanteras, for the bhog of the evening's pooja. Surprisingly, I normally forget to make these on that day as there is no internal clock in my system to remember festivals and associated pooja rituals. Yes, I remember the foods but then I need to get a clue when to start. So this year too when I was leaving for a friend's place the husband gently reminded to make Besan ke laddoo for the pooja that he would do in the night. Did I tell you he is the one who performs festive rituals quite well, I am the one who just watches the pooja being performed, enjoying the scents and chants.

Talking of the scents and the chants, the Sankatmochan temple at Varanasi is one place if you love the scent of a temple. That ghee laden sweetmeats, a heavy waft of Tulsi leaves and some Ghee lamps burning, you are transported into a different world when you visit this place. The holy water that (Gangajal kept in a pot with Tulsi leaves in it,called Charanamrit) the Pandit offers has a distinct Tulsi taste and aroma that I can feel right now typing these lines. That was the reason I wanted some Tulsi leaves to be kept with these besan ke laddoo so the aroma gets infused in them. You are right, I am talking about he Sankatmochan waale besan ke laddoo. Those ghee laden laddoos with a crackling of crystalline sugar is kept in a palm leaf box along with Tulsi leaves and you get that taste of Tulsi when you have them reaching home.

I learned the trick of making that crackling sugar from my MIL. My mother used to make the besan ke laddoo with simple powdered sugar and that was good but nothing extraordinary. That crystalline sugar that is called Boora in North India can be made at home within 15 minutes or so, depending on the quantity you want. The process is pictured step wise later.

ingredients...
(to make about 20 large laddoo)

Chickpea flour or besan (the coarse variety preferably) 250 gm
sugar 250 gm (the whole quantity will not be used)
ghee 200 gm

procedure...

Heat ghee in a thick base kadhai and pour in the besan. Mix well and start roasting on low flame. The mixture looks crumbly in the beginning and goes on to become flowy. I took many pictures during the roasting process that took about 40 minutes, as the consistency and color of the besan went on changing. The aroma also changes and you would know when the besan is well roasted. See the pictures for more details, starting from the first to last..

Sankatmochan wale besan ke laddu

After roasting the besan, start with making the syrup for making crystalline sugar. Since the sugar syrup needs to be whisked vigorously in the last lap, you would want your hands be free from roasting the besan at that time. I can handle both the things simultaneously as I have some practice, and I do switch off the besan side of the gas if required, you can do that too.

So for making the crystalline sugar you start with sugar and just enough water to submerge the sugar. The first picture in this collage is taken after a couple of minutes of adding the water so you see more water than it was, the sugar already had started melting. It will be good to know that there is no strict quantity of water added, as it just take a couple of minutes more to get the right consistency if you add a little more water.

Sankatmochan wale besan ke laddu

The syrup first starts boiling, then frothing and when the frothing increases, and you see some sugar being crystallized on the sides of the pan, just take the pan off the flame and whisk vigorously with the help of a sturdy spatula (a wire whisk doesn't work as the sugar syrup starts resisting movements).

You would notice after the fourth picture the sugar looks crystalline and white, a few steps in between are missing as whisking and clicking pictures is not possible simultaneously. In the missing steps, the sugar syrup looks like honey first and then starts getting opaque, that is the time it will start crystallizing too. Just keep stirring to make smaller crystals otherwise it would result in a huge chunk of white sugar.  There will be some large crystals too, you might like to thrash them using a Pestle or just sieve the sugar so you get uniform sized sugar crystals. The large chunks can be used to sweeten anything you wish (I use them to make the syrup for shakkarparey, recipe next).

The sugar is then mixed with the roasted besan mixture. The two are mixed well to combine well. You can add some chopped nuts or cardamom etc, but they are not added in the Sankatmochan wale laddoo and you wont like to spoil the original taste if you are looking for that. The quantity of sugar can be tasted and adjusted at this step.

Sankatmochan wale besan ke laddu

Allow the mixture to cool down so you can handle them to shape balls. The laddoo gets solidified after some time in winters, owing to the presence of ghee.

If you notice the mixture is too cold and does not bind well to form laddoo, you can heat the mixture on gas or in microwave so the ghee melts again to allow binding of laddoo well.

Sankatmochan wale besan ke laddu

The large sugar crystals are visible in this picture. They provide a nice texture and the taste of the laddoo is transformed owing to this.

Did I tell you I made this laddoo and Shakkarparey at 8 Pm that day? That was after I returned from my friends  place. I kneaded the dough for shakkarparey when the laddoo mixture was cooling down and used the same leftover sugar in the pan to make the syrup for shakkarparey too.

ingredients for the shakkarparey...

whole wheat flour (you can use maida too) 2 cups
fennel seeds 2 tsp
ghee 1/3 cup for shortening
more ghee for deep frying

procedure..

Rub the shortening part of ghee into the dry flour till it resembled bread crumbs and then add the fennel seeds and water to knead a firm and strong dough.

Roll out the dough into a half centimeter thick circular roti and cut squares using a sharp knife. The squares can be like cookies or biscuits, any size you prefer.

Deep fry all of them in batches till they are pinkish brown and crisp. Low flame is helpful in making them crisp and cooked through.

Now add water to the sugar just like we made the sugar syrup in the laddoo recipe. I just added some more sugar and water to the same pan with leftover large chunks of sugar and proceeded to cook the syrup.

The same kind of frothing happens again and you can keep a bowl of cold water to check if the syrup is ready to crystallize  Just drop a tsp of syrup in the bowl of water, if the syrup immediately looks like a glass coin it is ready for coating the shakkarparey (Or crystallizing as required for the laddoo).

So as soon as you get the indication that the syrup is ready, tip in all the fried shakkarparey squares into the syrup and start stirring and mixing them quickly. The syrup will coat the squares and then become white in color. A uniform coating of sugar will be there on each of the fried square.

Sankatmochan wale besan ke laddu

These are like glazed cookies.

Let them cool and store in an airtight container. Discard the remaining sugar or use it for sweetening anything else if you have a large quantity left.

I cooked a few more sweetmeats for diwali. There was some Gujhia made at my friends place. It was an opportunity to bond with her kids and see the contented happy smile when they eat a freshly fried Gujhia. I also made a raisin, almond and date syrup Sondesh on the day of Diwali. Will post the recipe very soon.

Wishing you all a great time, good food and family bonding this festive season.

Sankatmochan wale besan ke laddu

There was silence on my blogs as I was away for a vacation in the mountains. We visited Gangtok and Darjeeling before Diwali and brought back great food memories. Those will be shared soon here on the blog. Loads of pictures and food storied to be shared with you all. Stay tuned.

Wednesday, October 31, 2012

atte ka halwa | the UP counterpart of teacakes...


atte ka halwa

Halwa is a traditional UP dish that is sweet but not necessarily a dessert. It can be a breakfast for some, yes in the older days it was a quick dish to make on stove tops and was almost equivalent to the cakes we bake today in fancy ovens. I say cakes because of the ghee that goes into  traditionally made Halwa that is only comparable to a cake and not a cereal breakfast. If the content of ghee is lesser, a halwa can be a cereal breakfast in it's composition.

Halwa is definitely not a breakfast dish anymore in our adult lives, with our butts stuck to the chairs all day, but in the childhood days halwa and jalebi was a happy note to start the day on most weekends. Going by what my mother in law tells me, she used to pack halwa and poori in Arvind's lunch box often. I know where his love for halwa and all things sweet comes from. I have to make some halwa every now and then, making just one serving is my solution as I don't like it much and can eat only 2-3 tea spoonfuls at a time.

ingredients...
(1-2 servings)
atta (whole wheat flour) 1/4 cup
ghee 1/4 cup
sugar 2 tbsp or more if you like it sweeter
water 1/4 cup
chopped nuts as per taste
powdered green cardamom or nutmeg if you wish
procedure..

Heat the ghee in a deep pan and tip in the flour into it. Keep stirring on low heat till the flour starts getting aromatic and changes color to pinkish brown. This takes about 5-8 minutes for this quantity.

If making a larger quantity, halwa can be a work for 40 odd minutes, I have made halwa for family get togethers and the aroma of roasting flour makes everyone hungry while the halwa takes it's own sweet time to get made. Once ready it pleases everyone.

Ad the sugar once the flour becomes nicely browned, and let the sugar crystals become caramalised a bit. It will start getting sticky after a couple of minutes. If making large quantity, it may take another 10 minutes. So as soon as the sugar crystals start getting sticky, add the water in a gentle stream. and mixing the halwa mixture steadily, using a spatula with the other hand. The halwa comes together and becomes like a shining dough, keep stirring it till it starts getting a bit crumbly by further dehydrating.

Add chopped nuts, roasted or fried if you wish, mix well and serve hot.

Halwa is never served cold unless it is a carrot or pumpkin halwa. It can be a nice quick snack if you have a sweet tooth.

atte ka halwa


This kind of dryish crumbly halwa is great with hot milk for breakfast as well. Some people like it a little wet, you would have to not dehydrate it while cooking after adding water in that case.

Making a small amount of halwa is not very tricky and you can always make some for your kids instead of those store bought muffins or biscuits. It is a high calorie and high carb dish but healthier than many of the ready packed food that we hand out to our kids mindlessly.

I have posted an instant besan ka halwa made in microwave and a kadhai made besan ka halwa too. Go have a look if you want besan ka halwa. A step by step mung ka halwa recipe is also posted if you have some time to indulge. Now you know how much loved is halwa at my place.

You know what, I started getting that aroma of halwa being made while typing this. I don't like halwa much but that aroma is one of the favorite food aromas for me. Tell me when are you going to make some halwa for your loved ones?

Cheers...

Saturday, October 13, 2012

Fresh water chestnuts for fasting food | Kachhe singhade ki katli...


Fresh water chestnuts are in the market for quite some time now. We have already enjoyed them boiled, stir fried and even raw just after peeling the tough skin. The husband loves these Singhada a lot in all it's forms. Keeping in mind his love for desserts, I make this kachhe Singhade ka halwa every season. This time I decided to make this kacche singhadeki katli and it is something I will be repeating many times. Even for visiting guests who love mithais.

Let me tell you a secret before the recipe. The husband is so besotted by fresh (kaccha) singhada that he is ready to peel them on the weekends so he can get to eat them at least 3-4 times a week in season. So I stir fry the peeled singhada for him either in ghee and salt n pepper or with sprouts and sweet corn like this one.

This singhade ki katli is a new entrant, the kachhe singhade ka halwa was already a favorite. A Katli or halwa made using the dry singhade ka atta (water chestnut flour) is also among his favorites. These are a few things we have been eating since childhood. Simple foods that succeed in making us feel the warmth of home.

This Kacche singhade ki katli is a 15 minute dessert believe me. Healthy and quick. Yummy you would know when you try this.


ingredients...

about 500 gm of raw fresh water chestnuts peeled and cleaned
2 tbsp ghee
2-3 tbsp sugar
2-3 tbsp mixed nuts chopped

procedure..

Make a smooth paste of the raw water chestnuts in your food processor or mixie jar. Should make about scant two cups without adding any water.

Heat the ghee in a wide pan (kadhai) and pour the water chestnut paste in it and start stirring with a spatula.

See the picture in series. The paste changes it's consistency and color and starts becoming more glutinous, if I can use the word. No gluten content in it alright.


Just when the cooking mixture becomes almost translucent and fragrant too, a very characteristic nutty aroma that I love, add the sugar and stir to dissolve.

Pour into a greased square tin or container and spread chopped nuts over it and press the nuts so the embed properly.The container should be appropriately sized to get you thin or thick katlis (squares like fudge or brownie), so keep that in mind.

Cut in squares when cool and remove from the container. Serve fresh and see if you can save some leftovers.

Keep in a lidded container in fridge for about three to four days. I would recommend to serve it on room temperature as chilled katli tastes a bit blander than the room temperature version.


This makes the best of Vrat ka khana recipes as it can be served to guests who are fasting. Happens a lot of times during Navratri. Many of my guests are already in awe of the sugar free or naturally sweetened mithai substitutes I serve. This Water chestnut flour, gluten free Panforte is one that brings me copious complements.

This kachhe singhade ki katli is one more addition to such unusual, awe inspiring snack treats.

Cheers for fasting days ahead...